This is a follow-up article that will reinforce your idea about the migration process. This Article will be precise and concise. So, let’s begin.
I hope you read this article, which effectively and flawlessly helps you to understand and design the whole migration phase. We have four articles on migration, especially two for Zimbra OSE to Carbonio CE migration. One method uses Sciprt, while the other one uses imapsync.
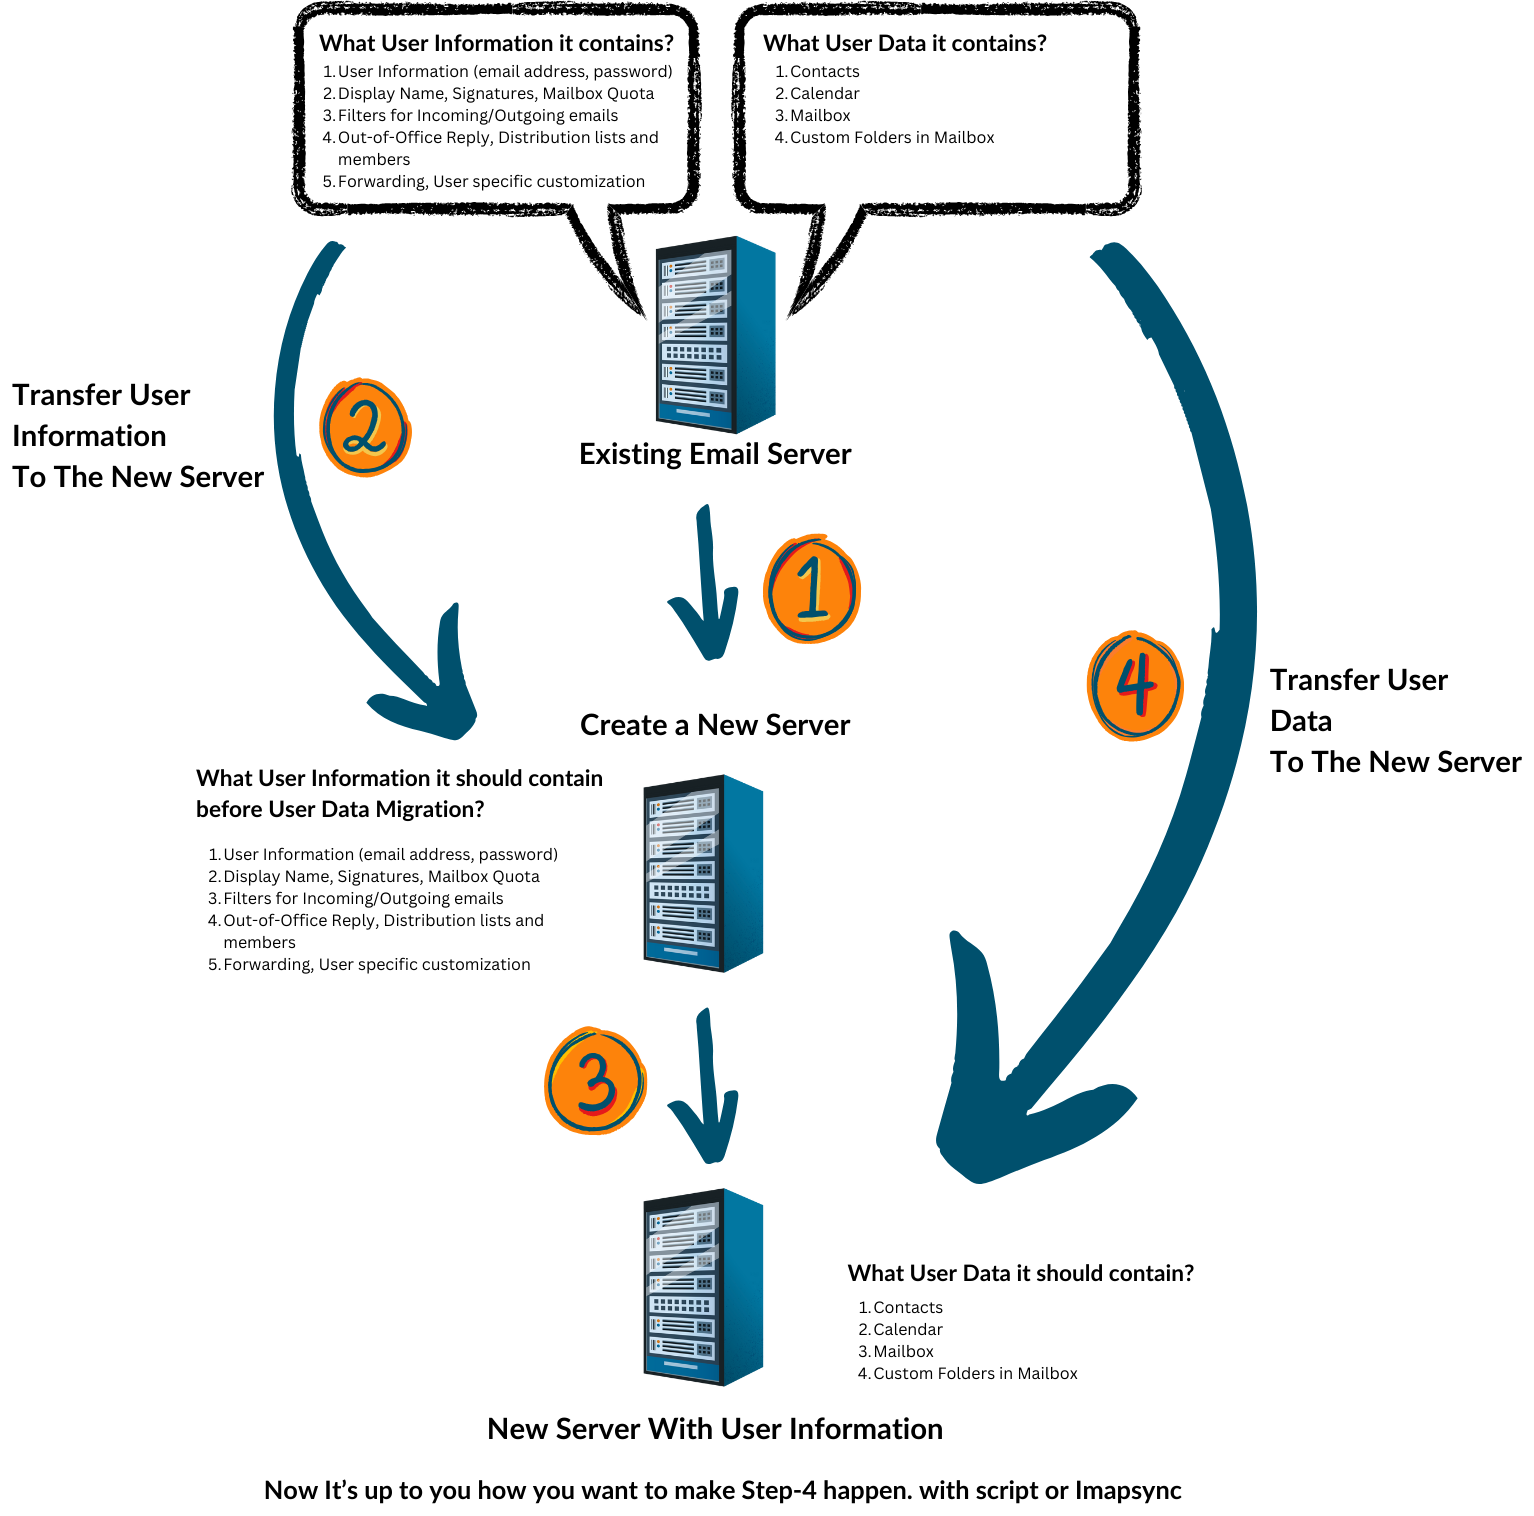
However, regardless of your chosen method, the underlying concept is the same. That is preparing another server that is almost identical to the source/current server. So that you can start migrating user email data.
Important remarks: In our previous imapsync article, we mentioned that the existing and new servers should have different names; otherwise, export/import LDAP data creates errors and aborts the entire process. But we have a fix for this, So YOU DO NOT NEED TO CONFIGURE YOUR NEW SERVER WITH A DIFFERENT NAME.
Let’s review the LDAP dump process.
- Create an LDAP dump for the existing server. This LDAP dump contains all the data shown in the image.
For COS:
/opt/zimbra/common/sbin/slapcat -F /opt/zimbra/data/ldap/config -b "" -s "cn=cos,cn=zimbra" -H 'ldap:///???(&(objectClass=zimbraCos)(!(cn=default))(!(cn=defaultExternal)))' -l /opt/zimbra/backup/coses.ldif

For User Information:
/opt/zimbra/common/sbin/slapcat -F /opt/zimbra/data/ldap/config -b "" -H 'ldap:///???(&(!(entryDN:dnSubTreeMatch:=cn=zimbra)))' > /opt/zimbra/backup/provisioning.ldif- Clean up these data.
For COS:
perl -p0e 's/\n //g' /opt/zimbra/backup/coses.ldif > /opt/zimbra/backup/coses_1.ldif
perl -p0e 's/zimbra(ProxyCacheableContentTypes|Pref(Reading|Contacts|AutocompleteAddress|IM|FileSharing|Briefcase|CalendarReminder)|MobilePolicyDeviceEncryption|IMService|Feature(Briefcase|IM|ImportExport|MailPollingInterval|Notebook|PeopleSearch|ShortcutAliases|TouchClient|WebSearch)).*:.*\n//g' /opt/zimbra/backup/coses_1.ldif > /opt/zimbra/backup/coses_2.ldif

For User Information:
perl -p0e 's/\n //g' /opt/zimbra/backup/provisioning.ldif > /opt/zimbra/backup/provisioning_1.ldif- Transfer cleaned LDAP data to the new server:
rsync -avz /opt/zimbra/backup/coses_2.ldif /opt/zimbra/backup/provisioning_1.ldif "user_name@new_carbonio_server:/opt/zextras/backup/"- Import LDAP DATA to the New Carbonio Server
For COS:
/opt/zextras/common/sbin/slapadd -F /opt/zextras/data/ldap/config/ -v -c -l /opt/zextras/backup/coses_2.ldif

For User Information:
/opt/zextras/common/sbin/slapadd -F /opt/zextras/data/ldap/config/ -v -c -l /opt/zextras/backup/provisioning_1.ldif
You may be wondering: Are all commands identical to the article? How will they make any difference?
The “-c” Continues processing even if there are errors (non-critical errors are ignored). Errors like having the same server hostname, domain, and other data.
With this, step-1 completes.
Now, it is up to you how you want to migrate your user data from the existing server to the new server. Using the Script-based method or the IMAPSync Method?
Let us know.