Did you think it thorugh before starting the migration?
Migration is a more critical activity than installing a new server. A significant amount of complexity is involved in a migration no matter how large or small the infrastructure you are dealing with. So be prepared to embark on a journey to know all the Dos and Don’ts. Let this article be a lighthouse whenever you need preform migration.
I am not going to bore you with infos like why do you need to migrate. It is obvious that either you need to:
- Switch to a new platform
- Upgrade your existing service to a modern and futuristic solution
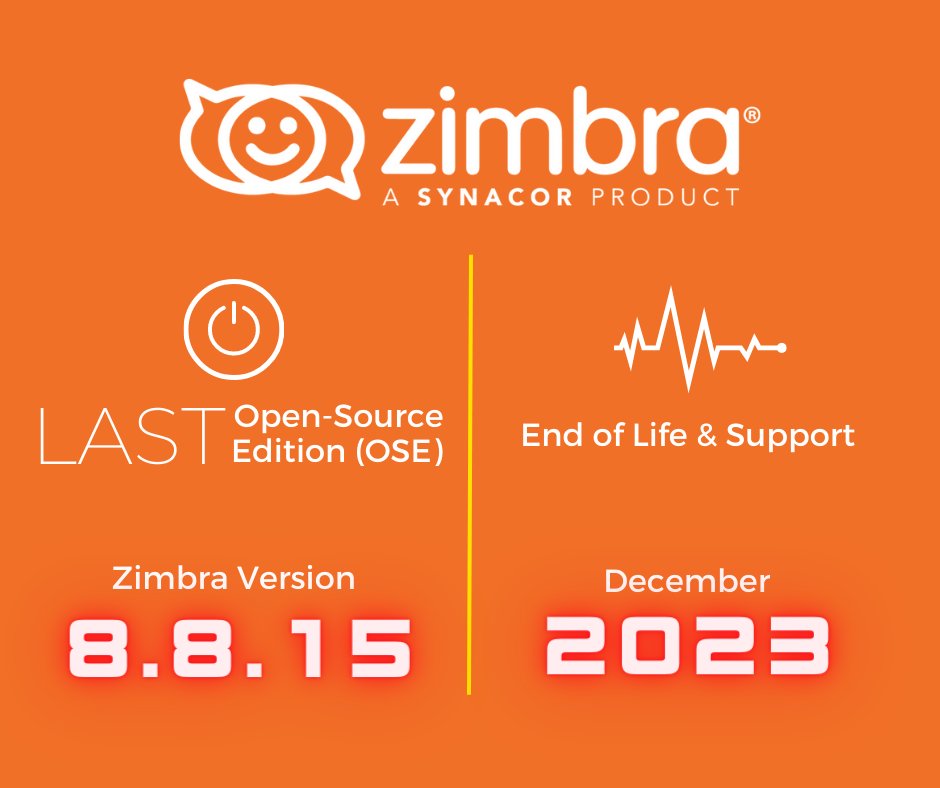
- Get rid of the End-Of-Life situation of your current service
- Hardware/Storage related issues, in other term scalability
- Meeting cost efficiency and regulation compliance.

Now as you have reached this point of no return, how could you plan and execute the whole operation like a pro?
Phase-1 Develop a Realistic Timeline-Oriented Plan
You should have a timeline based plan even before starting to think about the migration process. So let’s draw a table and see what we have to care about:
| Phase | Week | Activities |
| 1 | 1 | Develop a Realistic Timeline-Oriented Plan |
| 2 | 3-4 | Know your system |
| 3 | 5-6 | Align your users |
| 4 | 7 | Backup your system and configuration |
| 5 | 8 | Prepare the new server or Platform |
| 6 | 9 | DNS & Data Migration |
| 7 | 9 | Fix DNS, Check and Handover |
Phase-2 Know your system
I know, I know. You would say I have been using this system for years. I know everything about it. What else should I know more about it. The fact is, when we are so familiar with something, we become comfortable with it. We get the overconfidence about knowing it all and that leads to an unprecedented event during the migration process. So don’t assume and don’t be too confident. Be cautious. Make a list of things about your system.
Week 3-4:
- What operating system you are running, and should you know anything specific about its compatibility and stability during the migration process?
- List all the components of your system that you need to lay you hands on during the whole migration process.
- Make a list of all the modifications that has been done in your system over the time, so that you can enforce them in the new system after the migration.
Phase-3 Align your users
Migration is a completely technical activity, but aligning the regular non-tech users about the upcoming process, event and consequences should stay top in your check list. Care to know why?
Though you will be responsible and taking care of the whole migration process, in case of any discomfort the regular harmless users are gonna get you first. So why and what should you do about it?
Week 5-6:
- Users need to know when and how long they might experience downtime to plan their work accordingly.
- Users should be aware of potential temporary issues, such as slow access or missing emails, so they’ll remain patient and informed rather than frustrated.
- Educating users on the process and providing troubleshooting tips can reduce the number of support requests during the migration.
- Providing detailed guidance on what users need to do before, during, and after the migration ensures a smoother transition.
Circulate a notification email to all users with these mentioned facts before you enter the actual phase of the migration.
Phase-4 Backup your system and configuration
Make a backup of your system to avoid any unprecedented incident. That backup can be done in different forms like, Full backup, Incremental backup, Image backup, Snapshot backup, Local Backup etc. Now in these backups what should be our focus point:
Week 7:
| Email address | Contacts | Calendar |
| Custom folders | Signatures | Filter rules |
| Display Name | Forwarding Rules | Blacklist & Whitelist Policies |
| Files | Tasks | Email Data |
| Custom scripts & modifications | Security policies | Shared resources |
| Key configuration files from the server | Distribution List | Aliases |
| Out of Office auto replies |
If you are using postfix based system then you could also backup the following files:
- access
- main.cf
- transport
- freshclam.conf
- postfix_header_checks
- index
- log
- aliases
- master.cf
- virtual
- localconfig.xml
- salocal.cf.in
- store
- header_checks
- nginx.conf
- amavisd.conf
- opendkim.conf
- zmlogrotate
- db
I know it’s a long list, and frankly your system may not have all the components. But keeping a backup of all of these components including the server level full backup/image backup/snapshot backup will save your life, and rolling back the migration process will be much easier in case of any trouble.
Remember,
The more information you have, the more control you have over the situation.
Phase-5 Prepare the new server
Week 8:
So far we have covered all the possible preparations with the old server. Now it’s time to focus on the new server. We wrote an article on the best available open source operating system for your server, take a look at it and you will get quite a good idea on how to choose. After selecting the operating system, you need to prepare it in best possible manner. In that case, this article How to Prepare an OS could help you greatly.
But keep in mind all the above mentioned articles were written before Zimbra End-Of-Life (EOL).

But they are still valid for Carbonio CE without any doubt. So this would be our following steps in this phase:
- Install Carbonio Community Edition on an officially supported operating system.
- Repopulate the new server with the backup data taken at Phase-4
- Make sure the new server is fully functional and identically as close to the original/old one.
As soon as the new server is ready to roll it’s time to hit the DNS.
Phase-6 DNS & Data Migration
At this point both your old server and new server are ready to participate in the migration. But Managing the DNS at this phase could be a little tricky and confusing. So we are going to explain the details of this phase in a different manner. So pay attention to it!
Week 9:
Scenario-1
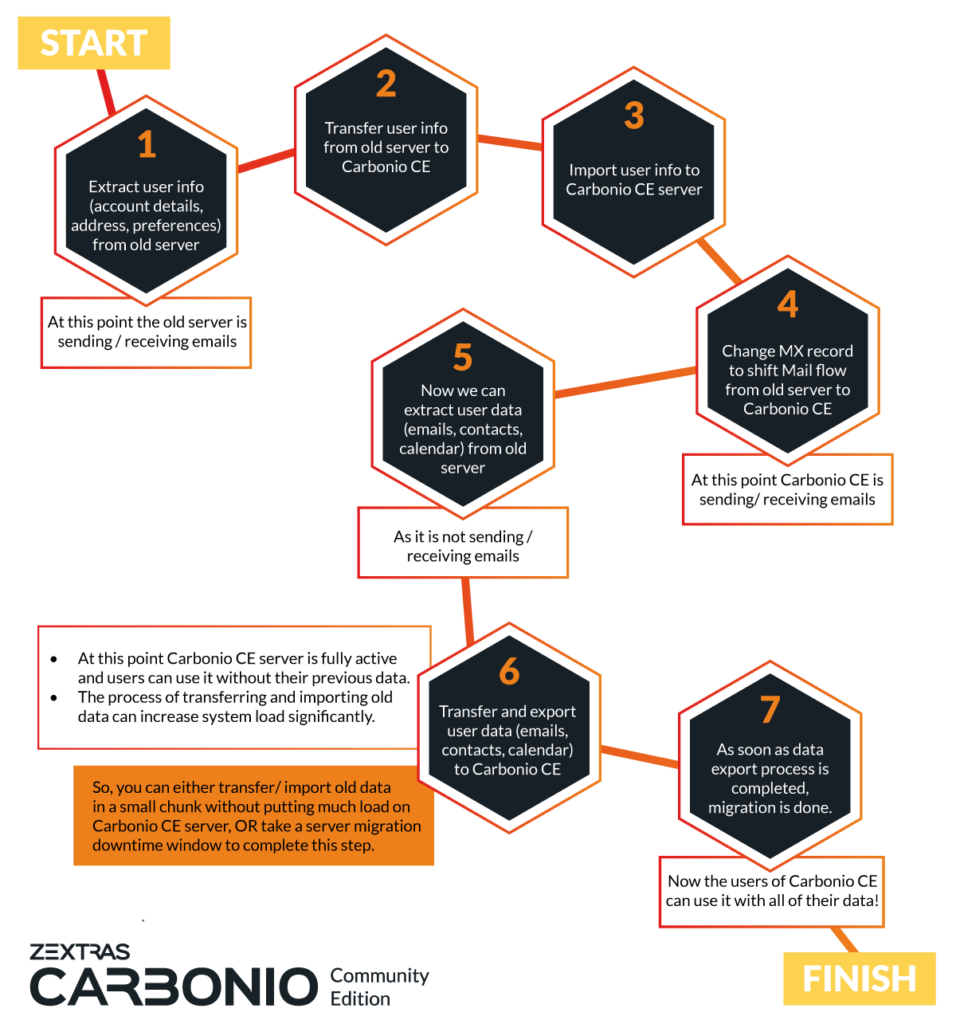
- Your MX server is still pointed to your old server. Therefore, incoming emails for your domain are still coming to your old server.
As our new server is ready, if we start migrating email data from old server to new server without stopping the incoming to old server, then the email data migration will be an endless process. You will keep transferring email data from old to new server and new emails will keep coming to the old server. An endless loop.
- Therefore, you point your MX record to the new server at any weekend. During the weekend the DNS record (MX) will be propagated worldwide, and incoming mail to the old server will be stopped and instead, incoming emails will land on the new server (as it is fully prepared to receive emails).
- At this point users will be able to access their webmail on the new server, but without previous email. Only then after some crosschecking, you will initiate the email data migration from old server to new server by either script based method or IMAPSync method. As a result, users will be able to gradually get all of their previous emails in their new mailbox.
- By the way in case of emergency, if users need to access their old emails immediately, they can access them from the old server using URL or the server IP address.
- The transfer of email data can take days and even weeks depending on their volume, therefore users need to be aligned with the whole scenario and how it works.

Scenario-2
- Your MX server is still pointed to your old server. Therefore, incoming emails for your domain are still coming to your old server.
If users are unwilling to go with scenario-1, in which they will not be able to access the old emails for a brief period of time, but want to have all emails at once then this is the alternate scenario. This scenario involves significant downtime.
- Point your MX record to any third server (Service providers’ server) where the server will store all the incoming mails untill new server is being activated.
- At this point on incoming emails are coming to old/new server. Start your email data migration using script based method / IMAPSync method.
- When the data migration completes, release the incoming hold emails from the third server (Service providers’ server).
- Finally, after waiting a few hours you can allow users to login to their email account at new server and they will get all the emails including old and new emails.
As this article gives you as general idea about the planning for pre migration phase, you can implement these plannings for all the methods mentioned available in our blog and for any other customized methods.
Phase-7 Fix DNS, Check and Handover
Hopefully when you are at this phase, you service and data has been successfully migrated. But to ensure its steadiness and stability, don’t let your guard down yet. Make sure all DNS records are properly published for the new server. Ensure all users are able to access and use the email at their new webmail.

Migrating your email system is a significant undertaking, but with careful planning and adherence to best practices, you can achieve a seamless transition. By following the dos and don’ts outlined in this guide, you’ll be well-equipped to navigate the complexities of the migration process, minimize disruptions, and maintain the integrity of your valuable data.
Remember, the key to a successful migration lies in meticulous preparation, clear communication with stakeholders, and a thorough understanding of the tools and resources at your disposal. By backing up all critical components, testing the new system thoroughly, and providing robust support to your users, you can ensure that your organization moves forward with confidence and efficiency.
To get all the migration related articles you can take a look at this link.
So, take a deep breath, follow the guidelines, and get ready to enjoy the benefits of a more powerful and reliable email platform with Carbonio Community Edition. Happy migrating!
