In our previous article, we gave you an overview of Carbonio CE webmail interface features. In addition to that topic, today we will see all the usual and perks of user account settings.
So let’s get to the details.
User Account Settings
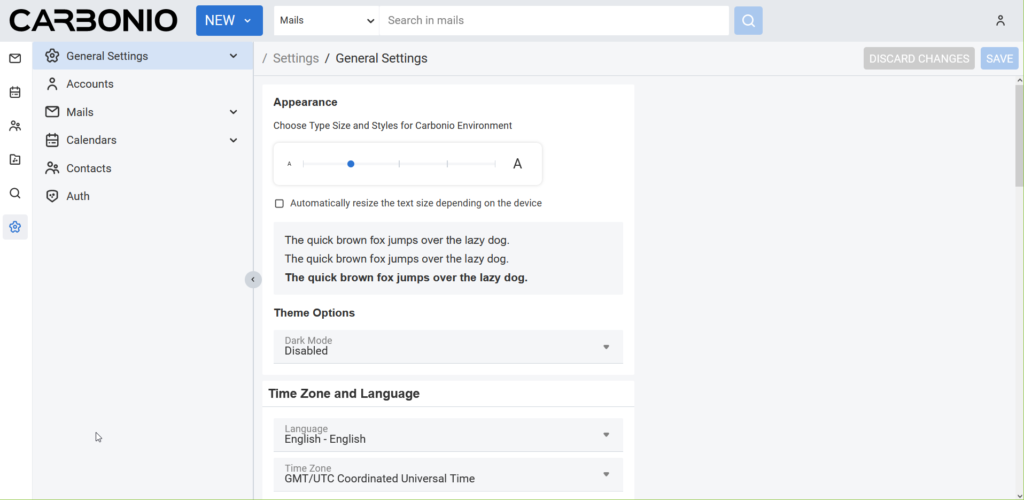
This is the overall look of user account settings. As you can see, it contains the following major items and features under these items:
General SettingsAccountsMailsCalendarsContactsAuth
Special notes: As there are lots of options, we will describe options that are more useful to us.
General Settings
So let’s check what we are going to see under General Settings.
Appearance
You can choose Font Type Size and Styles with this option.

Theme Options
It allows you to choose your preferred theme for the interface.

Time Zone and Language
Choose your preferred language and time zone. Currently, there are 16 languages available to choose including English. If you want any particular language in this list, please feel free to let us know in the feedback.

Out of Office Settings

In this Out of Office setting, you will be able to opt for auto-replies during your out-of-office period. You can create your own Auto-Reply Message. You can also select the behavior of this auto-reply message towards any external senders. Also, a time period can be defined to send these auto-replies. During this time period, you can also create an appointment so that others can check your availability status from your calendar.
Search
You can customize your search parameters from this option.

User’s Quota
You can check your current mailbox quota here. By default the quota is unlimited. But only your server’s administrator can modify this quota.

Accounts
In this section, you can manage the following settings:
- Accounts list – You can add multiple accounts associated with this account
- Primary Account Settings
- Settings for Sent Messages
- Delegates
- You can add delegates to your account here
- You can manage the behavior of your sent messages as follows:
- Save a copy of sent messages to my Sent folder
- Save a copy of sent messages to delegate’s Sent folder
- Save a copy of sent messages to my Sent folder and delegate’s folder
- Don’t save a copy of sent messages
Mails
You can modify the following settings in this section:
Displaying Messages

Conversation ordering – You can order your message/conversation from new to old or old to new
Check new e-mail – You can set a time at which interval new emails will be looked in your inbox
Display mail – You can also set the display of emails as HTML or Text format
Message Selection


You can set the delay time while sending the email.
Visualization Options – You can sort mails by either conversation or message. In conversation, you will see all related emails under one thread/chain. In message, you will see all emails as individual email.
Default Mail Search

You can use this option to select the default search folder.
Receiving Messages
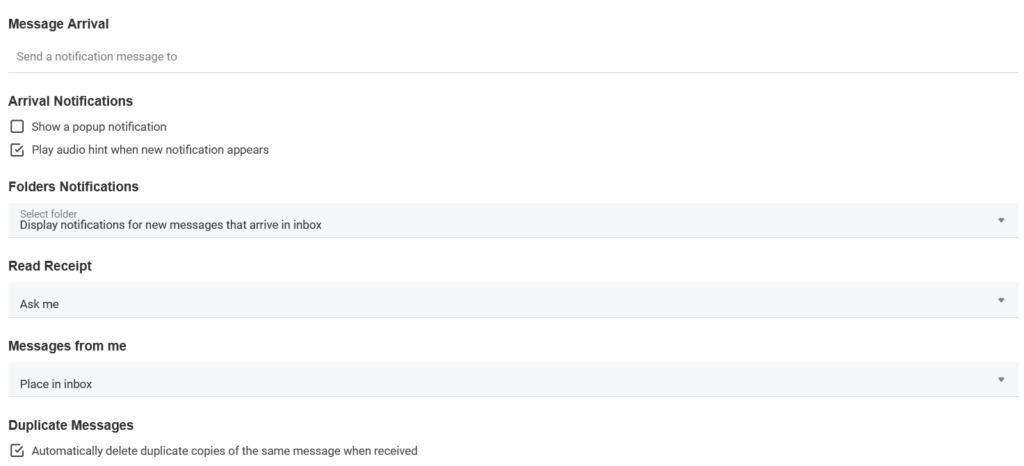
This Receiving Messages segment comes with some useful options. Such as,
- Message Arrival – You can set this and whenever you receive a new email a notification will be sent to the defined address.
- Arrival Notifications – You can manage the notifications with these options.
- Folder Notifications
- Read Receipt – By enabling this option, you can send a receipt the sender of any email whenever you read an email for the first time.
- Messages From me
Another useful option in this segment is, Duplicate Messages. If you enable it, any duplicate message you receive will be deleted.
Signatures
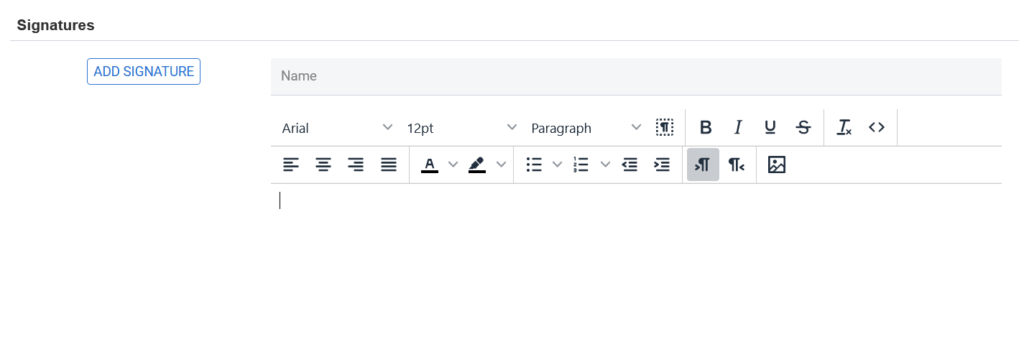
Also you can add multiple signatures and use them as your convenience under the Set Default Signatures.

Composing Messages

You can choose whether you want to compose an email as HTML or Text.
Filters
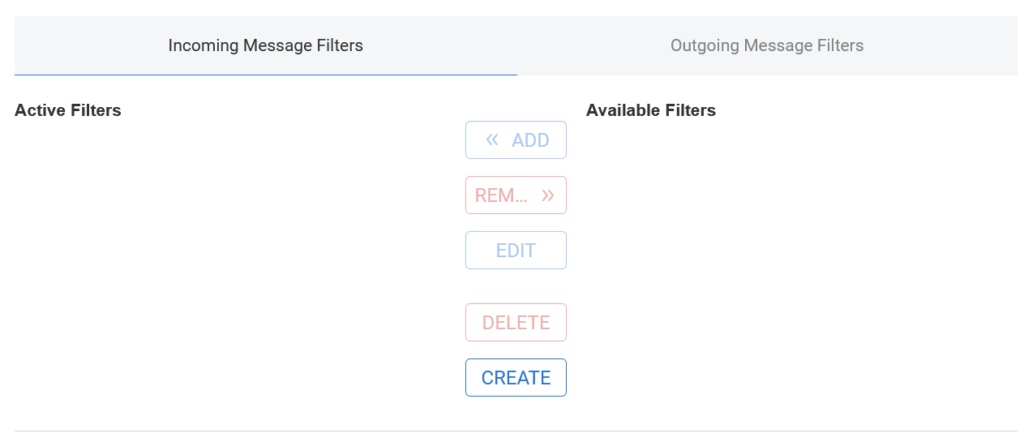
Using the Filters option, you can create filters for both of your Incoming/Outgoing messages.
Note: changes to filter rules are saved immediately
Trusted Addresses

Mail from these addresses or domains will be considered trusted and images will automatically be displayed.
Calendars
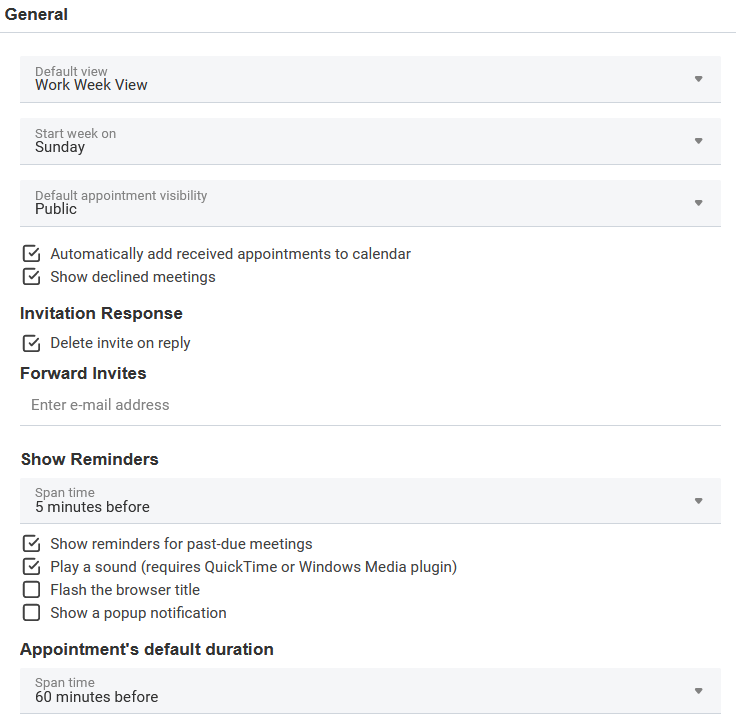
In this General section of calendars, you can do following things:
- Default View – You can set your calendar view in days, weeks, months or list.
- Start week on – You can set the day that starts your week.
- Default appointment visibility
Invitation Response
You can choose whether you want to delete the invite after the reply.
Forward Invites
You can forward the invites another email address.
Show Reminders
You can manage the calendar event reminder with this option.
Appointment’s default duration
In this option, the default duration of appointment can be set.
Work week

You can customize your work week view from this option.
Creating Appointments

You manage your default calendar from here.
Apple iCal
Apple iCal can be configured to access your Calendars using the CalDAV protocol.When this preference is enabled,shared calendars are displayed in the ical account’s Delegation tab so you can delegate access to your Calendars to other users.
Permissions

From this permission segment, you can control the interaction/display of your calendar events with other external users.
Contacts

In this Options segment of Contacts, you can manage following behaviors.
Auth
This Auth segment has 4 sub section.
- Change Password
- Exchange ActiveSync
- Mobile Apps
- OTP Authentication
Change Password
With this option, you can change the user password.

You can also manage Exchange ActiveSync, Mobile Apps and OTP Authentication in this segment.
We will use several other articles to describe this points in details in some other days.
So that’s it fro today.
😊
