For additional guidance, check out our community articles detailing the process of migrating from your current platform to Carbonio CE.
For enterprise-level requirements and advanced features, consider checking out Zextras Carbonio – the all-in-one private digital workplace designed for digital sovereignty trusted by the public sector, telcos, and regulated industries.
With this article we are going to see how to configure, through the administrative interface, the external authentication to Active Directory in Zimbra.
Configuration
After logging in to the AdminUI, go to Configure
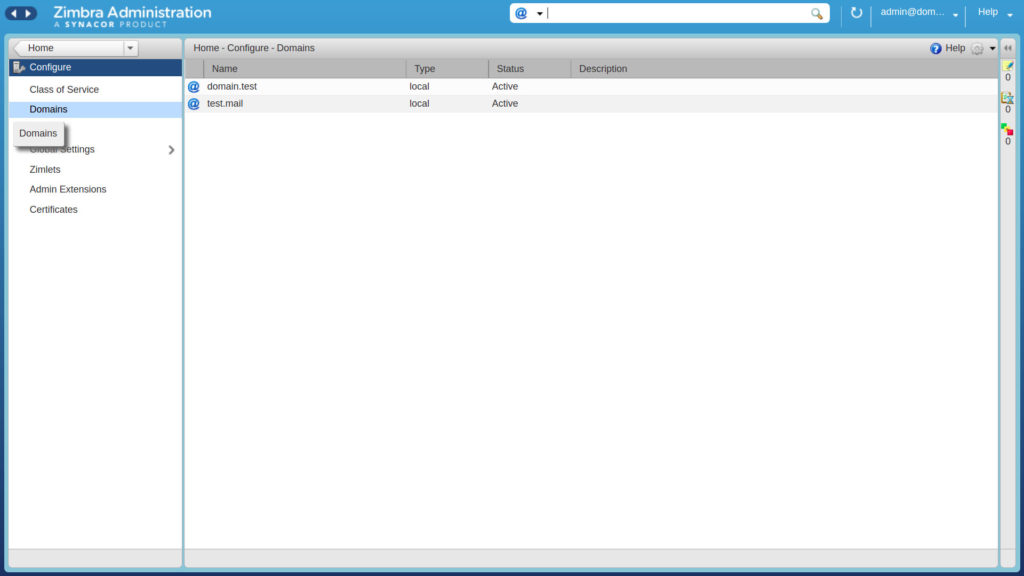
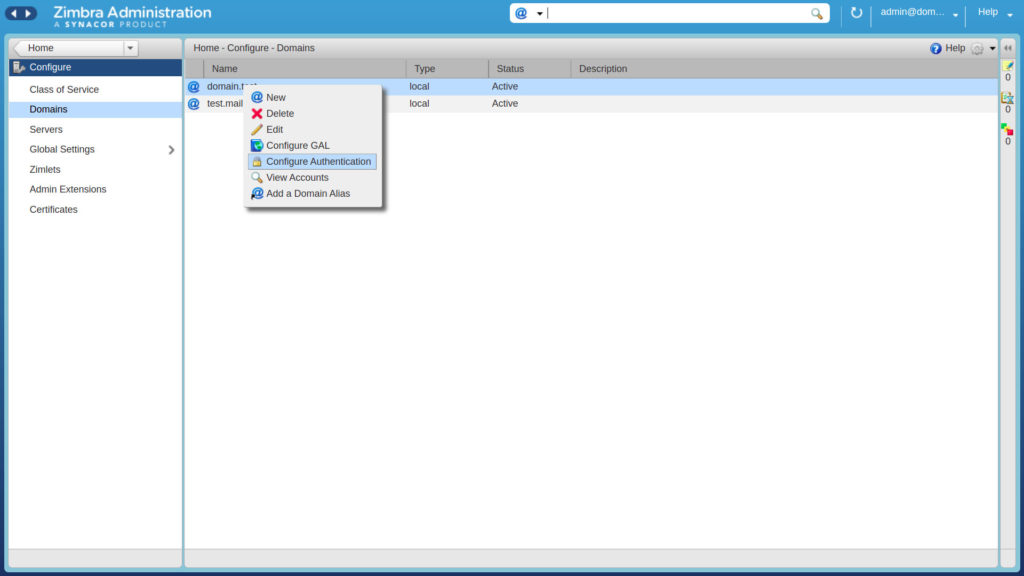
Then, to show the available domains, click on Domains. Select the one you want to configure, then “right click” on it and select “Configure Authentication”
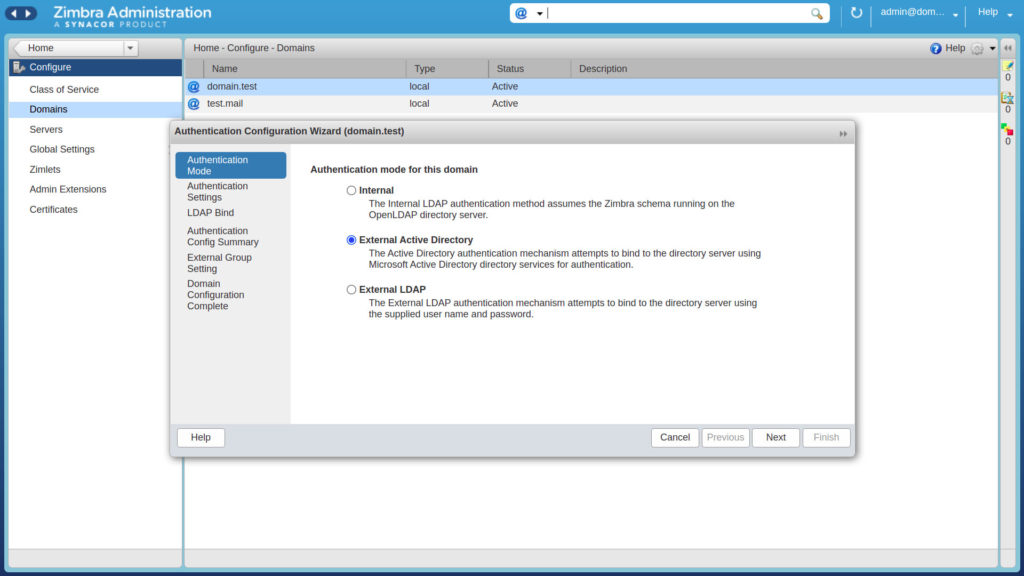
A window will appear with three options to choose from. Select “External Active Directory”
Now, you need to enter the Active Directory domain name and the server name or IP address.
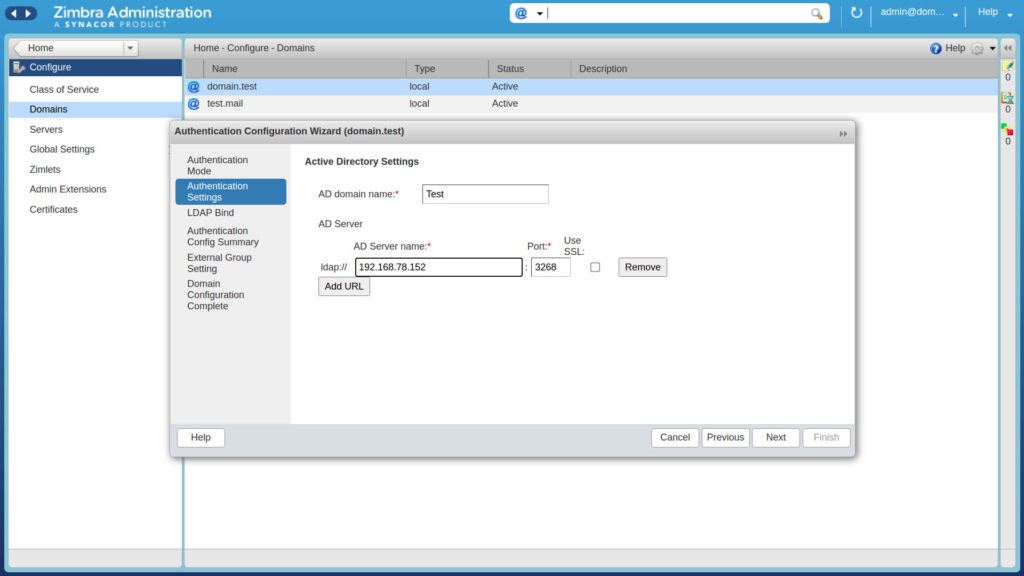
Under this configuration you can leave blank the spaces in the next window. After completing the steps above, you can test if the authentication works.
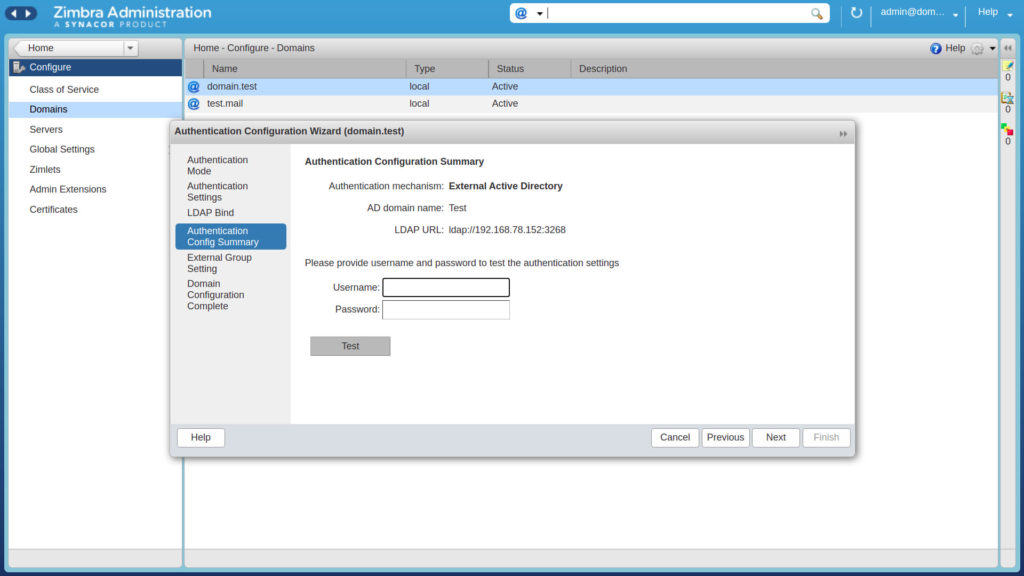
Again you can leave the next window unchanged and then click to “Finish” to complete the configuration.
Synchronization
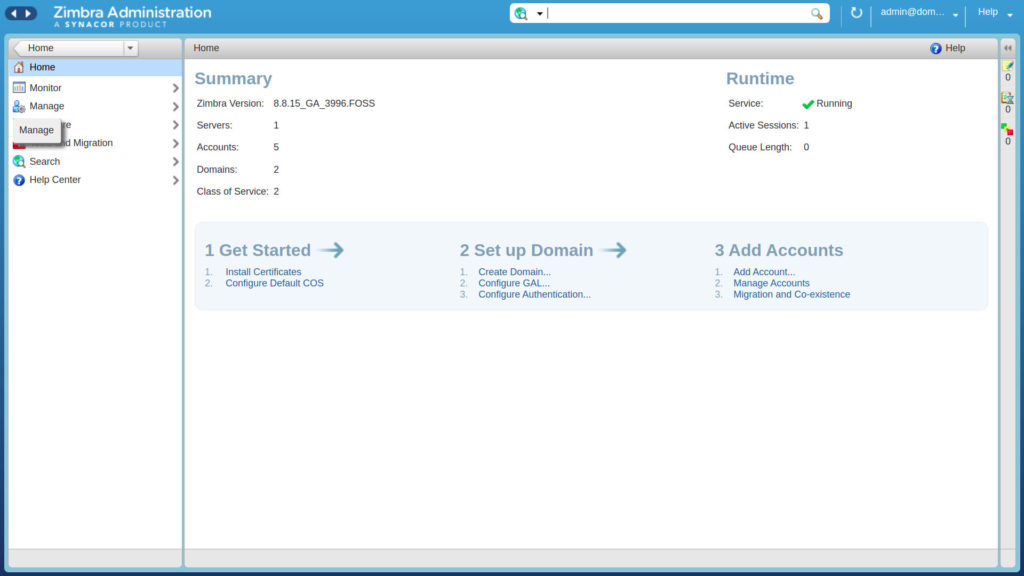
To synchronize Zimbra with Active Directory, you need to create in Zimbra the same account names you have in AD. By clicking on the “Home” button, you get back to home. Then click to “Manage”.
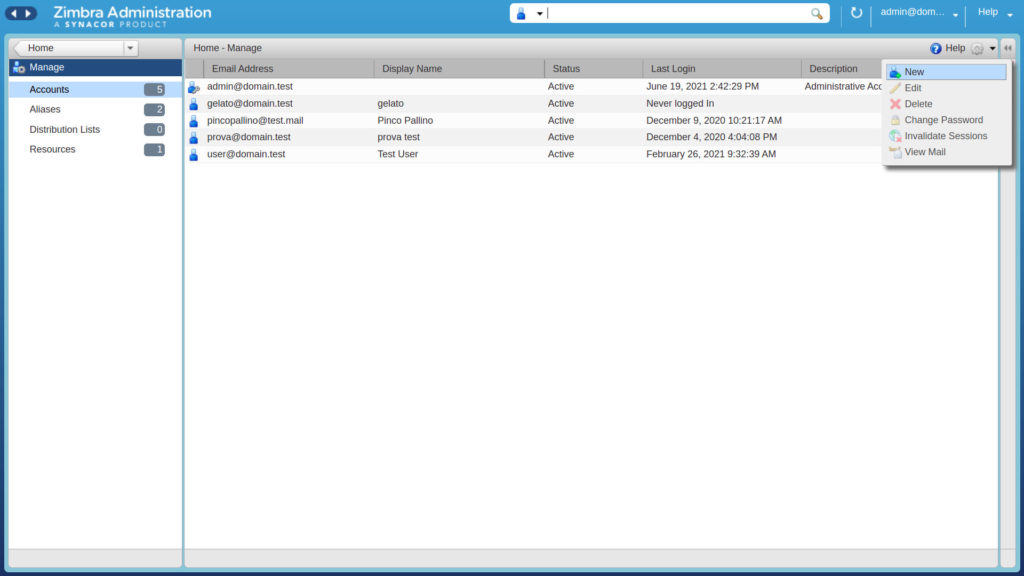
In the top right section, you can click on the button, and then select “New” to create a new user.
The user that you are going to create, must have the same name as the Active Directory user for which we are creating login, while the domain name should be the one used for zimbra.
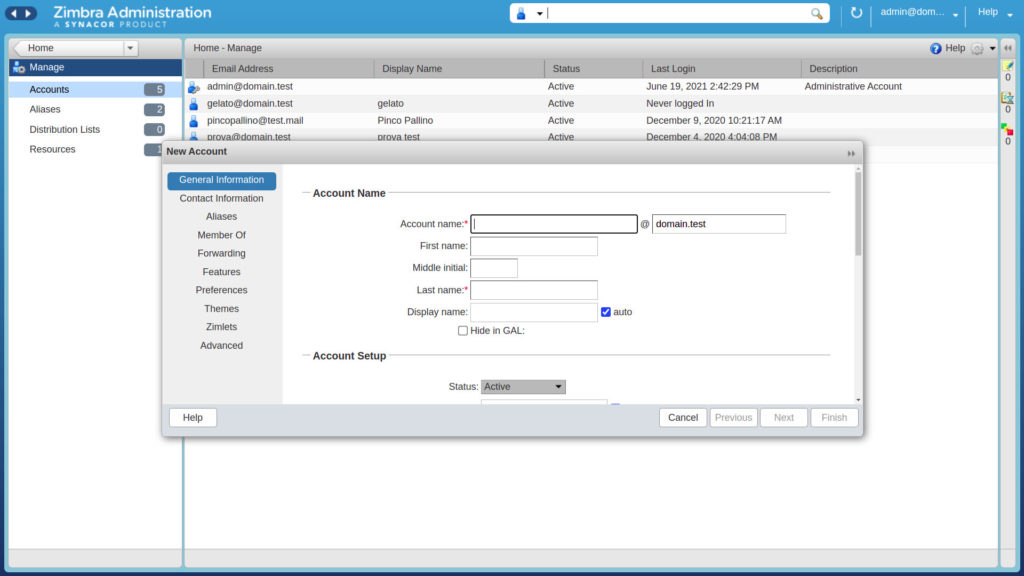
Scrolling down on the windows, you will notice that there is no password section, since it is taken from AD.
Test
To test the configuration all you have to do is to try to login with the new user we created.

