For additional guidance, check out our community articles detailing the process of migrating from your current platform to Carbonio CE.
For enterprise-level requirements and advanced features, consider checking out Zextras Carbonio – the all-in-one private digital workplace designed for digital sovereignty trusted by the public sector, telcos, and regulated industries.
Sharing calendars can be a very effective tool to improve your work efficiency. This feature enables you to easily see when your teammates are free so that you can create a meeting appointment. Let’s say, you have to set an appointment with external collaborators and some of your colleagues, but you don’t have the time or you don’t want to lose time asking everybody when they’re busy. Even if you had the time to ask one by one to know their free hours, finding the free hours manually would be a time-consuming task. With calendar sharing, it can be done with some clicks of the mouse.
One of the useful features of Zimbra is sharing calendars. With this feature, you can let others see your schedules if you set them as view-only or even let them manage your schedules. The calendars can be shared with external users as well as internal users, although external users will only be able to view the calendars. When you share a calendar with the internal users you can set the type of access to your calendar.
If the user has a manager or admin access to the shared calendar, they can set appointments and send the invitations or accept and decline your invitations on your behalf. On the other hand, when a user responds to the meeting appointment on your behalf, the email heading shows an On Behalf of field with your address, in addition to From field with the user’s address. The details of your private appointments will not be visible to the viewer but they can see the time of the appointment as busy, although you can set the viewers to be able to see the details of private appointments when you are sharing the calendar.
To share your calendar with an internal user
- Go to the Calendar tab
- Right-click on the calendar you want to share from the left and select Share Calendar
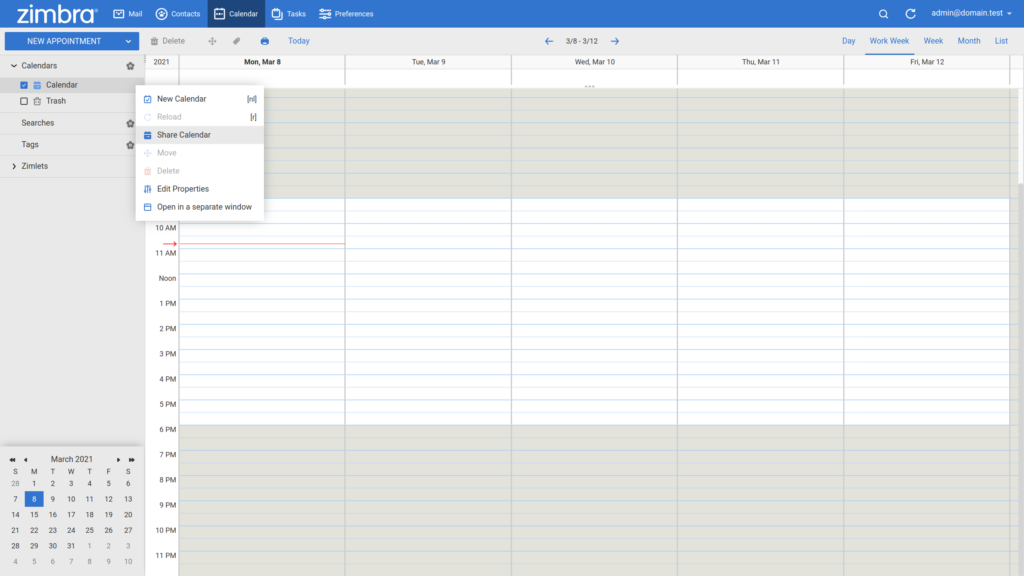
- Select Internal users or groups in the Shared with section
- Enter the user’s address in the Email box
- Select type of access in the Role section
- Check or uncheck users’ privilege to see your private appointments
- Select sending option in the Message section
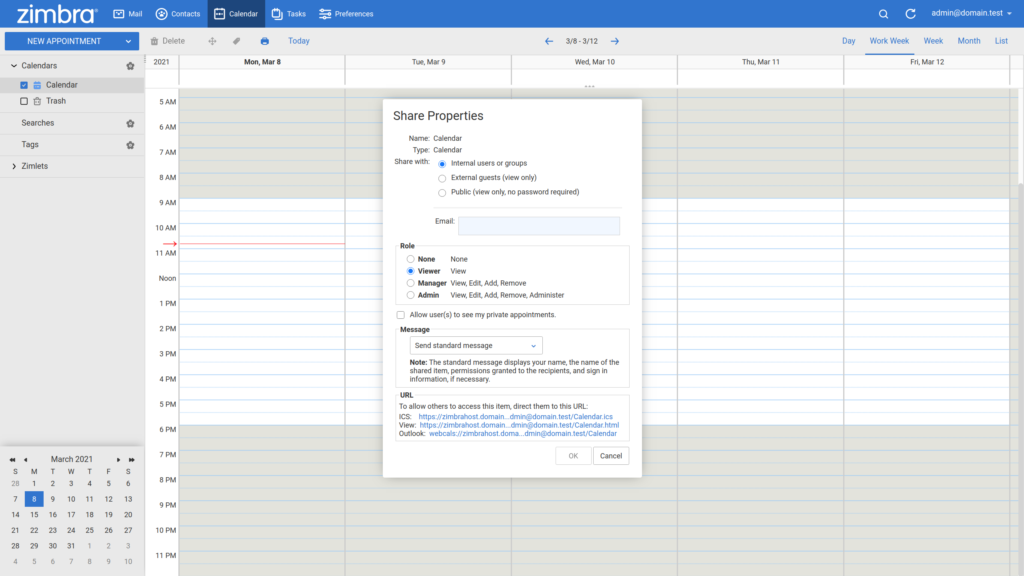
- Click OK
Types of access in the Role section you can give to the users are
- Viewer option gives access to view.
- Manager option gives access to view, edit, add, remove.
- Admin option gives access to view, edit, add, remove, share, and revoke calendar shares.
To share your calendar with an external user
- Go to the Calendar tab
- Right-click on the calendar you want to share from the left and select Share Calendar
- Select External Guests (view only)
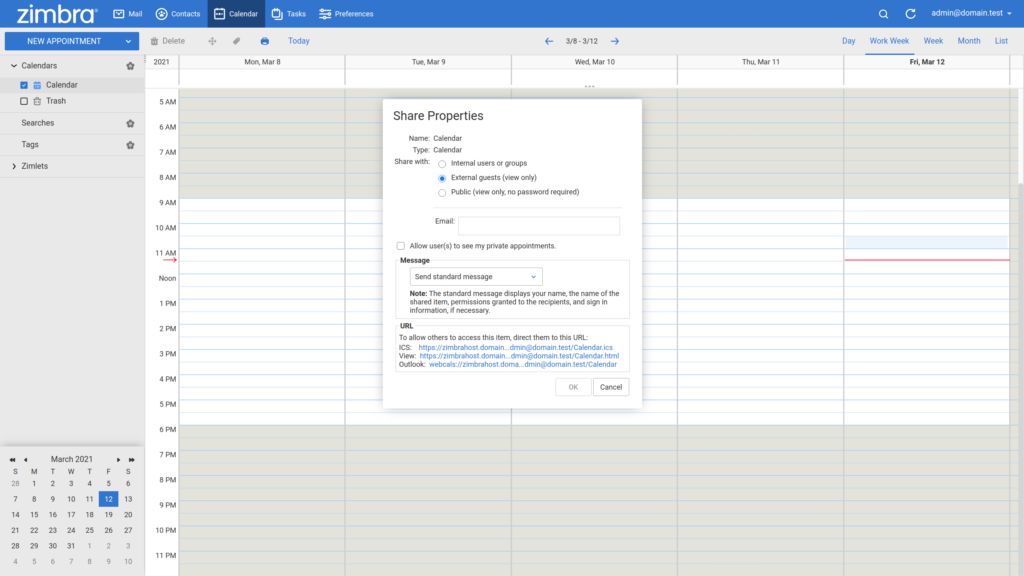
- Enter the email address of the external user
- Click Yes
The receiver should receive an email to accept the share. They will be then redirected to a sign-in page to specify their display name and password to access this shared item.
Alternatively, you can manually send a link containing the calendar information to external users as follows, although the administrators usually disable the public share option for the users to prevent them to send the invitation. This option is the same process used to publish a calendar.
- Go to the Calendar tab
- Right-click on the calendar you want to share from the left and select Share Calendar
- Select Public (view only, no password required) in the Shared with section
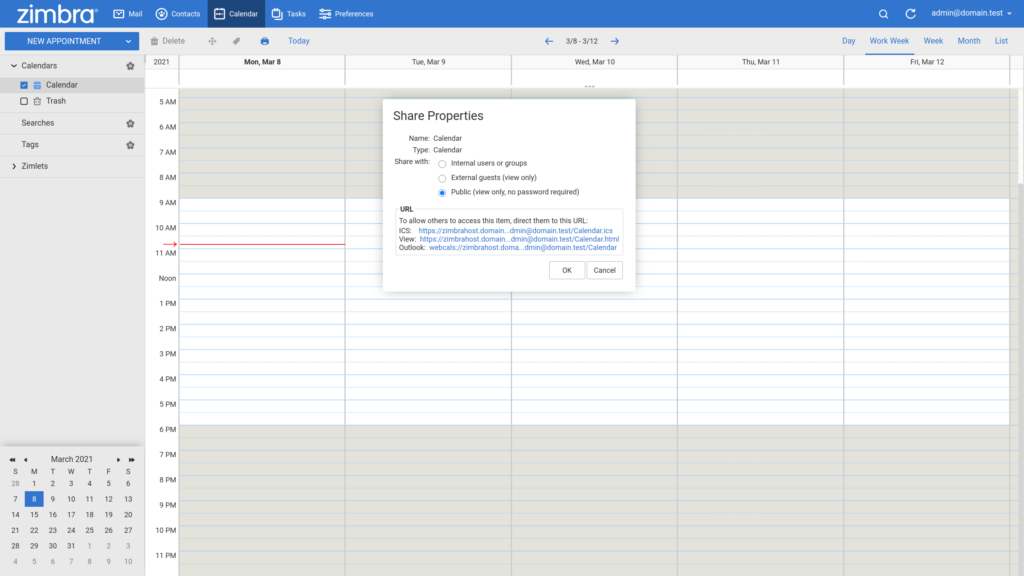
- Copy the View link from the URL section
- Send the URL to the external user
You can also email a link to your free/busy status that shows appointments in your personal and shared calendars.
To share your free/busy status with other users
- Go to the Calendar tab
- In the Calendars pane, click the gear icon
- Click Send Free & Busy Link As and select to send the information as either HTML, ICS, or an ICS Event
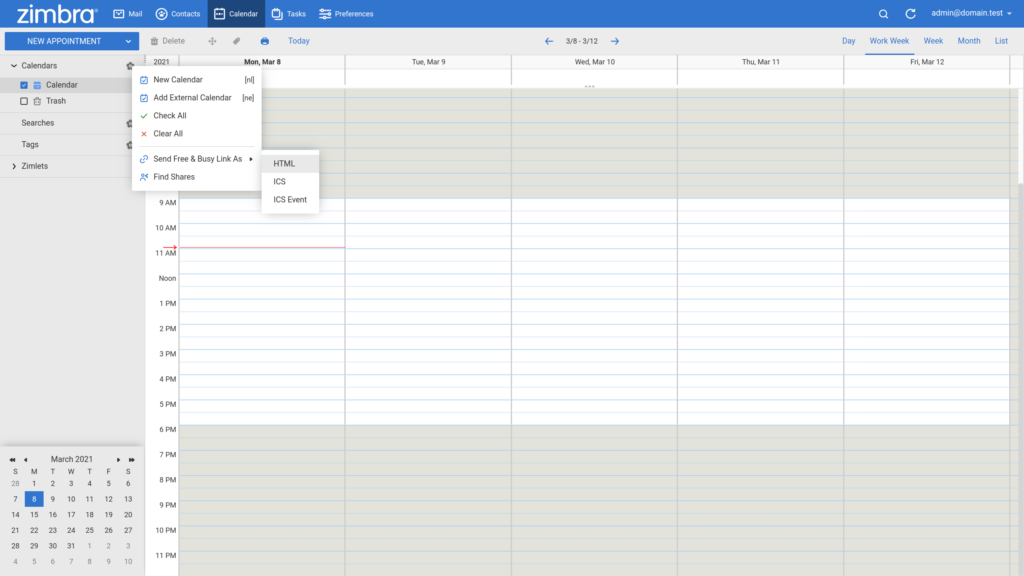
- In the compose window that opens with the calendar link in the text area, complete the address and subject line
- Click Send to send the email to the users
Your calendar updates itself for the recipients when you add new events to your calendars.
Revoking a calendar share
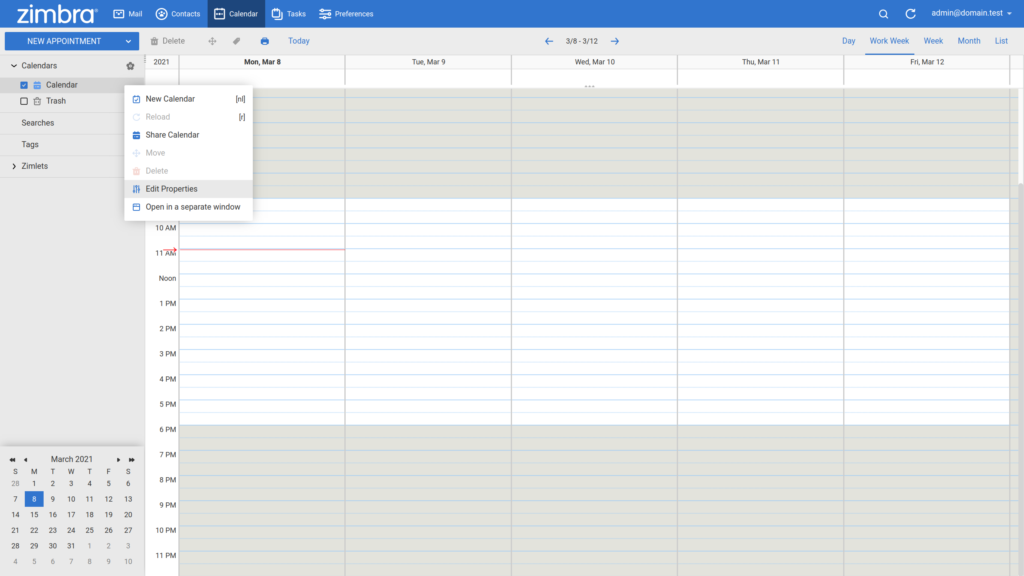
Right-click on the calendar you wish to un-share and select Edit Properties
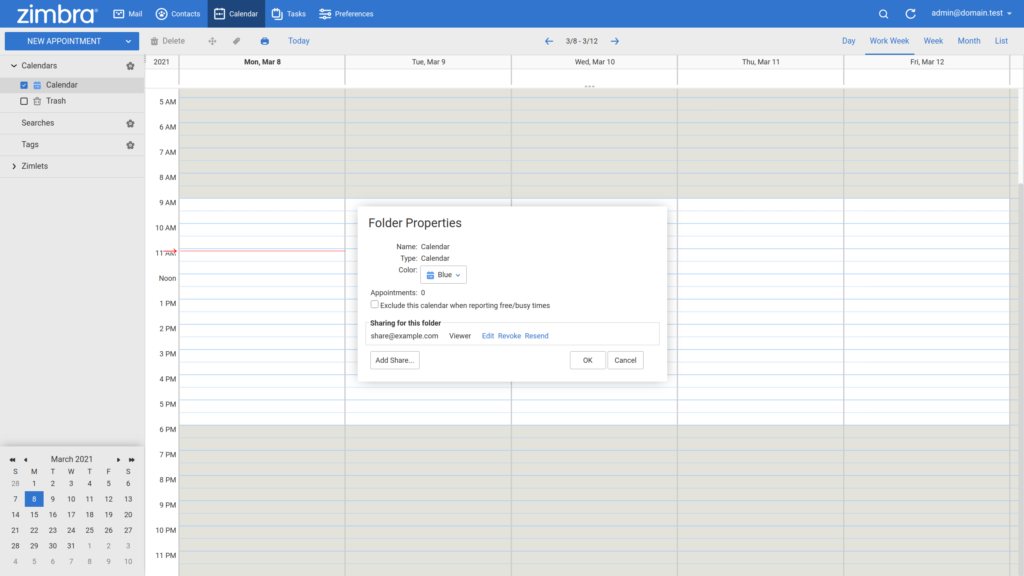
In the Sharing for this folder section of the Folder Properties dialog box, click revoke next to the email address of the person you wish to exclude
Choose Yes when you are asked to confirm.
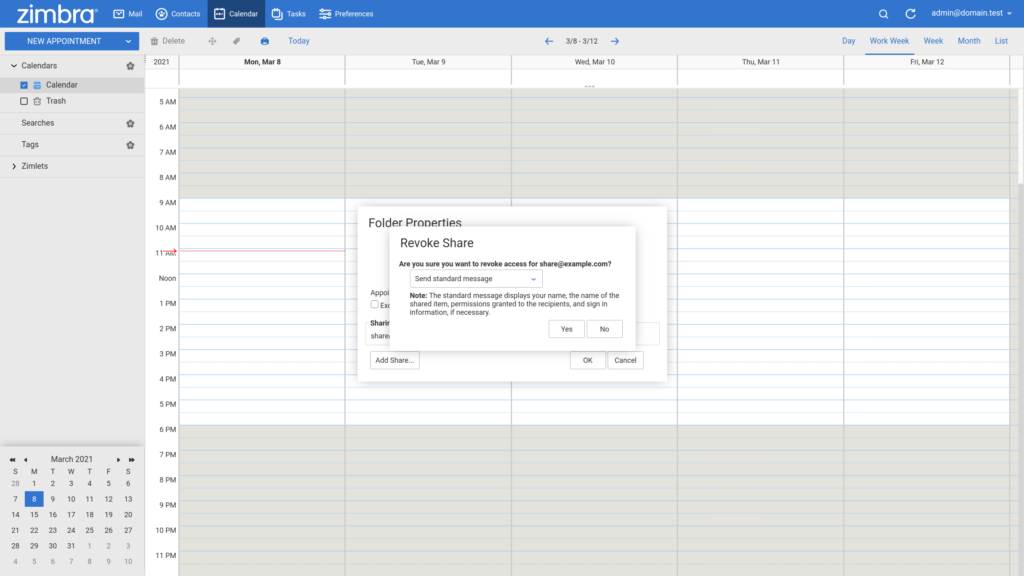
Note that your appointments, including any created for you by the person whose privileges you just revoked, remain on your calendar.
Working with calendars shared with you
After someone has shared their calendar with you, you should receive an email from them in your Zimbra account. Click on the Accept Share button, choose a name and color for the calendar, and click Yes.
If you didn’t receive an email, you can
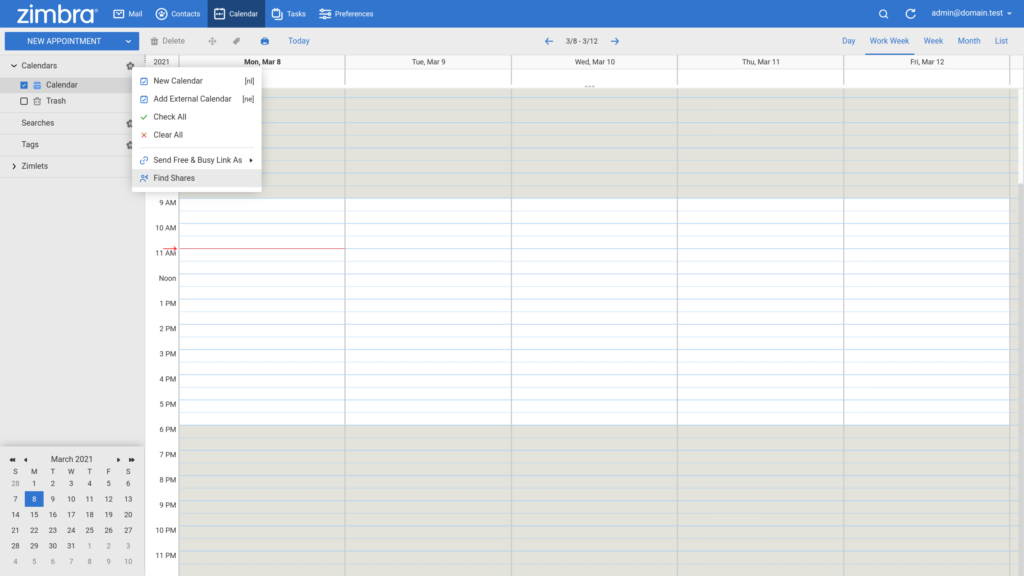
- Go to the Calendar tab
- Click on the gear icon in the calendar pane, and select Find Shares.
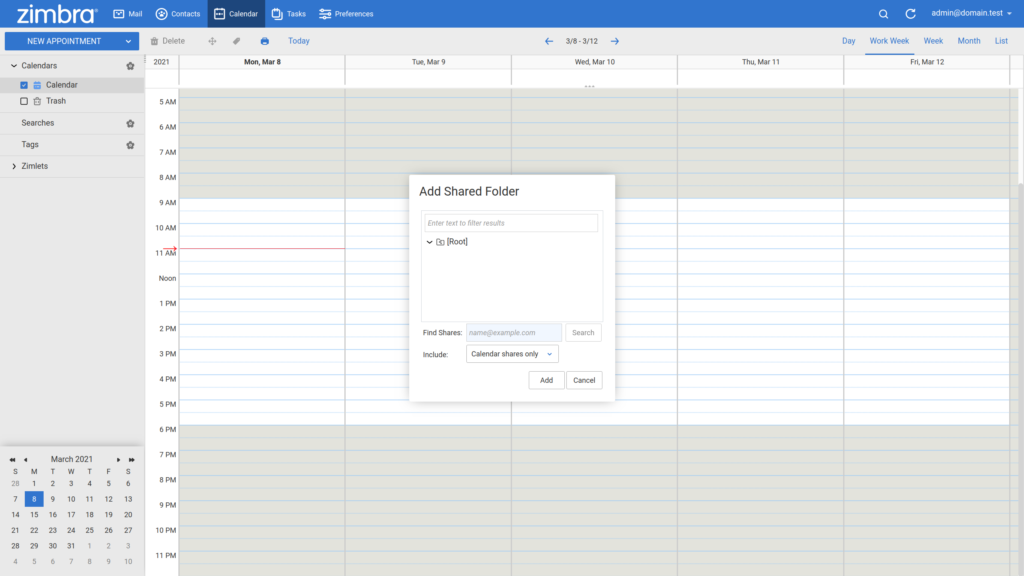
- The Add Shared Folder window opens, select the calendar shared with you, and click Add
Alternatively, you can
- Go to the Preferences tab
- Select Sharing from the left pane
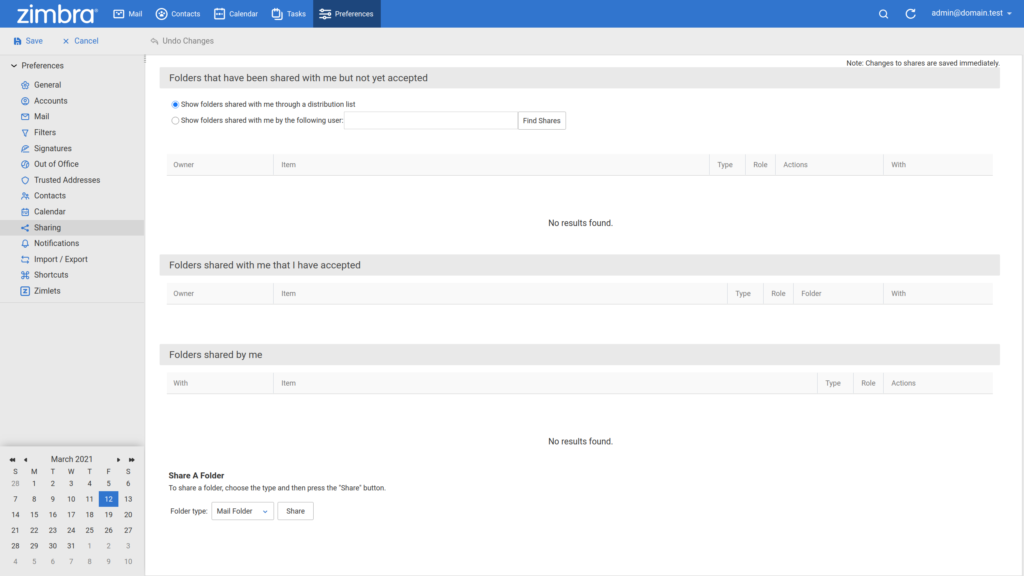
- Under the Folders that have been shared with me but not yet accepted section find or search the shared calendar
- Click Accept
- The Accept Share window opens, select desired properties, and click Yes
You will now see the shared calendar in your Calendars list with the name and color that you chose. Now, when you go to add an appointment, you can choose which Calendar should hold it. The new appointment will have the same color as the calendar that holds it.
How to sync shared calendar to your mobile device
If the Zextras Mobile feature is activated for your account by the administrator, you can synchronize any folder that is not owned by you to any device connected to your account. To share a calendar to your mobile device
- Go to the Calendar tab
- Right-click on the calendar you want to sync from the left and select Folder Sync Settings
- Check the Enable synchronization for this folder checkbox
- Press OK
The calendar will be synchronized to any mobile device connected to your account.
*The screenshots show the Zimbra OSE interface with the Zextras Theme.
