One of the key advantages of corporate email systems is the ability to delegate email sending. If an employee handling client communication goes on vacation, they—or the mail system administrator—can delegate email-sending rights to another employee. This ensures uninterrupted and seamless communication from the client’s perspective.
To enhance this process, Carbonio implemented Personas, virtual identities that users can configure to send emails from different addresses. This article explains how to set up and manage personas effectively.
Setting Up and Managing Personas
Users can configure personas in Carbonio through two primary methods:
- Via the Web Client – Users can create, edit, or delete personas within their settings.
- Administratively – Admins can configure personas through the command line or by accessing the user’s web client using the View Mail function.
Managing Personas in the Web Client
Managing Personas in the Web Client
To manage personas, navigate to the Accounts section within the user settings of the web client. By default, all emails are sent from the user’s original account.
Creating a New Persona

1. Click ADD PERSONA.
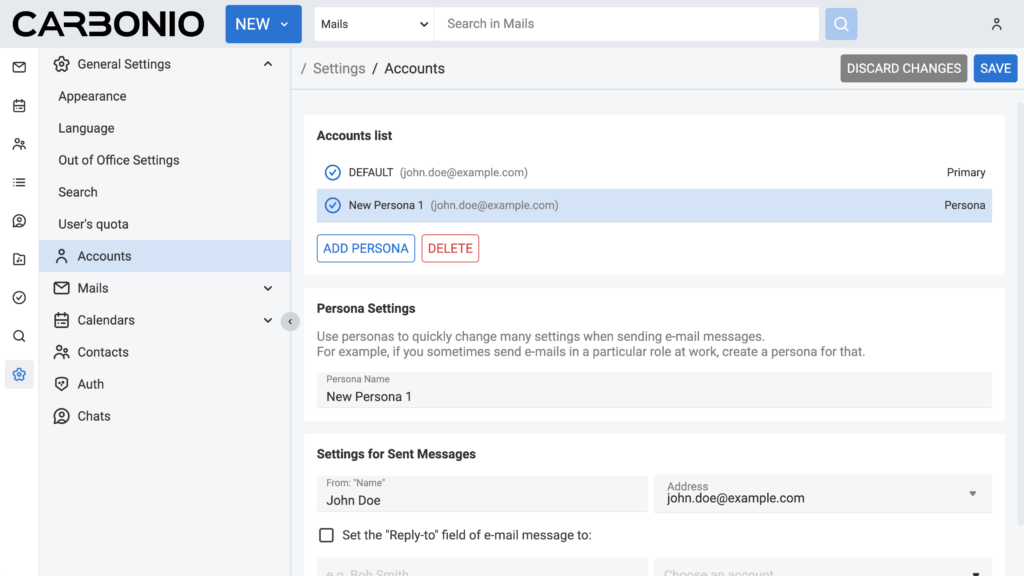
2. If the user has an alias, the new persona will automatically use it as the default address.
3. If a different email address is needed, modify the newly created persona’s settings.
4. Set a Persona Name for easy identification.
5. Configure the From: and Reply-To: headers to reflect the desired email identity.
6. Save the changes.
Once saved, the new persona becomes selectable when composing an email.
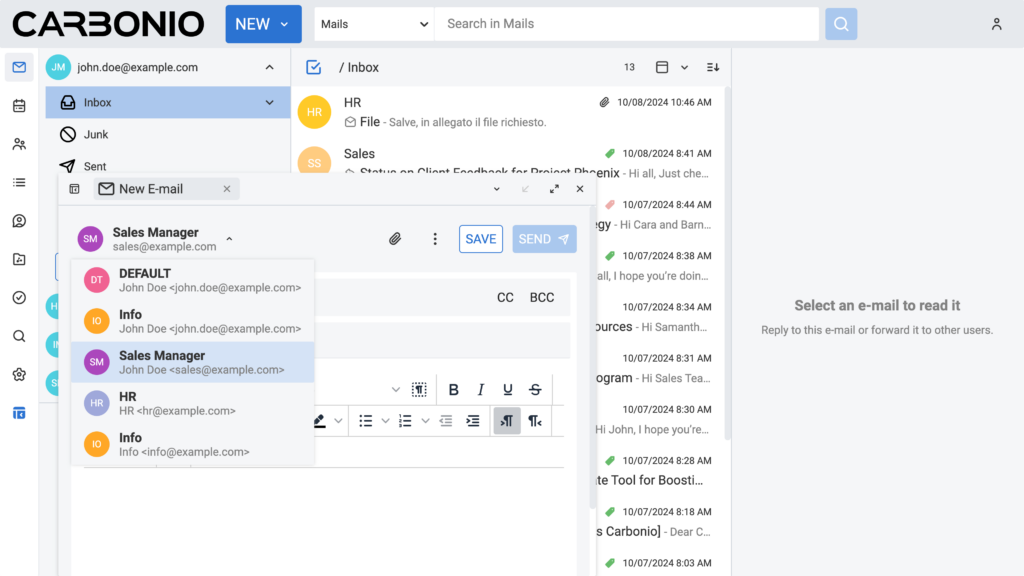
The recipient will see the email as sent from the persona’s specified address, though the email metadata will retain the sender’s original account details.
Hiding the Original Account
To prevent the display of the original sender’s account, SendAs rights must be delegated to the user for the persona’s email address.
Administrative Persona Management
Configuring Personas via the Admin Console
Admins can configure a user’s persona by accessing the web client on their behalf:
1. Open the Admin Console.
2. Select the relevant domain and locate the user account.
3. Click VIEW MAIL to log in as the user.
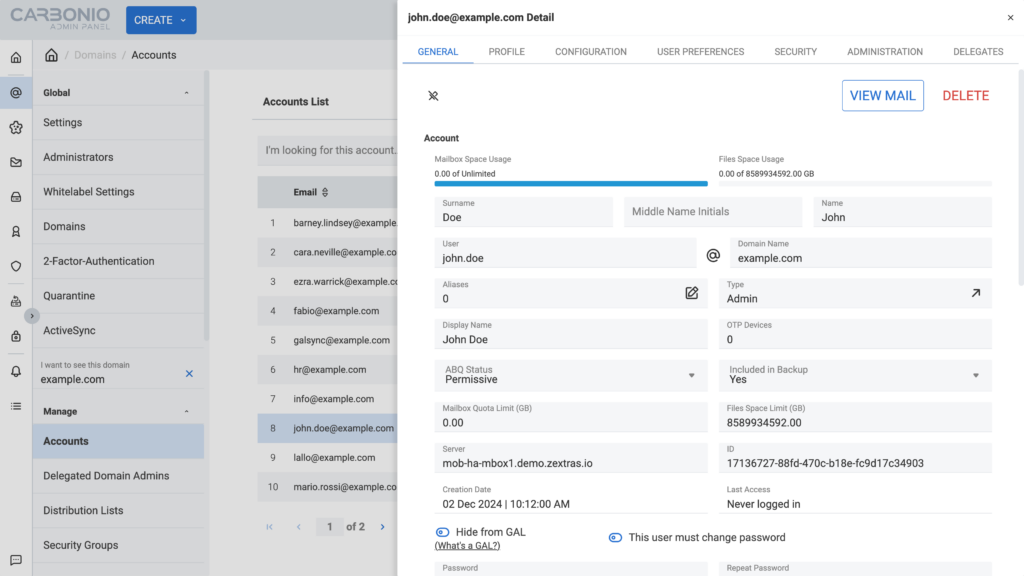
4. Follow the steps outlined in the web client persona setup.
Managing Personas via Command Line
For bulk persona management and automation, administrators can use command-line tools.
Commands for Persona Management
- Create a Persona:
carbonio prov createIdentityorcarbonio prov cid - Modify a Persona:
carbonio prov modifyIdentityorcarbonio prov mid - Delete a Persona:
carbonio prov deleteIdentityorcarbonio prov did - List Personas:
carbonio prov gid
Example:
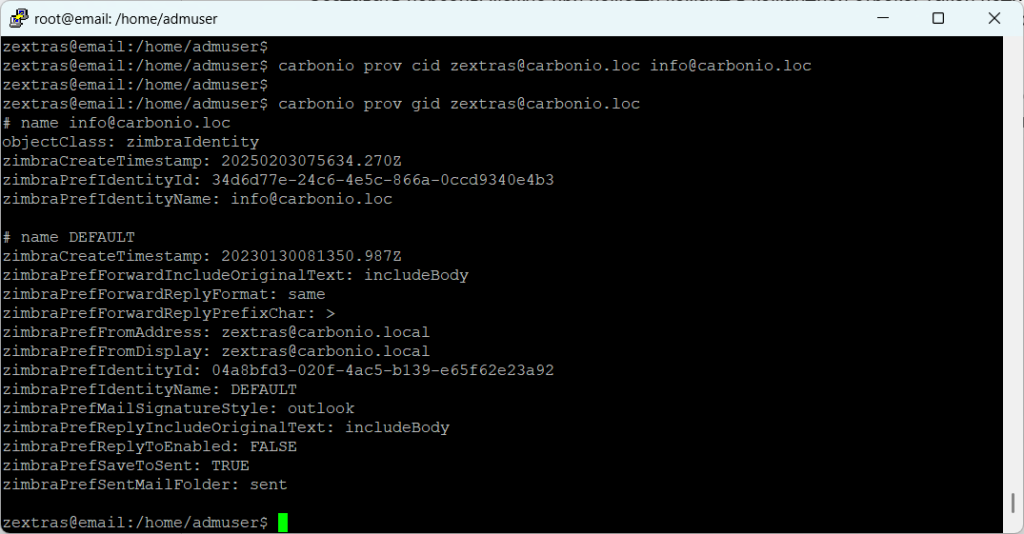
1. Create a persona: carbonio prov cid info@carbonio.loc
2. Verify the persona: carbonio prov gid
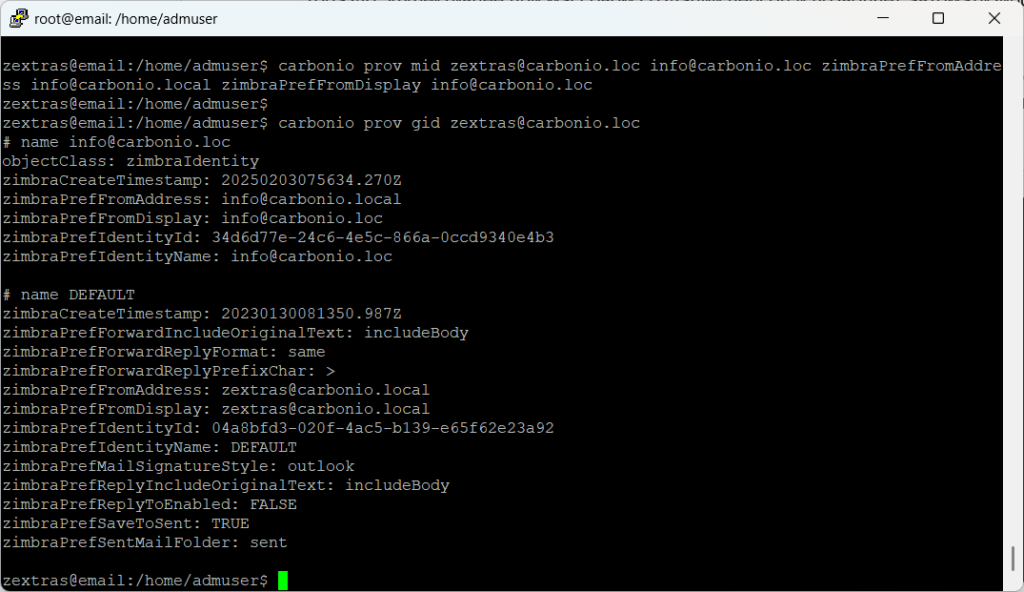
3. Modify the From address: carbonio prov mid info@carbonio.loc zimbraPrefFromAddress support@carbonio.loc
4. Delete a persona: carbonio prov did info@carbonio.loc

Configuring Personas via the Admin Console
Currently, the default persona cannot be replaced. Instead, update the DEFAULT persona settings:
carbonio prov mid zextras@carbonio.loc DEFAULT zimbraPrefFromAddress info@carbonio.loc zimbraPrefFromDisplay "Carbonio Support"This ensures that info@carbonio.loc is selected by default when sending emails.
Personas in Carbonio enable users to manage multiple email identities seamlessly, making communication more flexible and efficient. Whether handled individually through the web client or managed in bulk through the command line, personas help streamline professional email interactions, ensuring a consistent and professional experience for clients.