For additional guidance, check out our community articles detailing the process of migrating from your current platform to Carbonio CE.
For enterprise-level requirements and advanced features, consider checking out Zextras Carbonio – the all-in-one private digital workplace designed for digital sovereignty trusted by the public sector, telcos, and regulated industries.
Mail aliasing is another form of mail forwarding. In earlier days of postfix, we used to configure email aliases to forward emails. In this article, we will check the details of email forwarding and aliasing.
Understanding The Mail Forwarding Concept
Let’s take a look at some scenarios:
Scenario-1
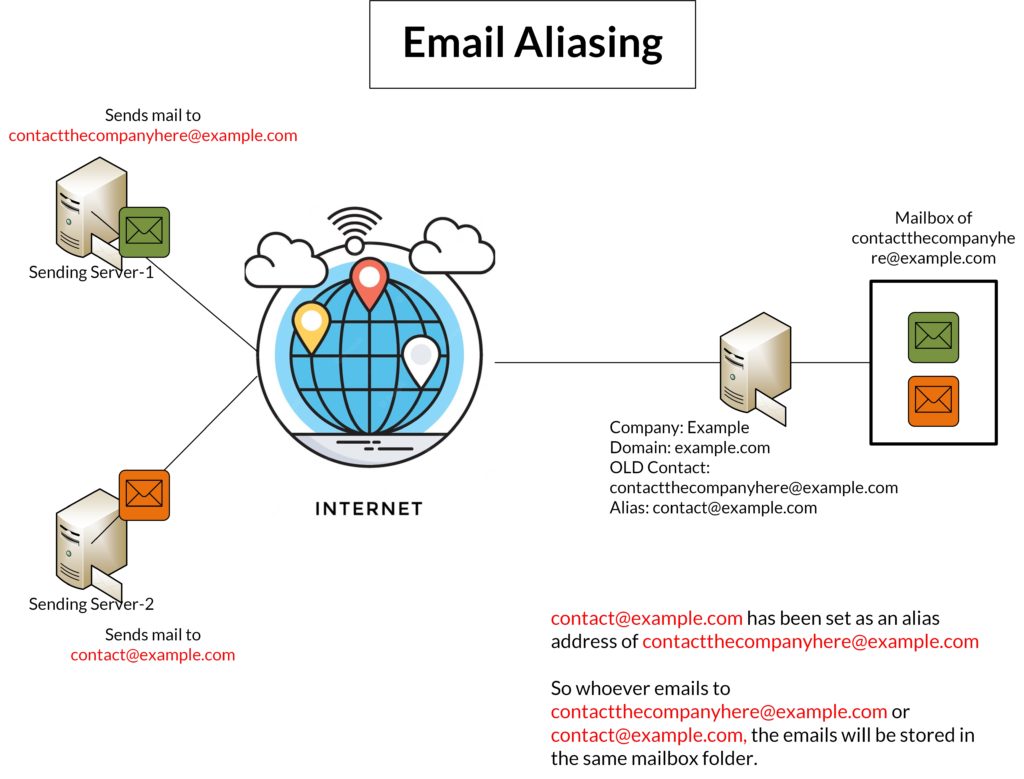
Your company’s existing contact email address is something like contactthecompanyhere@example.com. As you can see the address is self-explanatory and quite difficult for the user’s to use. So you want another easy address that can also collect emails on behalf of contactthecompanyhere@example.com. So you set an easy alias(contact@example.com) for contactthecompanyhere@example.com and all the emails destined for these two emails will be delivered to the same mailbox.
Scenario-2
You want to set up forwarding in such a way that a copy of all of your incoming and outgoing emails will be saved/forwarded to another mailbox.

Scenario-3
What if your organization demands multiple levels of forwarding as shown in the below-mentioned image? Take a look:
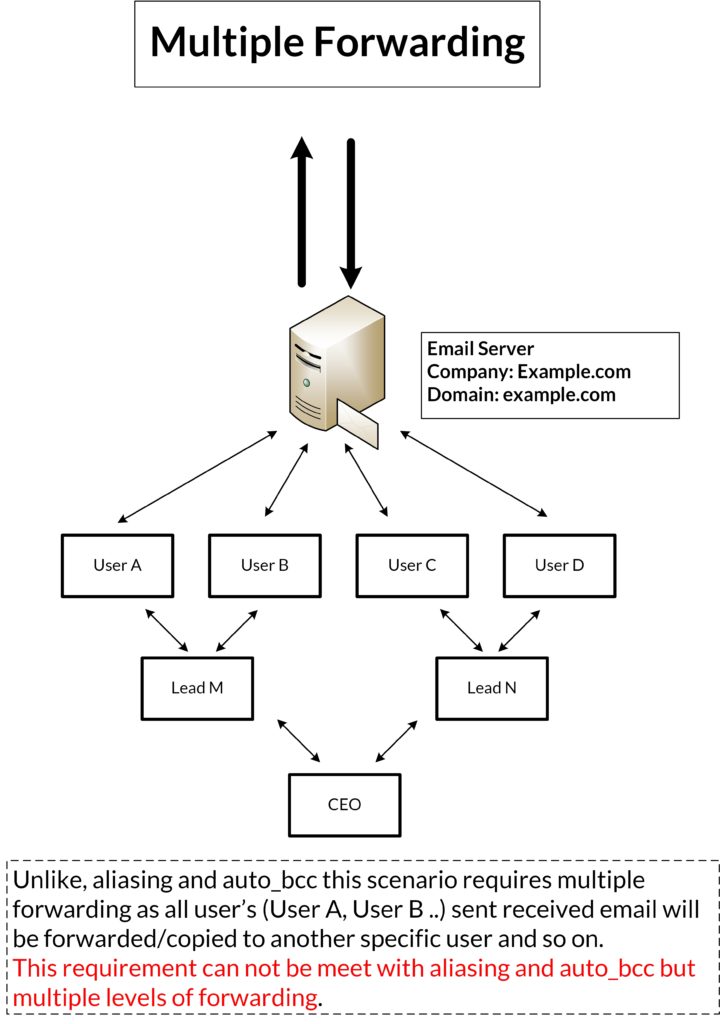
I hope now you have got some ideas about aliasing and forwarding. So let’s check how can we configure them.
How To Configure Email Aliasing Using GUI?
You can configure email aliasing using both GUI and CLI panels.
Let’s try the GUI first. From the screenshot, you can see we have an existing contact address(contactthe companyhere@example.com). But as you can see it is very inconvenient to use as an email address.

So you want another easy-looking address as an alias for the mentioned address. Go to the Aliases and create one.
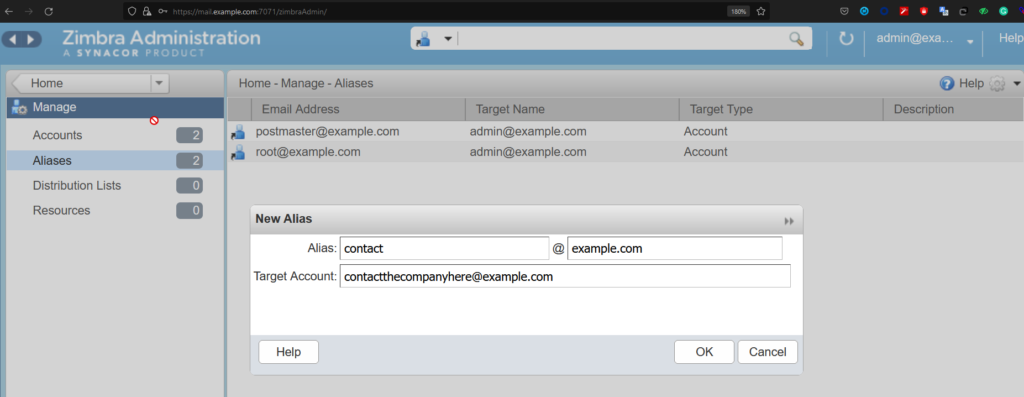

So now whoever mails to contactthecompanyhere@example.com or contact@example.com, the email will be delivered to the inbox of contactthecompanyhere@example.com.
Let’s send a test message to contact@example.com and check both log and inbox:
Aug 8 13:59:44 mail postfix/smtp[47993]: 5A3332419C1: to=contactthecompanyhere@example.com, orig_to=contact@example.com, relay=127.0.0.1[127.0.0.1]:10026, delay=0.13, delays=0.01/0.01/0/0.11, dsn=2.0.0, status=sent (250 2.0.0 from MTA(smtp:[127.0.0.1]:10030): 250 2.0.0 Ok: queued as 71EE12419C4)
Aug 8 13:59:44 mail postfix/qmgr[37449]: 71EE12419C4: removed
And you can the message sent to contact@example.com is successfully delivered to contactthe companyhere@example.com‘s mailbox.
With CLI access, you can easily create an alias email address with the following commands:
root@mail:~# su - zimbra
zimbra@mail:~$ zmprov aaa contactthecompanyhere@example.com contact@example.com
How To Configure always_bcc Using CLI?
As mentioned earlier that a copy of all of your incoming and outgoing emails will be saved in a designated email address through this auto_bcc settings. And you can set only 1 (One) address as auto_bcc address. Let’s see how you can do it:
[Add auto_bcc in /opt/zimbra/common/conf/main.cf]
vi /opt/zimbra/common/conf/main.cf
always_bcc = backup@example.com

[save & exit]

zimbra@mail:~$ postfix reload
/postfix-script: refreshing the Postfix mail system
Check the settings by testing send/receive emails.
How To Configure Multiple Forwarding Using CLI?
We can configure multiple forwarding using sender_bcc and recipient_bcc.
Configure sender_bcc
# su - zimbra
$ cd /opt/zimbra/common/conf/
$ vi sender_bcc
contact@example.com admin@example.com

[Remarks: Whenever contact@example.com sends an email, admin@example.com will get one copy of it]

$ vi /opt/zimbra/common/conf/main.cf
sender_bcc_maps = lmdb:/opt/zimbra/common/conf/sender_bcc

$ postmap /opt/zimbra/postfix/conf/sender_bcc
$ postfix reload

VERIFY
$ postconf | egrep "sender_bcc_maps"
Configure recipient_bcc
# su - zimbra
$ cd /opt/zimbra/common/conf/
$ vi recipient_bcc
contact@example.com admin@example.com

[Remarks: whenever contact@example.com receives an email, admin@example.com will get one copy of it]

$ vi /opt/zimbra/common/conf/main.cf
recipient_bcc_maps = lmdb:/opt/zimbra/common/conf/recipient_bcc

$ postmap /opt/zimbra/postfix/conf/recipient_bcc
$ postfix reload

VERIFY
$ postconf | egrep "recipient_bcc_maps"
This is how you can set multiple layers of forwarding in your Zimbra server.
How To Configure Simple Forwarding From Admin Panel?
As a system admin, you can also configure simple email forwarding form the GUI admin panel. To do so, login into the admin panel of your zimbra server. Go to Manage > Accounts and double click the account to open its settings where you can find options for mail forwarding.
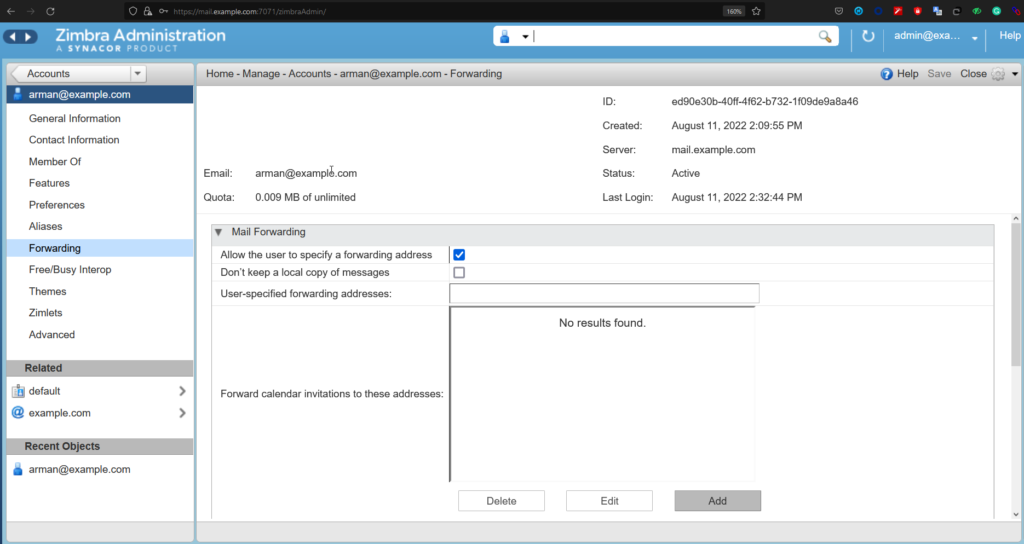
In the upper section of this forwarding option, you can set following policies:
- Allow the user to specify a forwarding address – If this option is checked only then the following option “User-specified forwarding addresses” can be set.
- Don’t keep a local copy of messages – If you want to keep any copy of a forwarded message, you need to uncheck this option. If this option is checked, then no local copy of forwarded message will be stored into original recipient’s inbox.
- User-specified forwarding addresses – User can specify a forwarding address here and user will be able to notice the forwarding.
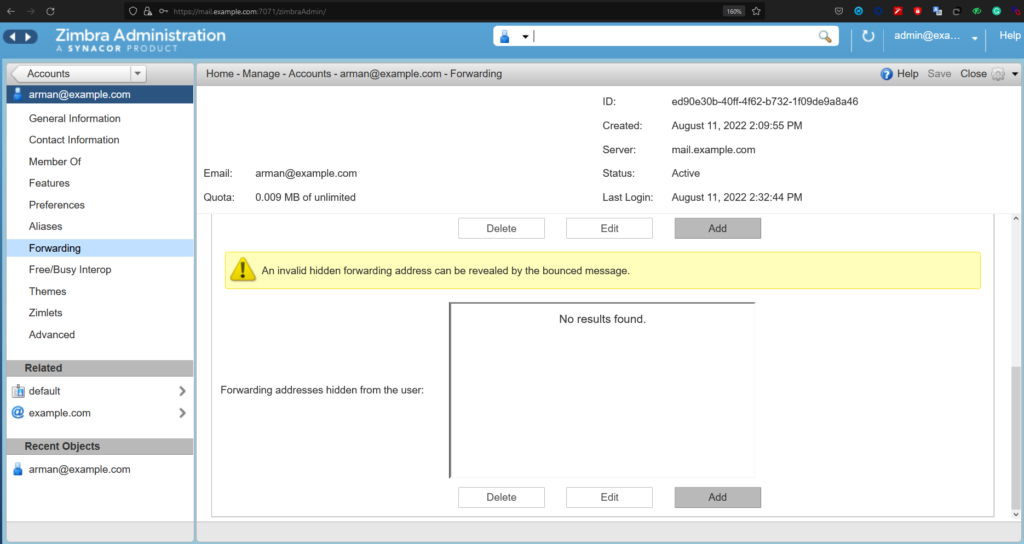
In this lower section of the forwarding option, you can set following policy:
- Forwarding addresses hidden from the user – If any forwarding address is set here, it will be hidden from the user.
In this article, you learnt, how to set aliasing and multiple types of forwarding in your Zimbra Server.
So that’s it for today.


