The Carbonio MTA (Mail Transfer agent) is the key node of the Carbonio CE infrastructure that powers its main function – sending and receiving email. At the heart of the Carbonio MTA is Postfix, which, in conjunction with Amavis, ClamAV, and SpamAssassin, provides reliable and secure email streaming, protecting users’ mailboxes from spam and virus-infected emails. In this article, we will talk about how to properly configure the Carbonio MTA and how an administrator can interact with it.
Carbonio MTA Node Features
The MTA host handles incoming and outgoing SMTP traffic. Unlike other mail protocols such as IMAP and POP3, SMTP requests are not proxied through Carbonio Proxy, which means that the MTA server must be available for connections directly from the Internet. The LMTP protocol is used to deliver messages within the system.
In addition to receiving and sending mail, the MTA host checks and filters incoming mail. They are implemented by Postfix included in Postfix, as well as those supplied with the MTA node by Amavis, ClamAV, SpamAssassin, CBPoilcyD, and Milter. In addition to the standard anti-spam and anti-virus functions, MTA can also block files attached to emails based on their extensions.
Multiple Carbonio MTAs in One System
As already noted, SMTP requests to the Carbonio MTA node are not proxied using Carbonio Proxy and therefore the node must be directly accessible from the Internet. However, in highly loaded email systems, it may be necessary to install two or more MTAs. In that case, how to provide load balancing between them?
In Carbonio, load balancing between multiple MTAs happens automatically for outgoing mail. Incoming mail requires DNS balancing. To do this, it is enough to add several A-records for one domain name to make everything work. Eg:
mail.example.tld     A     123.123.123.123
mail.example.tld     A     123.123.123.124
It turns out that when the MX record of the domain points to the A record of mail.example.tld, calls will go not to one server, but to two at once, which will allow using two MTA nodes at once and ensure load balancing. If there are more than 2 MTA nodes in your infrastructure, you can add additional A-records to DNS.
The Principle of Receiving Email
Because the MTA uses Postfix, mail is received and sent using mail queues. There are five in total:
Incoming – this mail queue receives all incoming messages sent from both internal and external addresses
Active – this mail queue receives messages that have passed Postscreen and CBPolicyD checks. Messages from this queue are sent to Amavis to be checked for viruses and spam. After passing the check, they are delivered or moved to another queue.
Deferred – this mail queue receives messages from the “Active” queue due to various reasons and cannot be sent at the moment. Subsequently, Postfix attempts to resend these emails to the recipient. By default, messages stay in this queue for 5 days, after which they are returned to the sender. This time period can be configured by changing the value of the bounce_queue_lifetime parameter in the zmlocalconfig.
Corrupt – this mail queue receives messages that are damaged during sending or receiving, and become unreadable.
You can view the mail queues on the command line with the following commands by logging in as user zextras (sudo su - zextras):
sudo /opt/zextras/libexec/zmqstatshows the number of emails in each of the mail queues.

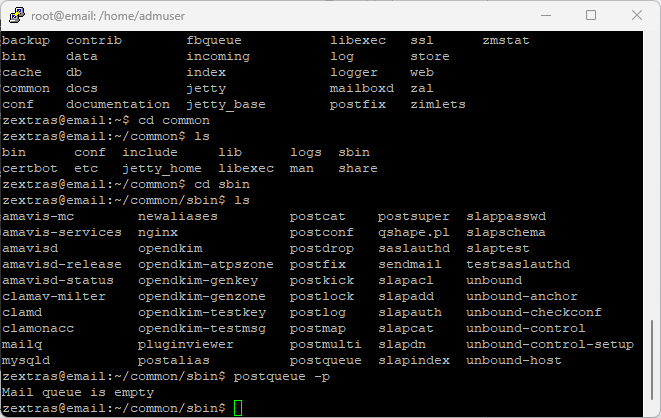
/opt/zextras/common/sbin/postqueue -pshows detailed descriptions of the messages that are in the mail queue. If the queues are empty, a corresponding notification will be shown.
The same effect can be achieved with the mailq command.
You can view a message that is in the mail queue using its identifier, which is provided when executing mailq and postqueue. Eg:
/opt/zextras/common/sbin/postcat -q EC753D0D00
To remove a specific message from the queue, use the command
/opt/zextras/common/sbin/postsuper -d EC753D0D00
To clear all queues, use the command
/opt/zextras/common/sbin/postsuper -d ALL
To clear a specific queue, add its name to the end of the previous command
/opt/zextras/common/sbin/postsuper -d ALL deferred
Distribution of Roles Between Carbonio MTA Nodes
The scenario where multiple MTAs on the same system perform different roles is also acceptable. For example, one of the two MTAs works only for incoming mail, and the second – only for outgoing mail.
To configure a Carbonio MTA node that works only on receiving mail, exclude the carbonio-mta-sidecar.service service from automatically starting:
systemctl mask carbonio-mta-sidecar.service
Also, delete the file /etc/zextras/service-discover/carbonio-mta.hcl
In order for the server to receive mail, it must be pointed to by a valid MX record in DNS.
To configure a Carbonio MTA node that works only for sending mail, simply add the corresponding server to the Carbonio infrastructure, but do not add any MX records leading to it. As a result, the Carbonio node will not receive emails but will continue to send them.
ClamAV Setup
In some cases, the official repository with database updates for ClamAV turned out to be inaccessible to some users. In this regard, the antivirus built into Carbonio cannot work normally immediately after installation. You can solve this problem by specifying another available repository. This is done using the command carbonio prov modifyConfig zimbraClamAVDatabaseMirror LINK_TO_THE_REPO.
You can set up a separate repository for each MTA server. This is done with a command like carbonio prov modifyServer mta.example.tld zimbraClamAVDatabaseMirror LINK_TO_THE_REPO.
In the examples above, replace LINK_TO_THE_REPO with a reference to a trusted repository, and in the case of a server team, replace mta.example.tld with the domain name of the Carbonio MTA server.
SpamAssassin Setup
SpamAssassin in Carbonio starts working automatically, right after installation. To increase the effectiveness of spam filtering, the administrator can add his own rules to SpamAssassin, or use Bayesian learning, which works in cases where users themselves move messages from the Inbox to the Spam folder or vice versa.
Postscreen Setup
Since the Carbonio MTA node is usually accessible from the outside internet, it is very important to protect it from external threats such as DoS attacks or mail bombing. For these purposes, the Postscreen service is built into it, which allows you to filter out automatically generated incoming connections and implement greylisting within the mail server.
CBPolicyD Setup
CBPolicyD is a powerful tool for setting various mail policies on the server. It allows you to configure both quotas and various mail policies. For example, using CBPolicyD, an administrator can prevent certain users from sending emails to external users, limit the number of senders who can send emails to a particular mailbox, limit the number of emails that a particular user can receive or send, and so on.
CBPolicyD is installed with Carbonio, but this module is not enabled by default. To enable it in a single-server infrastructure, you must run the carbonio prov ms mail.carbonio.tld +zimbraServiceEnabled cbpolicyd command. For a multi-server infrastructure, run this command on the MTA servers.
Milter Setup
Milter (short for Mail Filter) is a tool used to protect mailing lists from spam. The danger of this phenomenon lies in the fact that spam sent to the address of the mailing list will end up in the mailboxes of several users at once. This leads to increased consumption of mail server hard disk space and also increases the risks for the cybersecurity of the enterprise. Milter allows you to limit the range of users who can send emails to a specific mailing list.
To enable Milter, use the commands:
carbonio prov modifyConfig zimbraMilterServerEnabled TRUE
carbonio prov modifyServer mta.example.ru zimbraMilterServerEnabled TRUE
In the case of a server team, replace mta.example.tld with the domain name of the Carbonio MTA server
To directly limit the range of senders authorized to send messages to mailing lists, use the following commands:
carbonio prov grantRight dl distributionlist@example.tld usr user@example.tld sendToDistListGrant rights to the user user@example.tld to send emails to the distributionlist@example.tld distribution list
carbonio prov grr dl distributionlist@example.tld grp groupdl@example.tld sendToDistListGrant rights to members of the groupdl@example.ru distribution list to send emails to the distributionlist@example.ru distribution list
carbonio prov grr dl distributionlist@example.tld all sendToDistList
Grant rights to all accounts on the server to send emails to the distribution list address distributionlist@example.tld
carbonio prov grr dl distributionlist@example.tld dom example.ru sendToDistList
Grant rights to all accounts of the example.tld domain to send emails to the mailing list address distributionlist@example.tld
carbonio prov grr dl distributionlist@example.tld pub sendToDistList
Grant rights to everyone on the Internet to send emails to the distributionlist@example.tld mailing list
After assigning the necessary rights, do not forget to restart the MTA server for the changes to take effect. This is done with the zmmtactl reload command.