Update on Let’s Encrypt deployment on Carbonio CE
This article was written during the earlier age of Carbonio CE. Since then many things have changed. Now deploying Let’s Encrypt certificate is more easy and more convenient. You can use the Carbonio CE Admin UI panel to deploy Let’s Encrypt for each of your domain individually. Check out our blog for updated articles.
A public-key certificate is an electronic document that provides a reliable way for an entity to prove its identity. A trusted organization that issues these public-key certificates is known as a Certificate Authority (CA). A certificate authority acts as a trusted third party by both the owner of the certificate and those who rely on it.
The subject of such certificates is typically individuals and organizations while it can be a device like a computer which is the case in the context of an e-mail server. Certificate authorities can be commercial such as IdenTrust and DigiCert, or non-profit, like Let’s Encrypt.
In this article, you will see how to install and manage Let’s Encrypt certificates in Carbonio CE using Certbot on Ubuntu 20.04.
What is Let’s Encrypt?
Let’s Encrypt is a global Certificate Authority (CA) providing SSL/TLS certificates to individuals and organizations. Let’s Encrypt certificates are mostly used by websites to enable secure HTTPS connections. However, besides issuing SSL/TLS certificates for websites, Let’s Encrypt is commonly used as Domain Validation (DV) that can be used for any servers using a domain name such as e-mail servers.
Let’s Encrypt certificates remain valid for 90 days but you can renew the certificate at any time during this timespan without any charge that facilitates the setting up and maintaining TLS encryption.
What is Certbot?
Certbot is a free and open-source tool to facilitate obtaining SSL certificates from Let’s Encrypt and configure it onto your server. Certbot is also very useful to manage Let’s Encrypt certificates such as automating the renewal process.
Issue Certificates for Carbonio CE
We’re going to use Certbot to obtain and configure Let’s Encrypt certificates on our Server. The process is very straightforward. You install Certbot, issue the request for your server, obtain an SSL certificate, CA Intermediate, and Private Key for your domain, deploy it on your server, and you’re done.
Step 1: Installing Certbot
Note: Before installing Certbot, you need to remove certbot-auto or any other related Certbot packages installed using an OS package manager like apt and add the latest version maintained by the Certbot team since the one that comes with Ubuntu 20.04 is deprecated. we cannot be sure the command certbot uses the snap as opposed to the one installed by your package manager.
After successfully removing the existing Certbot-auto, it’s time to install the latest version maintained by the Certbot on the machine.
To install latest version of certbot, run the following commands
apt install snapd
snap install --classic certbot
ln -s /snap/bin/certbot /usr/bin/certbot
certbot --version
Now execute the certbot as follows:
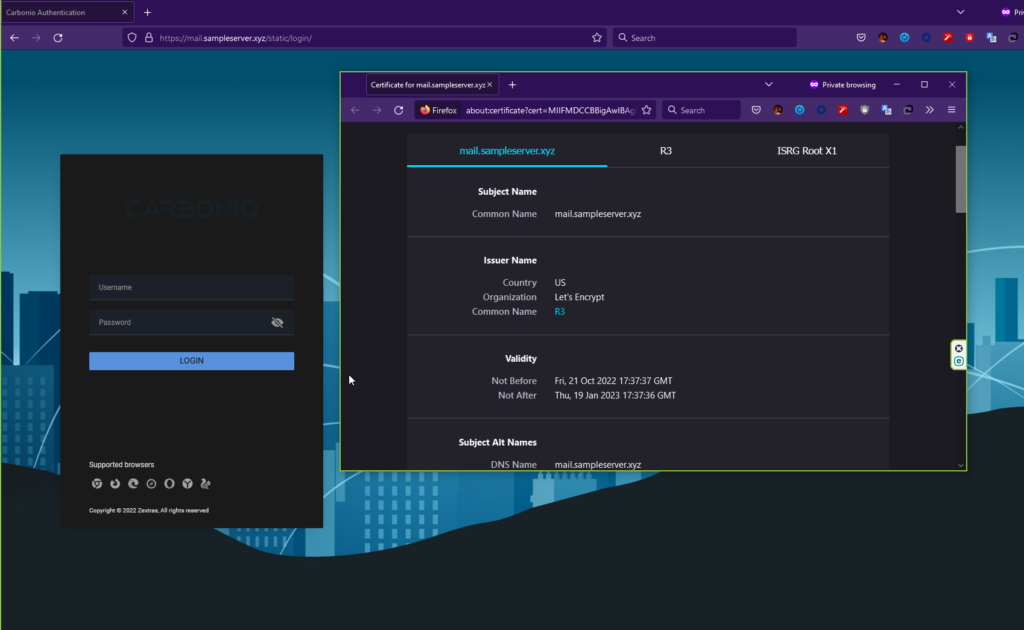
certbot certonly --key-type rsa --preferred-chain "ISRG Root X1" -d mail.sampleserver.xyzAfter the verification, certificate files – certificate, public key, and the chain – are placed in the /etc/letsencrypt/mail.sampleserver.xyz/ directory.
Check the directory /etc/letsencrypt/live/mail.sampleserver.xyz/. It should have following files:
cert.pem chain.pem fullchain.pem privkey.pem READMEStep 3: Preparing Certificate
By generating the certificate in the last step, you should have now obtained privkey.pem, cert.pem, and chain.pem.
First copy your privkey.pem file from /etc/letsencrypt/live/mail.sampleserver.xyz/ to /opt/zextras/ssl/carbonio/commercial/ as commercial.key using the following command:
cp /etc/letsencrypt/live/mail.sampleserver.xyz/privkey.pem /opt/zextras/ssl/carbonio/commercial/commercial.keyCopy other certificate and chain to the /tmp directory.
cp /etc/letsencrypt/live/mail.sampleserver.xyz/cert.pem /tmp
cp /etc/letsencrypt/live/mail.sampleserver.xyz/chain.pem /tmp
Now, acquire the ISRG Root X1 chain and concatenate it to your file.
wget -O /tmp/ISRG-X1.pem https://letsencrypt.org/certs/isrgrootx1.pem.txt
cat /tmp/ISRG-X1.pem >> /tmp/chain.pem
Step 4: Deploying Certificate
Give access to the commercial.key file using
chown zextras:zextras /opt/zextras/ssl/carbonio/commercial/commercial.keyNow verify the certificate using
su - zextras -c 'zmcertmgr verifycrt comm /opt/zextras/ssl/carbonio/commercial/commercial.key /tmp/cert.pem /tmp/chain.pem'Note that the deployment should only be executed after completing the verification step successfully.
Finally, deploy the certificate and restart the services to finish the deployment
su - zextras -c 'zmcertmgr deploycrt comm /tmp/cert.pem /tmp/chain.pem'
su - zextras -c 'zmcontrol restart'
Now check the status from your webmail interface.
Attention: To make your life a little bit easier, we prepared a script that can automate the installation of Let’s Encrypt SSL certificate in your server no matter how many domains you have. Try check that out.
You can find more information on the Carbonio Community Edition documentation webpage.
Comments
I have done this 3 times and it is not matching: # su - zextras -c 'zmcertmgr verifycrt comm /opt/zextras/ssl/carbonio/commercial/commercial.key /tmp/cert.pem /tmp/chain.pem' ** Verifying '/tmp/cert.pem' against '/opt/zextras/ssl/carbonio/commercial/commercial.key' 140091721712960:error:0607907F:digital envelope routines:EVP_PKEY_get0_RSA:expecting an rsa key:crypto/evp/p_lib.c:474: ERROR: Certificate '/tmp/cert.pem' and private key '/opt/zextras/ssl/carbonio/commercial/commercial.key' do not match. Thanks
@Rony, Hi, Could you please tell us some more details about your system? i.e. Your OS version Your Carbonio CE version, Your certbot version Did you followed all instructions mentioned in this guide? Regards, Sharif N.B. A new automated way to deploy certificate in Carbonio CE is being under development.
Hi. I just got the same error message as @Rony: 40516203750528:error:0607907F:digital envelope routines:EVP_PKEY_get0_RSA:expecting an rsa key:crypto/evp/p_lib.c:474: ERROR: Certificate '/tmp/cert.pem' and private key '/opt/zextras/ssl/carbonio/commercial/commercial.key' do not match. In my case, I'm running Carbonio CE 4.0.19-1.el8 under Rocky Linux 8.7 in a Google Cluoud VM. I had to setup dnsmasq for domain resolution because on setup the MX record on my DNS is different from the IP address that Carbonio was resolving (it was using the private IP address instead of the public one). I installed certbot via snap (as indicated) and generated the certificates successfully. Thanks in advance for any pointers for solving this.
After googling around, I found a solution: https://forums.zimbra.org/viewtopic.php?t=69645#p301581 basically we need to change the way the verification is made.
What authentification way you select? standalone or webroot?
In Miguel's answer you can see the link explaining the change on the verification process. Basically adapting that to Carbonio, you would run the command below on cli as root user: zmcertmgr=/opt/zextras/bin/zmcertmgr cp $zmcertmgr $zmcertmgr.bak sed -i -e 's/$self->run("$ssl rsa -noout -modulus -in '$keyf'/$self->run("$ssl pkey -pubout -in '$keyf'/g' \ -e 's/$self->run("$ssl x509 -noout -modulus -in '$crtf'/$self->run("$ssl x509 -noout -pubkey -in '$crtf'/g' $zmcertmgr
Standalone
The key must be of type RSA. Generate it like this: certbot certonly --standalone --agree-tos --renew-by-default --email it@domain.ba --preferred-chain "ISRG Root X1" --force-renewal --key-type rsa --rsa-key-size 4096 -d email.domain.ba
Hello, Nedim after executing the mentioned process, which follows to make the installation of SSL certifcado. Best regards
[…] Carbonio CE. Пытался сделать сам, взяв за основу инструкцию https://community.zextras.com/free-ssl-certificates-for-carbonio-community-edition-using-lets-encryp…, но столкнулся с проблемой, а […]
It would be useful to have an article for Red Hat and Letsencrypt
[…] https://community.zextras.com/free-ssl-certificates-for-carbonio-community-edition-using-lets-encryp… […]
Working now on Agust. 2024
Thank you. Works as of today. This method should be on documentation, the SSL check on mobile and desktop clients fails if you do not do this. (on the documentation there is one but it is without letsencrypt, the one with letsencrypt is only for web client not for server ssl access)