For additional guidance, check out our community articles detailing the process of migrating from your current platform to Carbonio CE.
For enterprise-level requirements and advanced features, consider checking out Zextras Carbonio – the all-in-one private digital workplace designed for digital sovereignty trusted by the public sector, telcos, and regulated industries.
A distribution list is a group of email addresses. In Zimbra, you can create and manage multiple distribution lists. So when anyone sends an email to a distribution list a copy of it is delivered to all of its member’s mailboxes.
With the distribution list, you can manage different groups of email accounts.
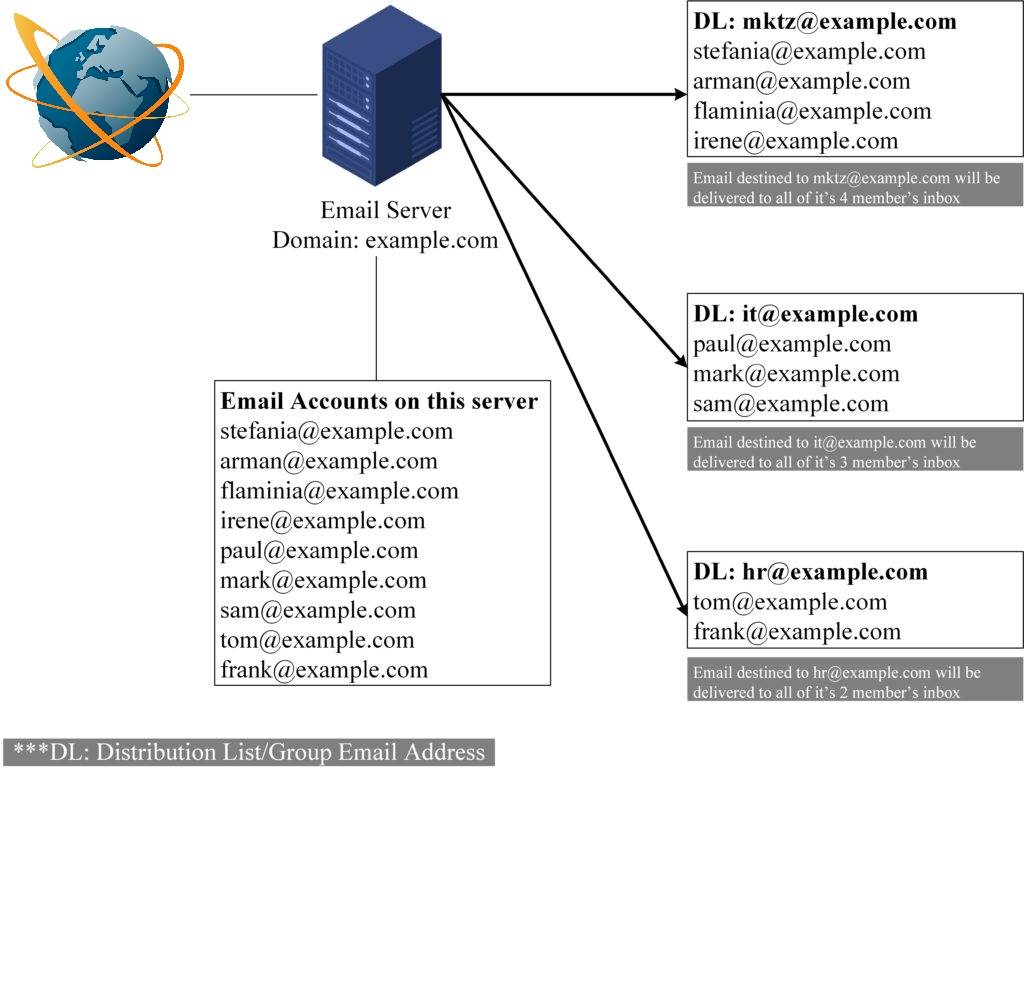
From the image, you can see the email server contains several email accounts. Out of those email accounts, multiple groups are formed. i.e Group mktz@eaxmple.com contains 4 email addresses. Similarly, Group it@eaxmple.com & hr@example.com contains respectively 3 and 2 email addresses.
So whenever someone sends an email to mktz@example.com, it is delivered to all of its member’s inboxes. The same thing happens to other groups also.
In addition to that group email feature, Zimbra also allows you to apply some policies to these groups. We will discuss them in this article and also you will learn how to manage your distribution list.
How To Manage A Distribution List
Step-1
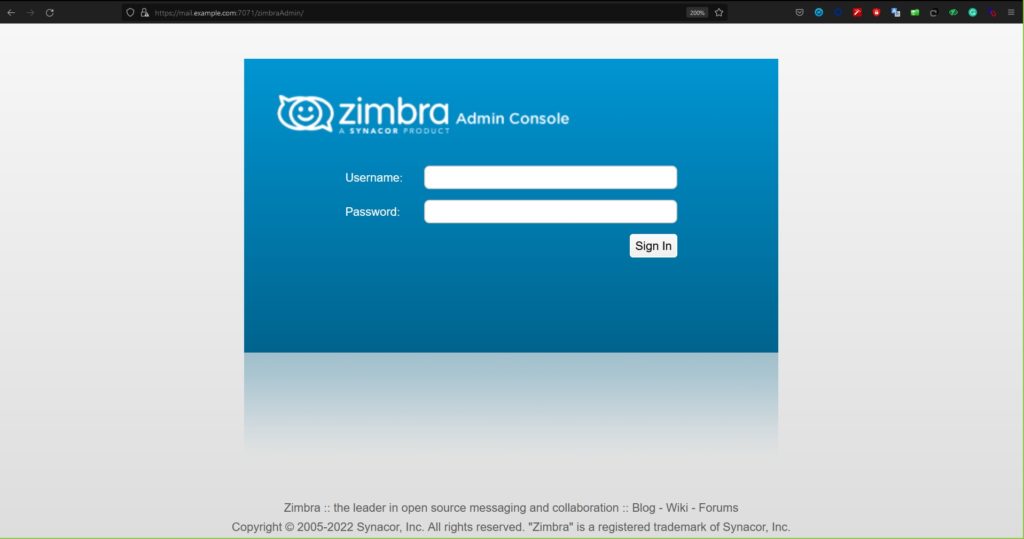
Login to your admin panel.
Step-2
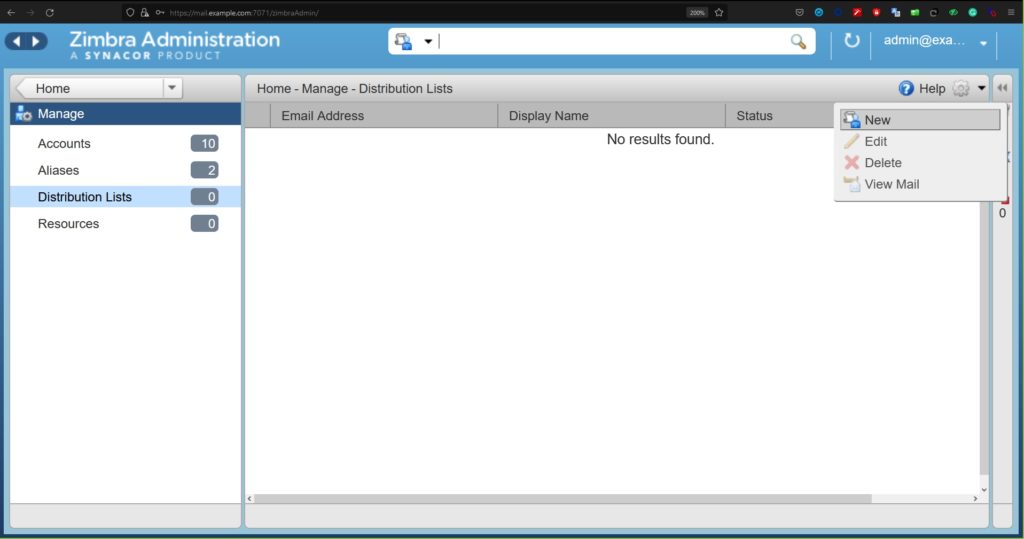
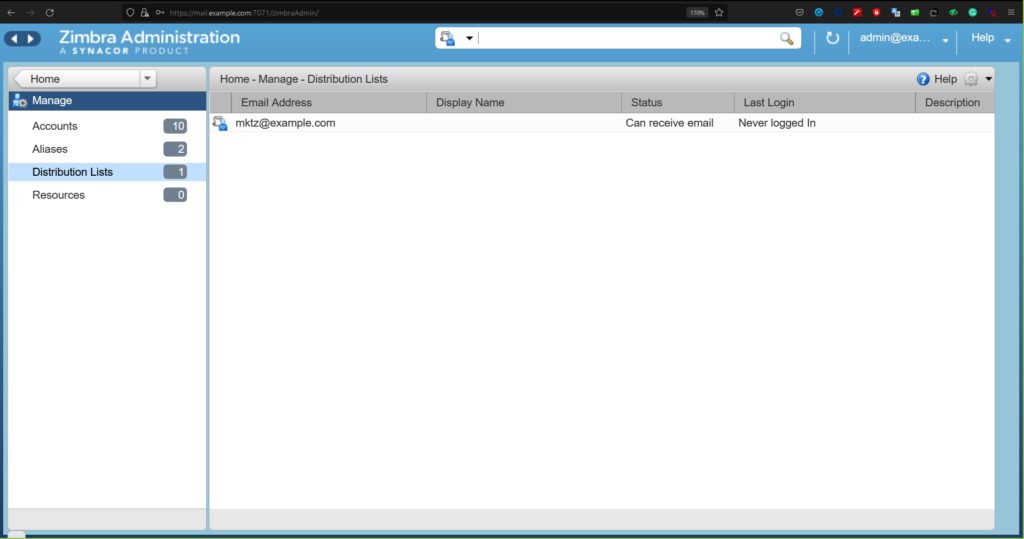
Go to Home > Manage > Distribution Lists. Select the New option using the Gear icon on the top right of the screen.
Step-3
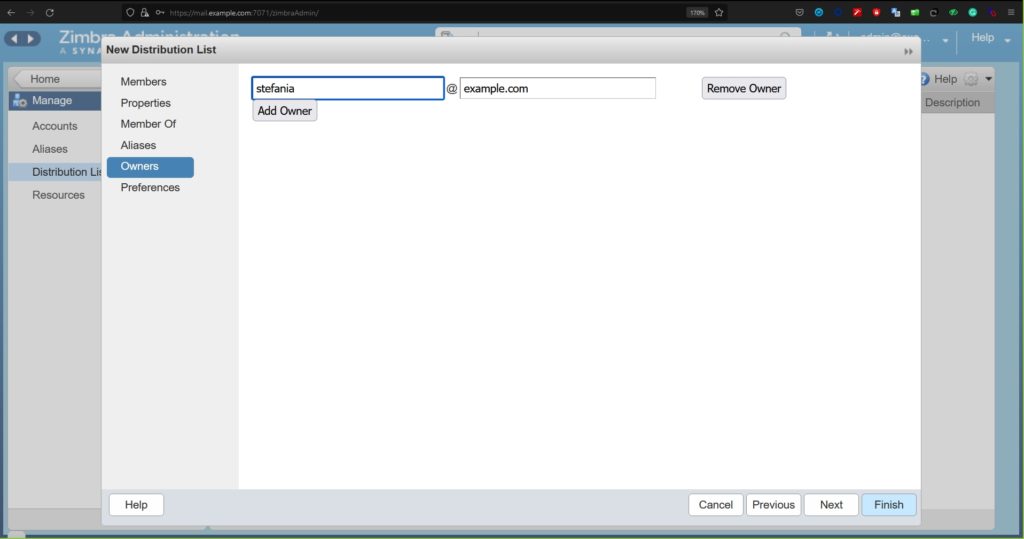
Fill out the panel as shown in the image:

Select a List Name for your distribution list. You can add members to this list from this panel.
Step-4
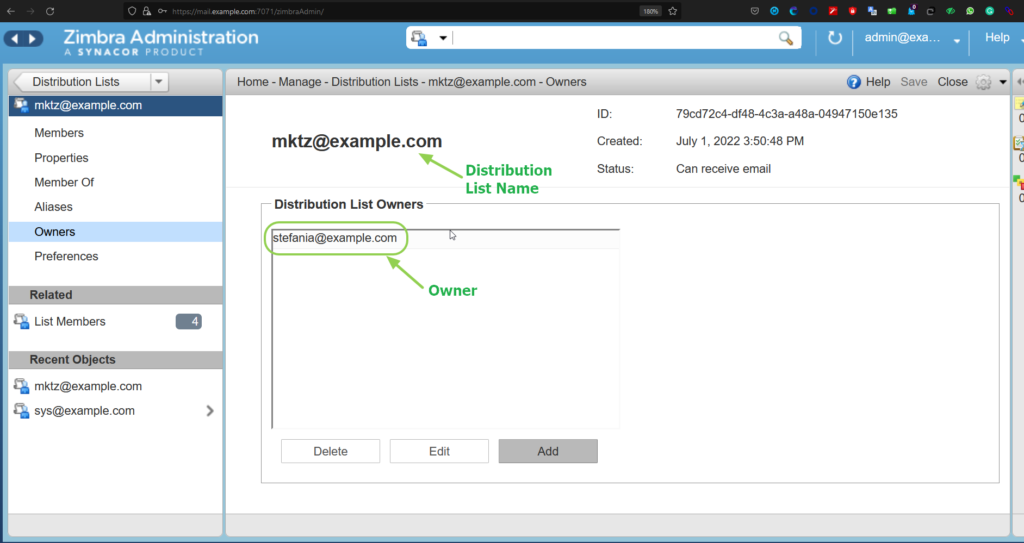
Add an owner of this list who will have the authority to manage the list.
***Keep all other settings as it is. You can change them later.
Step-5
Now the Distribution List is ready for use.
You can also double-click on the newly created Distribution List to view/edit them.
Now we will see how can we manage Distribution List using CLI.
Create a distribution list and add members to it using CLI:
[Create a distribution list]
zimbra@mail:/root$ zmprov cdl it@example.com
959e8ba3-0135-4384-acfa-bbed08c53977
zimbra@mail:/root$
[Add member to the distribution list]
zimbra@mail:/root$ zmprov adlm it@example.com paul@example.com
zimbra@mail:/root$ zmprov adlm it@example.com mark@example.com
zimbra@mail:/root$ zmprov adlm it@example.com sam@example.com
zimbra@mail:/root$
[Find the member of a distribution list]
zimbra@mail:/root$ zmprov gdlm it@example.com
# distributionList it@example.com memberCount=3

members
mark@example.com
paul@example.com
sam@example.com
zimbra@mail:/root$
[Remove/delete member from a distribution list]
zimbra@mail:/root$ zmprov rdlm it@example.com sam@example.com
zimbra@mail:/root$
[Delete an entire distribution list]
zimbra@mail:/root$ zmprov ddl hr@example.com
zimbra@mail:/root$
[Rename a distribution list]
zimbra@mail:/root$ zmprov gadl
it@example.com
mktz@example.com
zimbra@mail:/root$ zmprov rdl it@example.com sys@example.com
zimbra@mail:/root$
zimbra@mail:/root$ zmprov gadl
mktz@example.com
sys@example.com
How To Apply Policy In A Distribution list
To apply any policy in your distribution list, you need to enable the milter service in your Zimbra server.
Step-1
Enable Milter Server
[From GUI Mode:]
Global: Home > Configure > Global Settings > MTA > Milter Server

[From CLI Mode:]

su - zimbra
zimbra@mail:/root$ zmprov modifyConfig zimbraMilterServerEnabled TRUE
zimbra@mail:/root$ zmmilterctl start
Starting milter server...done.
zimbra@mail:/root$ zmmilterctl status
Milter server is running.
zimbra@mail:/root$
Step-2
Apply Policy to the distribution list. To do so, go to the admin panel. Find the distribution list. Double click it and find out its owner.
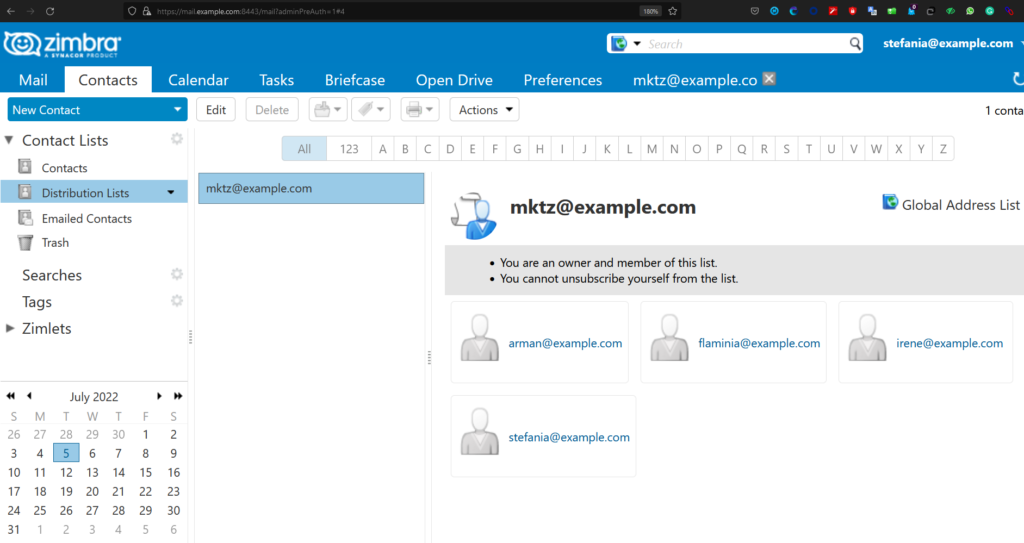
Go to the Owner’s email account(In this case, stefania@example.com). Go to the Contact, find the distribution list. Double click it.
A new window with all the settings will appear. We will check these options one by one:
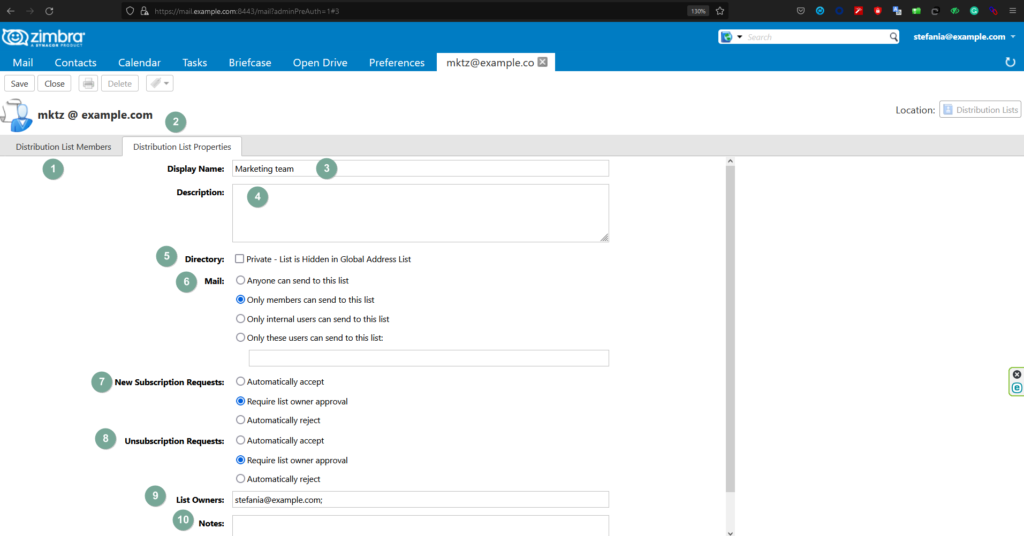
- Distribution List Members – In this Tab, you can edit the list of existing members of this group. You can add/remove members from here.
- Distribution List Properties – In this Tab, you will get all settings of this distribution list.
- Display Name – You Set can a
Display Namefor your Distribution List as like user email account. - Description – You can set a description of this Distribution List.
- Directory – You can opt-in/out to make this distribution list a private one and hidden from the GAL(Global Address List)
- Mail – This is an important feature. Here, you can set who can send email to this Distribution List.
- You can keep it open so anyone (both insider and outsider) can send an email to this list.
- You can allow only members of this group can send emails to this list.
- Only internal users of this server/domain can send emails to this list.
- You can also specify specific email addresses that can send emails to this list
- You can also manage the
New Subscription Requestsettings from this page. - Unsubscription Requests can be also managed from this page.
- List Owners – You can add/remove owners from this option.
- Notes – You can set additional notes in this field.
What is a Dynamic Distribution List?
A dynamic distribution list is a group that contains all current emails and includes all future email addresses in this group automatically. Mostly this kind of group is used in large organizations where dynamically adding users to a group address is more convenient.
zimbra@mail:/root$ zmprov cddl all@example.com memberURL 'ldap:///??sub?(&(objectClass=zimbraAccount)(ZimbraAccountStatus=active))' zimbraIsACLGroup FALSE
[Output]
f562f8a6-5ce4-41c5-9a65-b741a075aed6
The ‘ZimbraAccountStatus=active’ specifies that only active accounts are added. We can similarly add more filters as well.
You can also define a Distribution List as a dynamic distribution list during its creation.
Let’s Take A Look At An Example
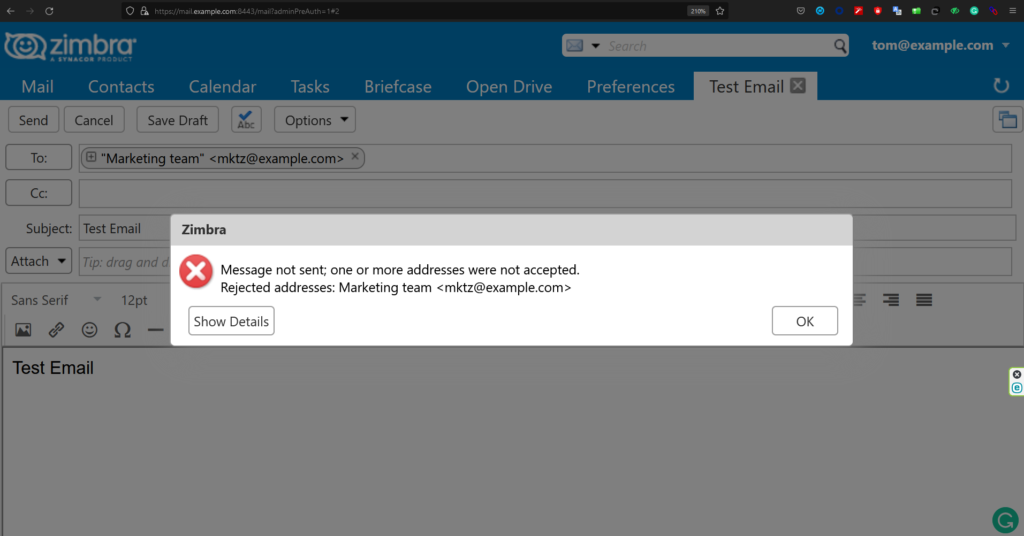
In this server(example.com), we have a distribution list mktz@example.com. It contains four members i.e stefania@example.com, arman@example.com, flaminia@example.com and irene@example.com. After enabling the milter server, we set the policy such as except for group members no other can send email to this list.
Now another user tom@example.com tries to send an email to this group (mktz@example.com). What will happen?
So now you learnt some important information related to managing distribution list. Hope it will help you in your day-to-day operation.
That’s all for today.