For additional guidance, check out our community articles detailing the process of migrating from your current platform to Carbonio CE.
For enterprise-level requirements and advanced features, consider checking out Zextras Carbonio – the all-in-one private digital workplace designed for digital sovereignty trusted by the public sector, telcos, and regulated industries.
With the upcoming end of the official support for CentOS Linux, as we have seen in the article “CentOS is dying: What’s next?”, it is likely that there will be an increase in the use of Oracle Linux, since it is the distribution closest to CentOS among those on the market, sharing philosophy and especially the core based on RHEL. Therefore, this guide to installing Zimbra on Oracle Linux, is designed for those who will decide to migrate to this distro and for those who already use it.
Requirements
Before we begin the actual installation of Zimbra on our system, we need to make sure we perform a few steps and configurations.
First, let’s go over what we need in order to proceed.
SUDO
Many of the commands shown in this guide require administrative rights to run. The easiest way to do that is by adding “sudo” before the command you want to run. You can also decide to log in as root user with the command: “sudo su – ” and then entering the root password. Doing so you will no longer have to enter “sudo” before giving commands.
However it is good practice to avoid performing more actions as root than you need to. Sudo facilitates this by allowing you to run individual commands as root without having to log in as root and without needing an interactive root shell for tasks. So, you can go for “sudo su”, but you have been warned.
System Requirements
- A clean minimal installation of Oracle Linux
- 8 GB of RAM
- At least 5 GB of disk space for software and logs
- FQDN (Fully Qualified Domain Name), for example “mail.sampledomain.com”
- A & MX record for your Server
- A static IP address for Zimbra server
OS
It’s highly recommended to have a fresh new installation of Oracle Linux, but in any case is important to consider that there are some services that are running anyway that may be in conflict with Zimbra, such as MTA, webserver and mainly postfix. In particular, you need to stop and uninstall postfix to make everything work properly:
sudo systemctl stop postfix
sudo systemctl disable postfix
sudo yum remove postfix
System Update
As a final step, we proceed to an update of our operating system:
sudo yum -y updateSecurity Checking
A first important step to perform in order to prepare our system for Zimbra installation is definitely the one related to security checks. In particular SELinux and Firewall:
SELinux
To avoid problems that could occur, it is important to check if Security-Enhanced Linux (SELinux) is enabled on your machine. We want it to be in “permissive” status. So here it’s how to check and eventually change its status:
- Check the SELinux status with command getenforce
- If the reply is “enforcing” as a status, you have to change it through the command sudo setenforce 0
- Now make a last check for the status with getenforce
Now you should see the status changed from “enforcing” to “permissive”
NOTE: In some cases you may want to completely disable SELinux. Refer to the following article to see how to do that.
Firewall
Most likely you have an active firewall on your server. In this case it will be necessary to open some ports to make sure that everything works correctly. Here are the commands to perform this operation (and the ports to open):
sudo firewall-cmd --permanent --add-port={25,80,110,143,443,465,587,993,995,9071,7071}/tcp
success
sudo firewall-cmd --reload
success
Please note that Ports 7071 and 9071 are used for Admin and proxyed Admin.
Configure System Hostname
Now you need to configure hostname to match our FQDN and make it point to your server IP Address. Remember that it must be static.
Configure Hostname
To configure the hostname in your system you have to enter as follows:
hostnamectl set-hostname <hostname>Where <hostname> is the name of your host (for example “mail.sampledomain.com”)
After doing that, you have to add the right IP in the “hosts” file. To do so you have to open the file with your favourite text editor:
nano /etc/hostsAnd then add the following line, leaving the others untouched:
<ip-address> <FQDN> <name>Where <ip-address> is the IP address of your mailserver and <FQDN> is the fully qualified domain name you want to use, for example:
192.168.0.11 mail.sampledomain.com mailWhen you finished, just save the changes you made and exit.
If you want to make sure everything is correct and working, you can enter the following dig commands to check A and MX records:
dig -t A “mail.sampledomain.com”
dig -t MX “sampledomain.com”
Static IP
As we have seen, we need a static ip address for our server, so, if your server uses a DHCP dynamic IP Address, then you need to edit your network interface card and configure it to use a static IP Address.
We wrote an article that shows different ways to set a static IP Address. It is base on RHEL, so it works fine for Oracle Linux. You can find it here: “Different ways to set a Static IP Address on CentOS / RHEL”
Download and Install Zimbra
Now that we’ve finished configuring and preparing our environment, it’s finally time to install Zimbra. From your CLI type the following:
wget https://files.zimbra.com/downloads/8.8.15_GA/zcs-8.8.15_GA_3953.RHEL8_64.20200629025823.tgzAt the moment we are writing the one above is the latest release available. You can always check for the latest on Zimbra website
After dowloading the file, extract it using tar command:
tar xvf zcs-8.8.15_GA_3953.RHEL8_64.20200629025823.tgzThen enter the extracted folder:
cd zcs-8.8.15_GA_3953.RHEL8_64.20200629025823Now it’s time to run the “install” script:
sudo screen ./install.shScreen
To help prevent an upgrade (or install) session from terminating before it is completed, it is suggested and reccomended to use “screen” command. It is important when the upgrade includes restoring a configuration that has a large number of accounts. Syntax is very simple. Just type : < screen ./install.sh >
If you don’t have it installed on your system, just type: sudo yum install -y screen to install it, then you will be able to execute the command.
You can decide to avoid the use of screen command and the simply proceed with Zimbra installation using the command sudo ./install.sh
Once we run above “install” script, then we will get text-based installation wizard:
Operations logged to /tmp/install.log.92OcKO6s
Checking for existing installation...
    zimbra-drive...NOT FOUND
    zimbra-imapd...NOT FOUND
    zimbra-patch...NOT FOUND
    zimbra-mta-patch...NOT FOUND
    zimbra-proxy-patch...NOT FOUND
    zimbra-license-tools...NOT FOUND
    zimbra-license-extension...NOT FOUND
    zimbra-network-store...NOT FOUND
    zimbra-network-modules-ng...NOT FOUND
    zimbra-chat...NOT FOUND
    zimbra-talk...NOT FOUND
    zimbra-ldap...NOT FOUND
    zimbra-logger...NOT FOUND
    zimbra-mta...NOT FOUND
    zimbra-dnscache...NOT FOUND
    zimbra-snmp...NOT FOUND
    zimbra-store...NOT FOUND
    zimbra-apache...NOT FOUND
    zimbra-spell...NOT FOUND
    zimbra-convertd...NOT FOUND
    zimbra-memcached...NOT FOUND
    zimbra-proxy...NOT FOUND
    zimbra-archiving...NOT FOUND
    zimbra-core...NOT FOUND
----------------------------------------------------------------------
PLEASE READ THIS AGREEMENT CAREFULLY BEFORE USING THE SOFTWARE.
SYNACOR, INC. ("SYNACOR") WILL ONLY LICENSE THIS SOFTWARE TO YOU IF YOU
FIRST ACCEPT THE TERMS OF THIS AGREEMENT. BY DOWNLOADING OR INSTALLING
THE SOFTWARE, OR USING THE PRODUCT, YOU ARE CONSENTING TO BE BOUND BY
THIS AGREEMENT. IF YOU DO NOT AGREE TO ALL OF THE TERMS OF THIS
AGREEMENT, THEN DO NOT DOWNLOAD, INSTALL OR USE THE PRODUCT.
License Terms for this Zimbra Collaboration Suite Software:
https://www.zimbra.com/license/zimbra-public-eula-2-6.html
----------------------------------------------------------------------
Do you agree with the terms of the software license agreement? [N] Y
Press “Y” to Accept the license, then configure the Zimbra package repository and select all the Zimbra Components to install.
Zimbra Packages
Before installing them, here is a brief description of Zimbra packages:
- Zimbra Core: This package includes the libraries, utilities, monitoring tools, and basic configuration files. Zimbra Core is automatically installed on each server.
- Zimbra LDAP: User authentication is provided through OpenLDAP® software. Each account on the Zimbra server has a unique mailbox ID that is the primary point of reference to identify the account. The OpenLDAP schema has been customized for the Zimbra Collaboration Suite. The Zimbra LDAP server must be configured before the other servers. You can set up LDAP replication, configuring a master LDAP server and replica LDAP servers
- Zimbra MTA: Postfix is the open source mail transfer agent (MTA) that receives email via SMTP and routes each message to the appropriate Zimbra mailbox server using Local Mail Transfer Protocol (LMTP). The Zimbra MTA also includes the anti-virus and anti-spam components.
- Zimbra Store: The Zimbra store includes the components for the mailbox server, including Jetty, which is the servlet container the Zimbra software runs within. The Zimbra mailbox server includes the following components:
• Data store. The data store is a MySQL® database.
• Message store. The message store is where all email messages and file attachments reside.
• Index store. Index and search technology is provided through Lucene. Index files are maintained for each mailbox. - Zimbra SNMP: Installing the Zimbra SNMP package is optional. If you choose to install zimbra-SNMP for monitoring, this package should be installed on every Zimbra server.
- Zimbra Logger: Installing the Zimbra Logger package is optional and is installed on one mailbox server. The Zimbra Logger installs tools for syslog aggregation and reporting. If you do not install Logger, the server statistics the server statistics section of the administration console will not display.
Note: The Logger package must be installed at the same time as the mailbox server.
- Zimbra Spell: Installing the Zimbra Spell package is optional. Aspell is the open source spell checker used on the Zimbra Web Client.
- Zimbra Apache: This package is installed automatically when Zimbra Spell or Zimbra Convertd is installed.
- Zimbra Proxy: Zimbra proxy can be configured as a POP and IMAP proxy server and for reverse proxy HTTP requests. This package is normally installed on the MTA server or on its own independent server. Zimbra proxy can be installed on more than one server. When the zimbra-proxy package is installed, the proxy feature is enabled. Installing the Zimbra Proxy is optional.
- Zimbra-memcached: Memcached is automatically selected when the zimbra-proxy is installed. At least one server must run zimbra-memcached when the proxy is in use. All installed zimbra-proxies can use a single memcached server.
Select the packages you wish to install and then type “Y” to modify the System. Now it will start downloading the Zimbra related packages. It may take some time depending on the speed of your internet connection.
The system will be modified. Continue? [N] YOnce all the Zimbra packages are installed in the backend we are almost done.
Now, as a first step, we need to set the correct domain after getting DNS error to the primary domain that you added DNS entry for:
DNS ERROR resolving MX for mail.domain.comIt is suggested that the domain name has an MX record configured in DNS
Change domain name? [Yes]Create domain: [mail.sampledomain.com] sampledomain.com
MX: mail.domain.com (<ip-address>)The second step is to set the admin password. To do so, enter “7” in the main menu and then “4” in the next one. When you’re done, press “r” to go to previous menu and then press “a” to apply the changes.
1) Status:                                  Enabled
   2) Create Admin User:                       yes
   3) Admin user to create:                    admin@domain.com
** 4) Admin Password                           UNSET
   5) Anti-virus quarantine user:              virus-quarantine.7xi47__k@domain.com
   6) Enable automated spam training:          yes
   7) Spam training user:                      spam.wasleuiv@domain.com
   8) Non-spam(Ham) training user:             ham.wzmkmrkq@domain.com
   9) SMTP host:                               mail.domain.com
  10) Web server HTTP port:                    8080
  11) Web server HTTPS port:                   8443
  12) Web server mode:                         https
  13) IMAP server port:                        7143
  14) IMAP server SSL port:                    7993
  15) POP server port:                         7110
  16) POP server SSL port:                     7995
  17) Use spell check server:                  yes
  18) Spell server URL:                        http://domain.com:7780/aspell.php
  19) Enable version update checks:            TRUE
  20) Enable version update notifications:     TRUE
  21) Version update notification email:       admin@domain.com
  22) Version update source email:             admin@domain.com
  23) Install mailstore (service webapp):      yes
  24) Install UI (zimbra,zimbraAdmin webapps): yes
Select, or 'r' for previous menu [r] 4
Password for admin@domain.com (min 6 characters): [54mE0RmqN] enter admin password here
After that go back to main menu (press “r”)
Main menu
   1) Common Configuration:
   2) zimbra-ldap:                             Enabled
   3) zimbra-logger:                           Enabled
   4) zimbra-mta:                              Enabled
   5) zimbra-dnscache:                         Enabled
   6) zimbra-snmp:                             Enabled
   7) zimbra-store:                            Enabled
   8) zimbra-spell:                            Enabled
   9) zimbra-proxy:                            Enabled
  10) Default Class of Service Configuration:
   s) Save config to file
   x) Expand menu
   q) Quit
*** CONFIGURATION COMPLETE - press 'a' to apply
Select from menu, or press 'a' to apply config (? - help) a
Installation is now complete.
Last Check
Before starting Zimbra, it is advisable to perform one last verification step to make sure that all services are active and running properly:
- Let’s go out from the package folder:
cd ..- Enter the Zimbra server by typing:
sudo su - zimbra- Perform a check on Zimbra services to see if they are all running with the command:
zmcontrol statusNOTE: If you were to reboot the system and do the same thing a few of these services may not be working, due to DNSMasq that might be yet to start to work completely when you send the command after the reboot. In this case just type:
zmcontrol restartTo stop and then restart all the services.
You could eventually start directly the ones that are not working, but stopping and restarting all of them is a faster way and gives also a more reliable result.
Enter Zimbra Admin Portal & Web Mail Client
Now you can finally enter Zimbra Admin Portal, by typing the following URL on your Web Browser:
https://<mail.domain.com>:7071/ or https://<ip-address>:7071

If you want to get access to the Zimbra Mail Web Client, then type the following URL in the browser: https://<mail.domain.com>
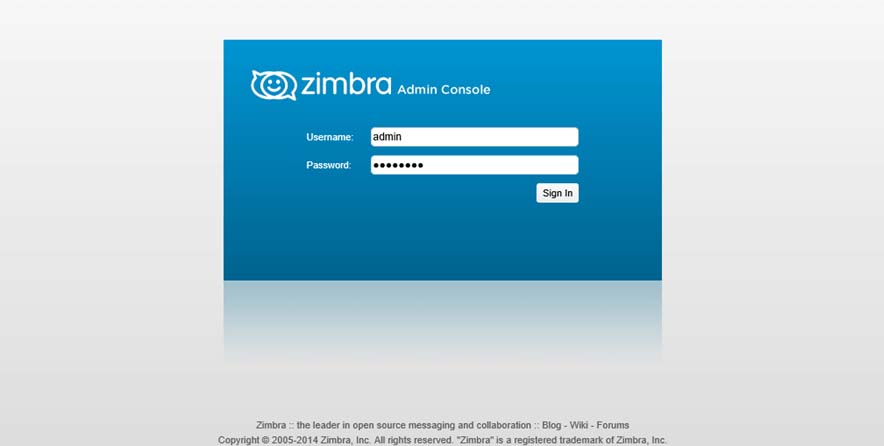
Note: For both the URLs we can use user name as “admin” and password that we set during the installation