For additional guidance, check out our community articles detailing the process of migrating from your current platform to Carbonio CE.
For enterprise-level requirements and advanced features, consider checking out Zextras Carbonio – the all-in-one private digital workplace designed for digital sovereignty trusted by the public sector, telcos, and regulated industries.
Hello and welcome! In this article we are going to see together how to manage contacts in Zimbra.
Let’s start by saying that Zimbra supports two types of contact lists:
- Personal – which is the list of contacts you create and mantain. In your contacts are created, by default, a Contacts, Distributions Lists, and an Emailed Contacts.
- Global Address List (GAL) – this list is available to user inside your organization.
Please note that you cannot edit GAL entries.
By selecting “contacts” in your Zimbra webmail client, you will see an overview of your contact lists. You can select your desired one and browse the contacts you saved in it.
Adding Contacts to an Contact List
In this section we’re going to see how to create and add a new contact to your list.
Add a New Contact
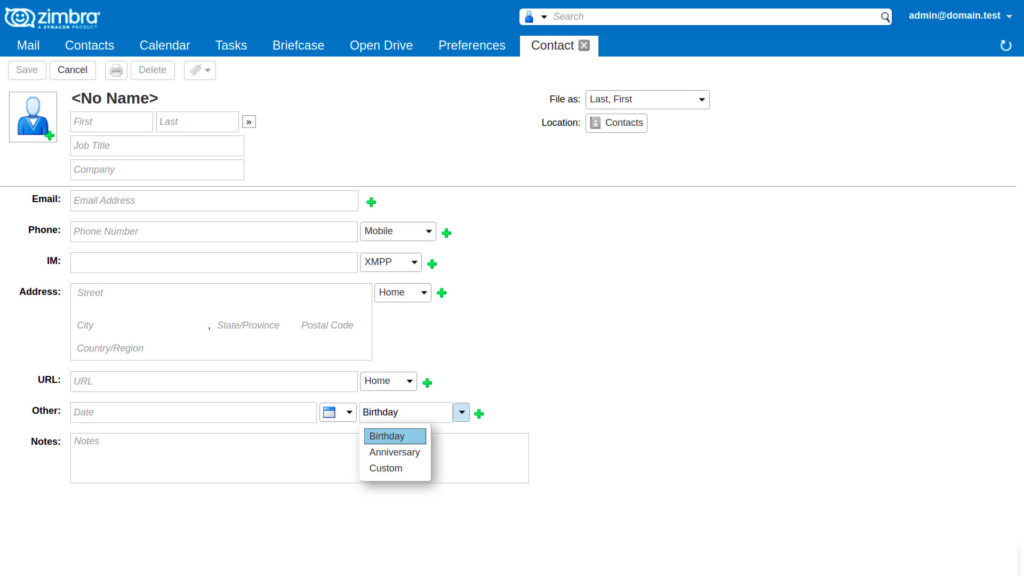
To add a new contact you should go to the Contacts page and then select New Contact.

Now enter contact informations. You can also upload a photo. Where you see a “+” sign next to a text box, you can add more than one entry if needed.
Optionally you can add some custom entries or a Birthday or Anniversary by selecting “Other” and then the desired selection from the drop-down menu.
When you finished, in the upper right of the screen select how and where you want to save the contact, then click “save” to complete the process.
Add a New Contact from an existing mail message
There is the possibility of adding one or more email addresses to an address book, directly from the “Sent By, To, Cc, and Bcc” fields.
To do this, all you have to do is, in an email message, to “right click” over the name you want to add. Then choose the option “add to contacts”. Now the rest of the process is the same as above.
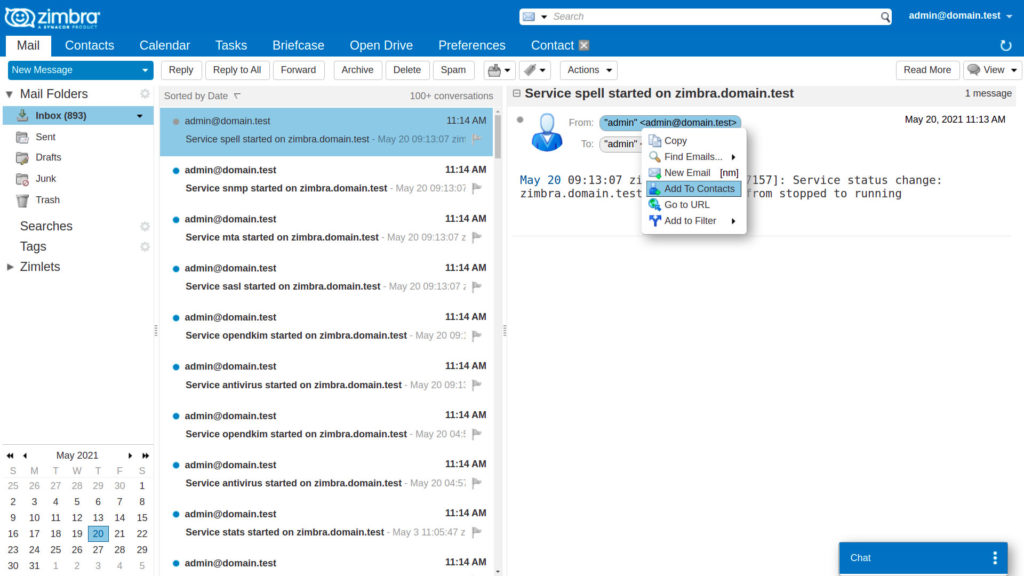
When you’re done, click “save” to end.
Automatically add contacts to emailed contact list
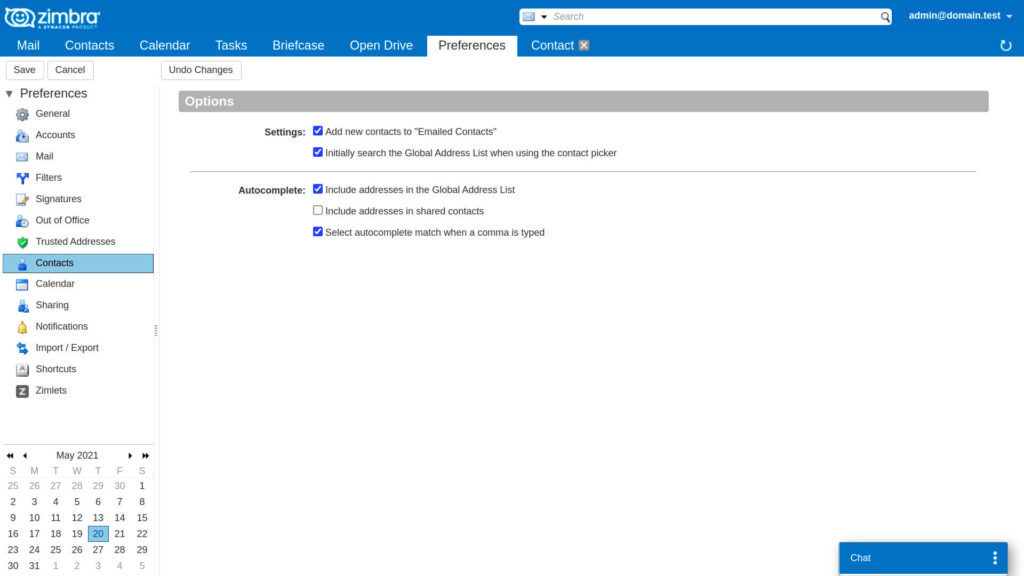
Every time you reply to an email or compose a new message to an address which is not in your contact list, it is automatically added to your emailed contacts list. In addition, if you are using the autocomplete feature, having an emailed contacts list will let you quickly find addresses you previously mailed to.
To enable this option, you must go to Preferences → Contacts. Under options → settings you have to select “Add new contacts to “Emailed Contacts”.
Creating a Contact Group
Now that we’ve seen how to create new contacts and add them to our address book, let’s move on to discover another very interesting and convenient aspect to use: contact groups.
This option is very convenient, because it allows you to gather several contacts in a single group, so that by selecting it you can send an email to all the addresses included in it, without having to add them one by one in your “send to” field.
To add contacts to a group, follow the steps below:
- First of all, go to Contacts → New Contact and from the drop down menu select Contact Group.
- Now you have to enter the name of the group you want to create.
- As a third step, it’s time to add new members to the group, by selecting them from your contacts or manually entering email addresses.
When you finished, click save.
Creating a Contact Group from a Contacts List
If you already have a contact list and want to create a contact group within it, making, as we described above, easier to send mail to multiple contacts not having to select every address singularly, you can proceed as follows:
- Inside contacts page, open a contact list.
- Select the contacts you want to add to your contact group
- After selecting the contacts, go to Actions → Contact Group → New Contact Group. Enter the desired name and press “ok”.
That’s all. The contact group is now created inside your contact list.
Adding Members to an Existing Contact Group
If you’re wondering how you can add new members to a group after creating it, or at least to an existing one, we’ll show you how to do it:
Select the desired Contact Group, then “right-click” on it and select Edit Group.

Now you can find and select a new member for the group by choosing from these options:
- Select the contact list where you’d like to search into, from the “in:” drop down menu, then type your desired entry in the “find” textbox and search. Select the names from the result list and click Add or Add All.
- You can also directly select names inside a contact list doing as described above, without searching for a specific name, but simply selecting the names displayed in the list.
- If you want to add an address which is not in a list, then you can type it in the “Or enter addresses below” text box. Separate addresses with a comma (,) then click “Add”.
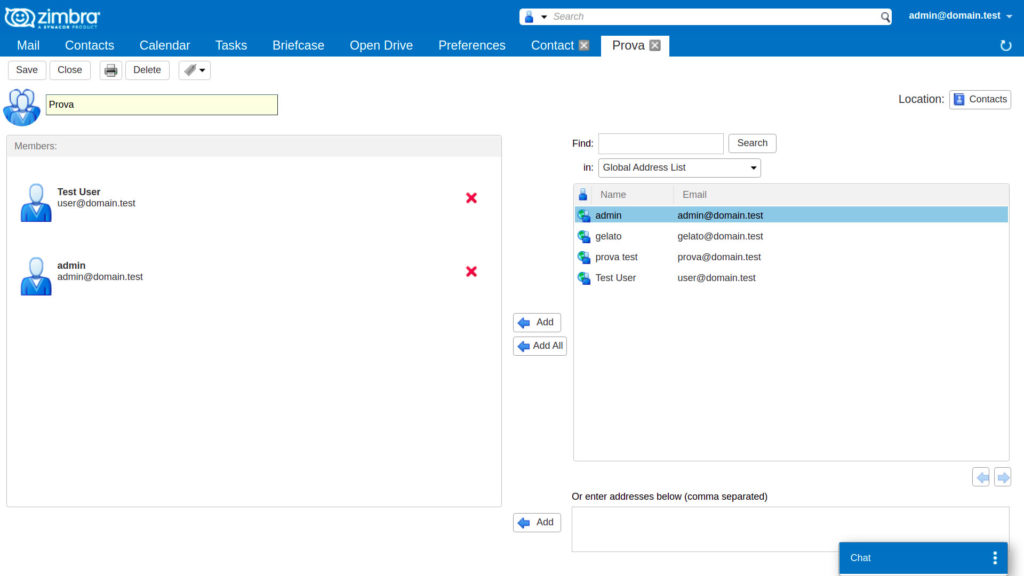
Click Save to finish.
Actions
Now we are going to see how to perform some common actions that are part of the basic operation in contact management.
Moving contacts to another Contact List
It is possible to move contacts from one Contact List to another. To do that, all you have to do is go to Contacts and select the contact list from which you wish to move a contact (or more than one), then by right-clicking it select “move”. Choose the new destination folder and the click “ok”
Editing Contact Information
To edit a contact information, under Contacts, right click the contact you want to edit and select “edit contact”. After making your desired changes, click on “save” to finish.
Forwarding Contact Information
Another useful option is to forward contacts as VCards (Electronic Business Cards). To do so, go under Contacts and select the contact list where the contact you want to forward is located. Right-click the contact and select Forward Contact. A compose pane will open. After completing the message, click “send” to finish.
The .vcf file can be directy downloaded to its contact list from the recipient.
Printing a Contact Name or Address Book
You may certainly find that you need to print one or more contacts or the entire address book. The operation, in this case, is very simple. You’ll have to select a list of contacts or a single contact (or several contacts), then click on the print icon and choose between Print selected contact(s) or Print Contacts.
Deleting Contacts
You can delete any contact lists and any contact you create. To do so you have three possible ways:
- From a contact list, select the contact to be removed and click Delete on the toolbar.
- Drag the contact name to the Trash folder.
- Right-click on the contact and select Delete.
Import/Export a Contact List
In Zimbra you can easily decide to import or export a contact list.
Importing a Contact List
It is possible to import a contact list saved in “csv” (comma-separated value) format:
Go to Preferences → Import/Export.
- In the Import File text box, browse and locate the .csv file to import.
- Choose the Type of contact list you are importing from the drop-down menu.
- Select the Destination address book to import the contacts or create a new one.
When finished, click “ok” and then “Import”.
Exporting a Contact List
Ad for the import, you can export a contact list to a csv file.
Going, like for importing, in Import/Export page, select, under Export Type, what you would like to export:
- Accounts
- Calendar
- Contacts
After that, select the source folder of the contacts you want to export, then click “ok” and Export to finish.
Distribution Lists
The last topic we want to cover is the Distribution lists.
A distribution list (or mailing list), is a group of mail addresses contained in a list with a common mail address.
Create a Distribution List
To create a distribution list, you first have to go to Contacts → New Contact and from drop-down menu select Distribution List.
Then, enter the name you want to assign to the Distribution List, in the text box next to the domain name. This will result in the email address of your distribution list.
Please remember that the name you are using must be available and not assigned to another mail address within your domain.
Now Select the Distribution List Properties tab.
- Enter a Display Name for the distribution list. It can also be different from the one you used for the distribution list email address.
- Then, enter the Description for the distribution list.
- If the distribution list is Private and hidden in GAL, check the Directory box.
- After that, select the Mail options. This wil set rules about who can view your distribution list.
- Select the type of New Subscriptions Requests you want to allow to this distribution list.
- Set the rules for Unsubscription Requests for this distribution list.
- Enter the List Owner’s name(s) and email address(es) in the text box.
- Enter any Notes you want to add to your distribution list.
- From the Distribution List Members tab, select new group members to add to your list.
When you finished, just click Save.
View a Distribution List
To view a distribution list, just select Distribution Lists from contacts lists page.
Modify a Distribution List
If you are the owner of a distribution list, you can modify it by selecting it under Contacts Lists page. After selecting the Distribution list, click edit. At the end click “save” to finish.
Subscribing and Unsubscribing from a Distribution List
You can subscribe to a distribution list if you know the name of the list and you are given the option to do that. Otherwise you must send an email message to the owner of the list and ask to be added.
If you want, instead, unsubscribe from a distribution list, after selecting that from Contacts Lists page, click “Unsubscribe” on the right of the distribution list header.
Remember that you must have permissions to modify the list. If there is a lock icon to the right of the name of the distribution list, then you are not allowed to unsubscribe from it.