The article has been updated to be compatible with Carbonio CE Release 23.12.0, 24.1.0
Zextras Carbonio Community Edition (CE) is an open-source and free e-mail server. Zextras Carbonio CE provides you with a completely private, easy to deploy, and highly customizable e-mail platform.
In this article, you’ll see how to have your own private e-mail server using Zextras Carbonio CE.
Why Carbonio CE
Zextras Carbonio CE e-mail server is entirely hosted on your properties and managed only by your own IT team. Therefore you have full control over your data and infrastructure. This provides two main advantages.
- Security of your data
- Compliance with data privacy regulations such as GDPR
Let’s see how exactly Carbonio CE helps you in these fields.
Carbonio CE and Security
Hence the name, an on-premises e-mail server, is deployed locally on your premises. It is considered the most secure form of deployment. Although both cloud-based and on-premises servers remain popular, choosing one depends on your type of data and specific needs.
Services like Google and Yahoo might be easier to set up as you don’t need much technical knowledge to deploy your own servers. However, they are not comparable to on-premises e-mail servers in terms of security. Solutions like Zectras Carbonio CE are preferred options for those who need the highest degree of protection for their sensitive data.
Carbonio CE and Privacy Compliance
Our data stored on the cloud storage will be replicated repeatedly across different data centers scattered around the world. For instance, a Gmail attachment uploaded in Google Drive will be stored multiple times worldwide for accessibility.
To some extent, almost all cloud services have specific options to store your data or at least part of your data domiciled in specific locations. For example, you have some control over your storage with the Google cloud platform and Amazon web services. But for the most part, a small business using services like Gmail will never be sure where their data end up. If your country requires you to comply with specific data protection regulations such as GDPR, a private e-mail server gives you all the control you need over your data.
Built-in Anti-spam And Antivirus
Zextras Carbonio CE comes with a built-in anti-spam and antivirus to further protect your server. Let’s quickly go through some of their features.
Antivirus
- Scanning infrastructure inbound and outgoing e-mails
- Real-time server-side scanner
- Automatic attachment scanning
- Scanning archives and compressed files ZIP, RAR, Tar, Gzip, etc.
- Detecting malware, crypto lockers, trojans, Microsoft macros, worms, etc.
- Automatic database updater
Antispam
- Automatic blocking of unsolicited bulk e-mails and spam
- E-mail header and body text analysis
- Heuristic and statistical/Bayesian scoring framework
- DNS blocklists
- Automatic purge of the spam folder
- Automatic source updater
How To Install Zextras Carbonio CE
As long as you have the requirements, the installation of Zextras Carbonio CE is very straightforward as the installer handles pretty much everything for you.
Requirements
- Intel or AMD 64-bit CPU 1.5 GHz
- 8 GB of RAM
- 40 GB of disk space for the operating system and Carbonio CE
- Internet connectivity
- FQDN (fully qualified domain name), let’s say
https://mail.example.com - Valid A & MX records for server and domain
- A clean installation of the operating system*
* We suggest a clean installation of Ubuntu Server 20.04 LTS as it’s officially supported by Zextras Carbonio CE. It’s always recommended to have a fresh installation of the OS although it’s not necessary. This way we’re sure there is not any conflict in different services and the troubleshooting process is much easier if you notice any misbehavior before starting the installation.
Update and Upgrade the repository file
It is always advisable to update and upgrade your system after a fresh installation.
apt update && apt upgradeEnsure a static IP address
It another basic and important thing during the installation of Carbonio CE. Whether it is private or public, your server should have a static IP address.
cat /etc/netplan/00-installer-config.yaml
# This is the network config written by 'subiquity'
network:
 ethernets:
  ens33:
   addresses:
   - 192.168.1.152/24
   gateway4: 192.168.1.1
   nameservers:
    addresses:
    - 8.8.8.8
    search: []
 version: 2
Update the /etc/hostname and /etc/hosts file
Properly update your hostname and hosts file.
cat /etc/hostname
mail.oldserver.xyz

cat /etc/hosts
# Generated by SolusVM
127.0.0.1       localhost localhost.localdomain

192.168.1.152   mail.oldserver.xyz      mail
Format for /etc/hosts
<IP_Address> space <FQDN> space <hostname>
*** Remove all IPv6 related lines from /etc/hosts
Perform a quick reboot and check host settings
It is always recommended to reboot your server once you modify your hostname/hosts settings. Then check if the settings are okay or not.
reboot now

hostname -f
mail.oldserver.xyz
Add Zextras/Carbonio repository to the system
You need to download and add zextras repository in your system in order to install necessary carbonio CE packages.
Head to the Carbonio Community Edition webpage and fill out the form. You will soon receive an e-mail including very easy instructions to add the repository to your operating system.
After you successfully added the repository, simply continue the next steps in this guide.
Again Update your repository
If you successfully able to add the repository following the emailed instruction, we can notice it during following step.
apt update && apt upgradeSet up dnsmasq [Optional]
[If you have published/resolvable DNS records for the domain that you are using for the installation, you can skip this step]
Warning: During the installation of dnsmasq, you may face conflict on port 53. To resolve this, remove and disable systemd-resolved.
systemctl stop systemd-resolved
systemctl disable systemd-resolved
systemctl mask systemd-resolved
Now install dnsmasq: [As you have removed systemd-resolved, you need to set /etc/resolv.conf manully before trying to install dnsmasq]
apt install dnsmasq -y

vi /etc/dnsmasq.conf
server=1.1.1.1
mx-host=oldserver.xyz,mail.oldserver.xyz,50
host-record=oldserver.xyz,192.168.1.152
host-record=mail.oldserver.xyz,192.168.1.152
#Restart the service#
/etc/init.d/dnsmasq restart
/etc/init.d/dnsmasq status
Install and Configure Postgresql
As the root user install the following packages:
apt install postgresql-12 -yTo configure PostgreSQL, edit file /etc/postgresql/12/main/pg_hba.conf, find the line:
#IPv4 local connections:
host    all             all             127.0.0.1/32            ident

remove the `#` before `host` (if present) and change it as follows:

#IPv4 local connections:
host    all             all             127.0.0.1/32            md5

*** To make sure the changes are picked up by Postgres, reload it.

systemctl reload postgresql
Now, we are going to create ROLE & DATABASE in Postgresql.
read -s -p "Password:" DB_ADM_PWD

su - postgres -c "psql --command=\"CREATE ROLE carbonio_adm WITH LOGIN SUPERUSER encrypted password '$DB_ADM_PWD';\""
su - postgres -c "psql --command=\"CREATE DATABASE carbonio_adm owner carbonio_adm;\""

systemctl restart postgresql
Install Carbonio CE Packages
Now, let’s install Carbonio CE related packages.
apt install service-discover-server \
carbonio-directory-server \
carbonio-files-db carbonio-mailbox-db carbonio-docs-connector-db carbonio-tasks-db \
carbonio-proxy \
carbonio-webui carbonio-files-ui carbonio-tasks-ui carbonio-files-public-folder-ui \
carbonio-user-management \
carbonio-mta \
carbonio-appserver \
carbonio-storages-ce carbonio-files-ce carbonio-preview-ce \
carbonio-docs-connector-ce carbonio-tasks-ce \
carbonio-docs-editor \
carbonio-prometheus -y
In this step, all the components (libraries, application server, users, configuration) are fetched and installed.
Services on the other hand are not enabled until they are configured in the next step.
Configure and launch Carbonio CE
In this step, you will use carbonio-bootstrap to configure your server. It is recommended to run the command in tmux or screen terminal as follows:
screen carbonio-bootstrapYou’ll see several menus to choose from and proceed with the configuration such as changing the domain. However, for a test installation, you can easily go with the default settings since it has all the proper configurations predefined.
Considering that you have already configured all the preliminaries including the MX record, you don’t need to set up or modify anything specific in this step.
Press y to finish and apply the configuration.
Select from menu or press 'y' to apply config (? - help)After the configuration, press return to finish the process.
Configuration complete - press return to exitSetup Carbonio Mesh & pending setups
Run following commands to complete the setup.
service-discover setup-wizard
pending-setups -a
Bootstrap Carbonio CE databases
Now we are going to bootstrap Files and Tasks related databases.
PGPASSWORD=DB_ADM_PWD carbonio-files-db-bootstrap carbonio_adm 127.0.0.1
PGPASSWORD=DB_ADM_PWD carbonio-tasks-db-bootstrap carbonio_adm 127.0.0.1
Install and Configure Workstream Collaboration packages.
Install and configure carbonio-message-dispatcher-db
# Set the DB Password one more time
read -s -p "Password:" DB_ADM_PWD

apt install carbonio-message-dispatcher-db -y
pending-setups -a
PGPASSWORD=$DB_ADM_PWD carbonio-message-dispatcher-db-bootstrap carbonio_adm 127.0.0.1
Install and configure carbonio-message-dispatcher
# Set the DB Password one more time
read -s -p "Password:" DB_ADM_PWD

apt install carbonio-message-dispatcher -y
pending-setups -a
PGPASSWORD=$DB_ADM_PWD carbonio-message-dispatcher-db-bootstrap carbonio_adm 127.78.0.10 20000
Install and configure carbonio-message-broker
apt install carbonio-message-broker -y
pending-setups -a
PGPASSWORD=$DB_ADM_PWD carbonio-ws-collaboration-db-bootstrap carbonio_adm 127.0.0.1
Install and configure carbonio-ws-collaboration-db
apt install carbonio-ws-collaboration-db -y
pending-setups -a
PGPASSWORD=$DB_ADM_PWD carbonio-ws-collaboration-db-bootstrap carbonio_adm 127.0.0.1
Install and configure carbonio-ws-collaboration-ce
apt install carbonio-ws-collaboration-ce -y
pending-setups -a
Install and configure carbonio-videoserver-ce
apt install carbonio-videoserver-ce -y
pending-setups -a
*** During the installation of carbonio-videoserver-ce package, you will be prompted for a bind address for the video server. You should use your server’s public IP address/External Public IP as the binding IP address of your video server.
Install and configure carbonio-ws-collaboration-ui
apt install carbonio-ws-collaboration-ui -y
su - zextras -c "carbonio prov mc default carbonioFeatureChatsEnabled TRUE"
Finish the installation
Reboot the server. After rebooting the server, restart below referred services as per mentioned order:
systemctl restart carbonio-prometheus-nginx-exporter.service
systemctl restart carbonio-tasks
systemctl restart carbonio-message-broker
systemctl restart carbonio-videoserver
systemctl restart carbonio-ws-collaboration
systemctl restart carbonio-message-dispatcher
Check the status of all services.
zextras@mail:~$ zmcontrol -v
Release 24.1.0 Community Edition.

zextras@mail:~$ zmcontrol status
Host mail.oldserver.xyz
        amavis                  Running
        antispam                Running
        antivirus               Running
        directory-server        Running
        mailbox                 Running
        memcached               Running
        mta                     Running
        opendkim                Running
        proxy                   Running
        service webapp          Running
        service-discover        Running
        stats                   Running
        config service          Running

root@mail:~# systemctl list-units carbonio*
zextras is the default admin account in Carbonio CE server. In this case the account is, zextras@example.com
zextras@mail:~$ carbonio prov sp zextras@oldserver.xyz 123456Congratulations! You have successfully deployed your secure and completely private Carbonio CE server.
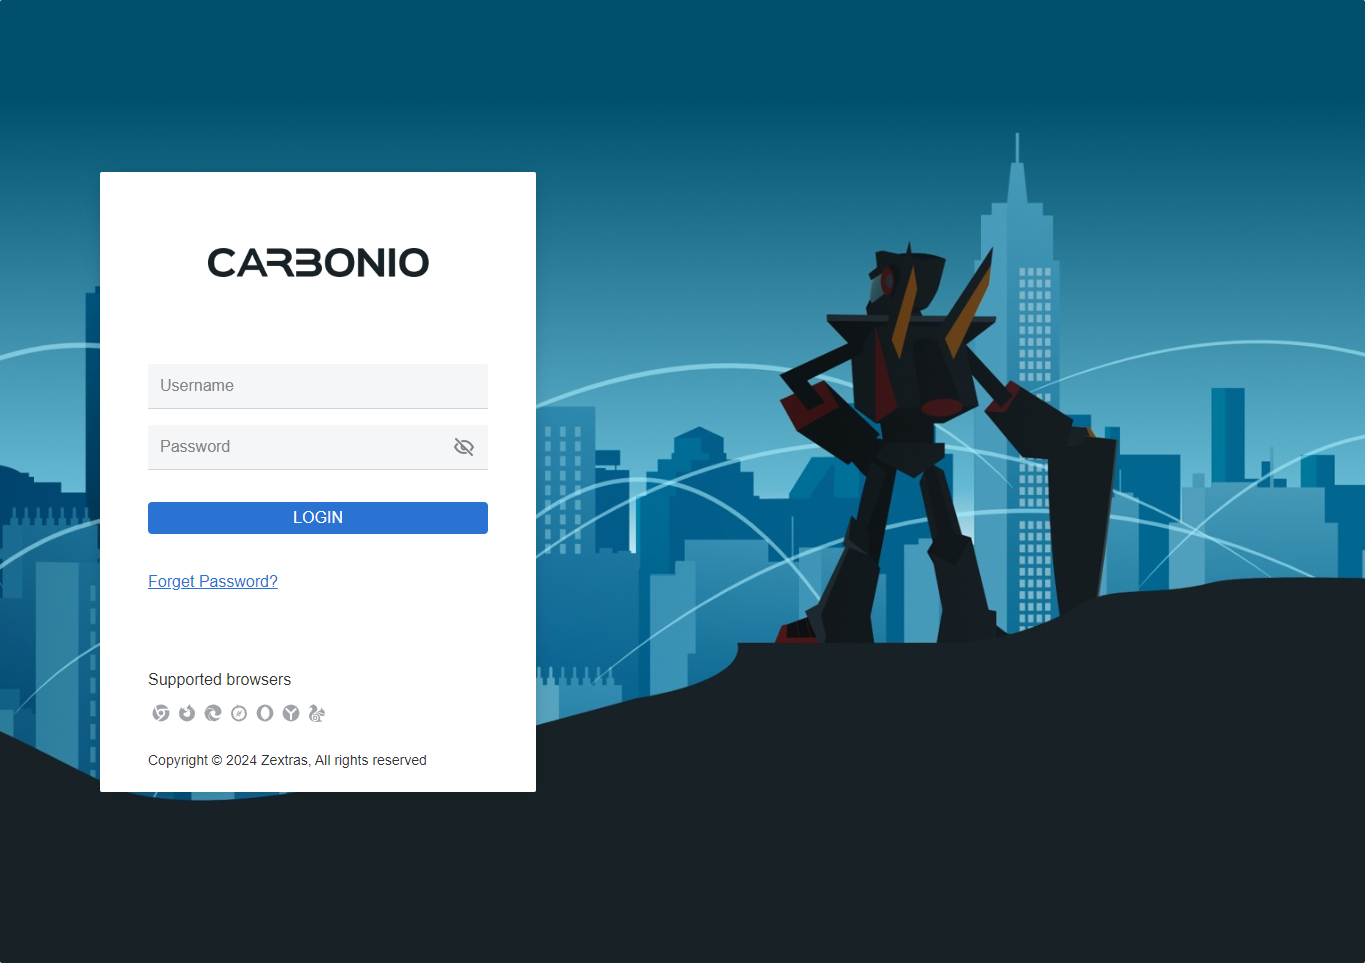
You can now access your admin panel using your IP or the domain you chose through port 6071:
https://mail.oldserver.xyz:6071https://yourIP:6071
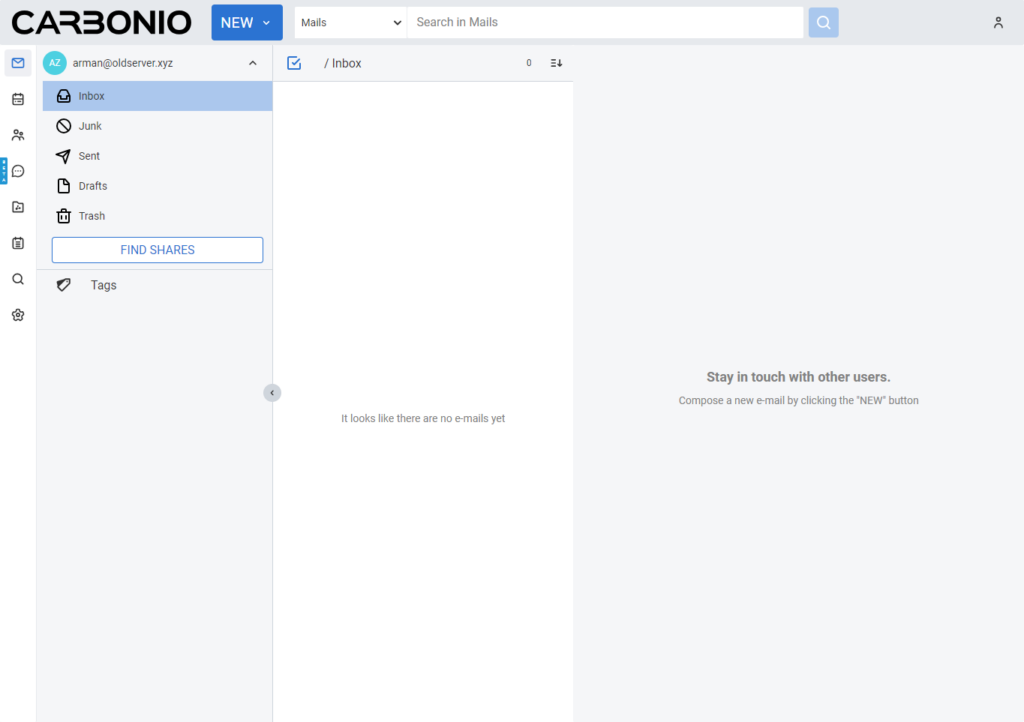
Similarly, users can access their Carbonio CE without specifying the port as follows:
https://mail.oldserver.xyz/https://yourIP/
Also if you are interested to install let’s encrypt certificate in your Carbonio CE server check out this Let’s encrypt installation article.
And that’s it 😊
Comments
Hi Arman, First of all thanks for the great news. I was following the instructions. But ended us getting E: Failed to fetch removed link 403 Forbidden [IP: 18.66.63.106 443] I have tried with several attempts but no luck. Hope to get the solution soon. Thanks, Sharif
@imsilsa
Hi Sharif,
Yes, it was due to some issues with our email system. You should have received a new e-mail with instructions updated, if not, please download Carbonio CE again from here: https://www.zextras.com/carbonio-community-edition/.
Comments are closed.