For additional guidance, check out our community articles detailing the process of migrating from your current platform to Carbonio CE.
For enterprise-level requirements and advanced features, consider checking out Zextras Carbonio – the all-in-one private digital workplace designed for digital sovereignty trusted by the public sector, telcos, and regulated industries.
This article will show you how virtual networking works in Oracle VirtualBox.
NOTE: it is assumed that you have already created a virtual machine with a running Linux operating system.
Virtual Networking Hardware
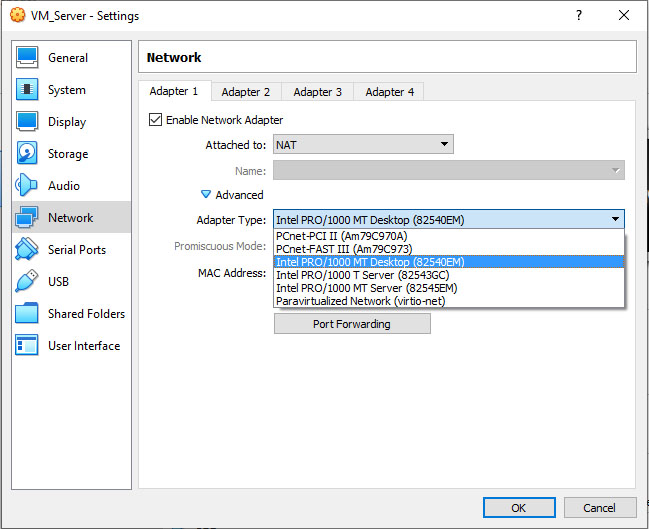
Oracle VM VirtualBox can virtualize different types of networking hardware:
| AMD PCNet PCI II (Am79C970A) | |
| AMD PCNet FAST III (Am79C973) | default settings because it is supported by nearly all operating systems, as well as by the GNU GRUB boot manager. |
| Intel PRO/1000 MT Desktop (82540EM) | works with Windows Vista and later versions |
| Intel PRO/1000 T Server (82543GC) | works for Windows XP guests without additional driver installation |
| Intel PRO/1000 MT Server (82545EM) | this variant facilitates OVF imports from other platforms |
| Paravirtualized network adapter (virtio-net) | If you select this adapter, then Oracle VM VirtualBox will expect a special software interface for virtualized environments to be provided by the guest. Oracle VM VirtualBox provides support for the industry-standard virtio networking drivers, which are part of the open source KVM project. |
Note: the majority of modern linux distributions include support for VirtIO (network, IO, scsi). Using hardware based on those technologies requires less resources (you do not have to emulate the whole hardware stack) and result in better performances (VMXnet/VirtIO-net can manage up to 10Gb/sec instead of 1GB of any Intel/AMD emulated card).
To select the hardware, you must go to the settings on your machine, then network tab. Click on advance and then select the network hardware you want to virtualize:
Networking Modes
Oracle VirtualBox has different networking modes. To select one, go to settings on your machine, then network tab. On the selected Adapter, check “attached to:” and select one of the options:
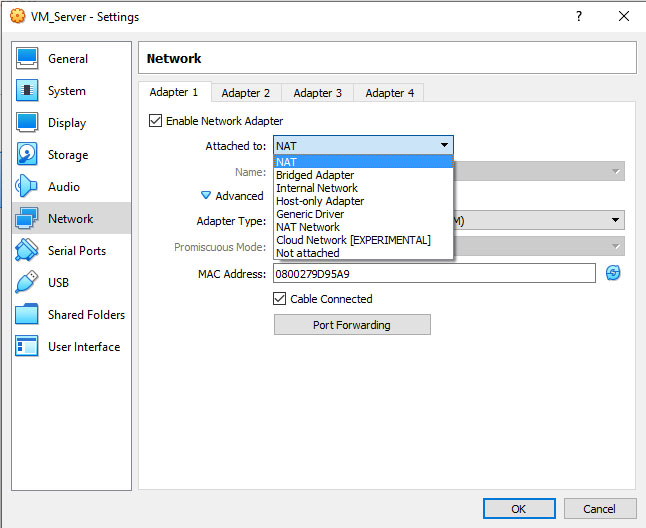
Below is a brief description of different network modes:
- Not attached: In this mode, Oracle VM VirtualBox reports to the guest that a network card is present, but that there is no connection.
- Network Address Translation (NAT): This is the default mode to browse the web, download files and view e-mails inside the guest.
- NAT Network: This is a type of internal network that allows outbound connections.
- Bridged networking: This is for more advanced networking needs. When enabled, Oracle VM VirtualBox connects to one of your installed network cards and exchanges network packets directly, circumventing your host operating system’s network stack.
- Internal networking: This is a network that is visible to selected virtual machines, but not to applications running on the host or to the outside world.
- Host-only networking: This can be used to create a network containing the host and a set of virtual machines, without the need for the host’s physical network interface.
- Generic networking: This mode allows the user to select a driver which can be included with Oracle VM VirtualBox or be distributed in an extension pack.
If you want to learn more about those different network modes, you can read the following article: VM Networking Modes
Adding a second Network Adapter
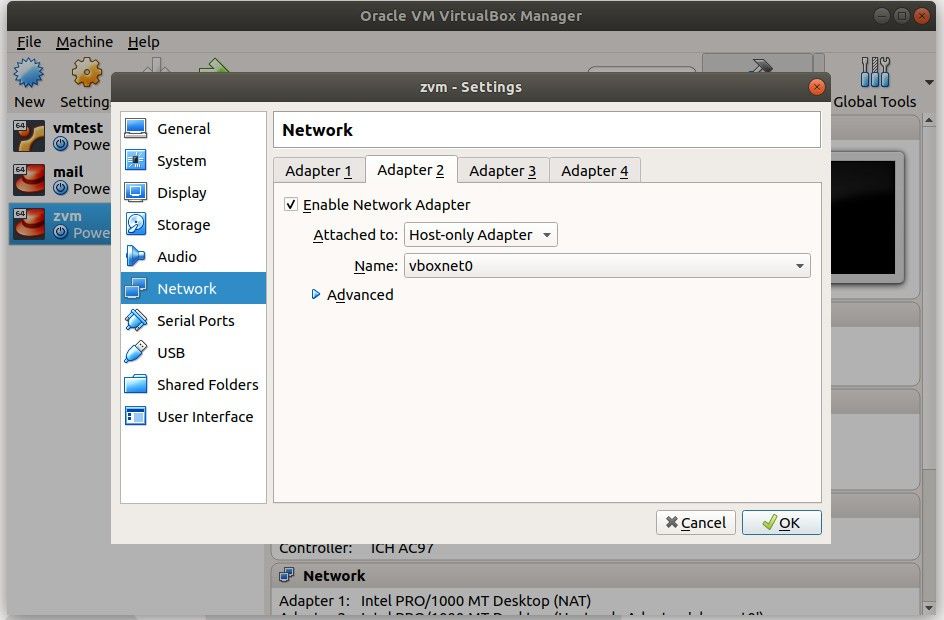
There are situations, such as for example if you want to set up a local virtual domain for Zimbra Installation, where you want to add a second Network Adapter. This gives a scenario where the first adapter is used to connect to the external network (“NAT” mode), while the second could be a “host-only adapter”.
The procedure is very simple, but let’s see it step by step:
From the VirtualBox Manager main page select “Machine Settings -> Network”. Go to Adapter 2 tab, check the option “Enable Network Adapter”. Yes that’s all. Pretty easy, no?
If you want to set up the second network adapter to be a host-only one, proceed as follow:
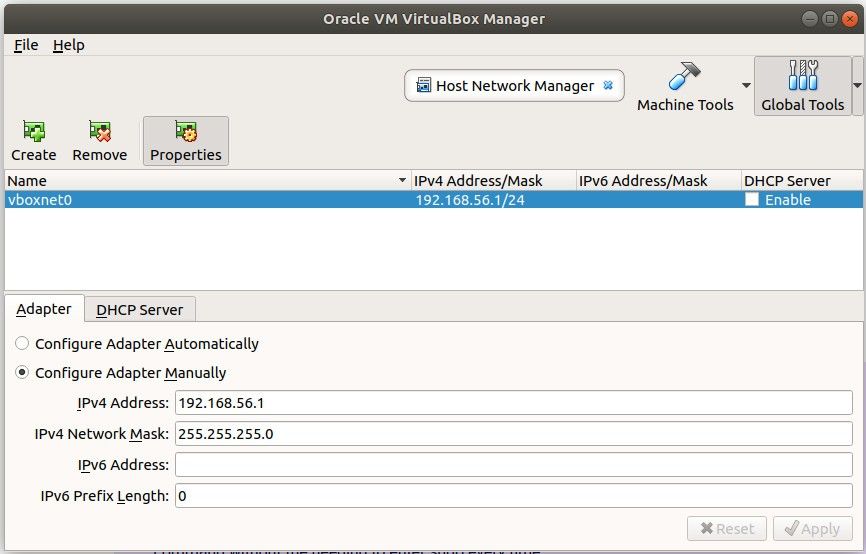
From your VirtualBox Manager, go and select “Global Tools”. Then select Host Network Manager and click on “Create” icon. The result, as shown below, will be a new network, called “vboxnet0” with a defined IPV4 Address and Mask. Leave the default settings as shown in the screen if you don’t have any specific needing.
Then you can go back to previous step and enable the secon adapter choosing “Host-only Adapter” as network mode, and the name of the one we created in the name tab (eg. “vboxnet0”)
When you finished, simply click “OK” to save everything. We are done.