Configuring Let’s Encrypt SSL certificate is always tricky. Specially when command line interface is the only resort for the System Admin. We can say so far it was the only way that all open source email solution provides offered to their users. In this earlier article, we have discussed how you can configure Let’s Encrypt SSL Certificate using CLI in a pretty straight forward and simple way. But this method has some limitations and challenges as it uses the default directory (/opt/zextras/ssl/carbonio/commercial).
In Carbonio CE, we care about your convenience. Therefore, we are always looking for ways to improve your experience and convenience. So whether you have single domain or multiple domains hosted in Carbonio CE, this is your ultimate guide to configure Let’s encrypt SSL certificate in your Carbonio CE server.
Important facts about Let’s Encrypt Installation
- As a preparation, you should have valid
MXrecords,Arecords for all the domains you wish to deploy the Let’s Encrypt certificate.
- To configure Let’s Encrypt, you need to have certbot package in your system. Usually, system admins need to install certbot manually using different sources. (i.e.
snapd). But in Carbonio CE we have taken care of that issue. Now a certbot package is shipped with Carbonio CE and it is installed during Carbonio CE installation. You Can check it’s status as shown below:
zextras@mail:~$ apt-cache policy carbonio-certbot
carbonio-certbot:
  Installed: 2.3.0-1ubuntu1~focal
  Candidate: 2.3.0-1ubuntu1~focal
  Version table:
 *** 2.3.0-1ubuntu1~focal 500
        500 https://repo.zextras.io/release/ubuntu focal/main amd64 Packages
        100 /var/lib/dpkg/status
zextras@mail:~$
Important Note:
You need to install python3-setuptools to make certbot work properly. So, execute apt install python3-setuptools as root user.
*** From Carbonio Release 23.9.0 you do not need to set up python3-setuptools, as we are including it with the certbot package and will be installed during Carbonio CE installation.
- Check the reverse proxy mail mode of your server. By default it is set as
https.
root@mail:~# su - zextras -c "carbonio prov gs mail.sampleserver.xyz | grep -i zimbraReverseProxyMailMode"
zimbraReverseProxyMailMode: https
But in order to make certbot work, you need to change the mode to redirect, as only https and redirect mode is supported in Carbonio CE reverse proxy. So let’s change the mode:
root@mail:~# su - zextras -c "carbonio prov ms mail.sampleserver.xyz zimbraReverseProxyMailMode redirect"
root@mail:~# su - zextras -c "zmconfigdctl restart"
Stopping zmconfigd...done.
Starting zmconfigd...done.
root@mail:~# su - zextras -c "carbonio prov gs mail.sampleserver.xyz | grep -i zimbraReverseProxyMailMode"
zimbraReverseProxyMailMode: redirect
root@mail:~#
The reason we changed the mode is because when we will try to execute certbot to configure Let’s Encrypt, the certificate authority will try to connect to you server using http protocol. The connection attempt will fail if the mode is set as https. Therefore we are changing the mode to redirect hence any connection attempt using http protocol will be redirected to https and the connection will be established successfully.
Now you system is ready for the Let’s Encrypt SSL deployment.
Let’s Encrypt SSL Deployment Steps
- Login to your Carbonio CE admin panel. Select you desired domain. Then select
Virtual Hosts & Certificatesunder Details.

- Add
Virtual Host Namefor your domain.
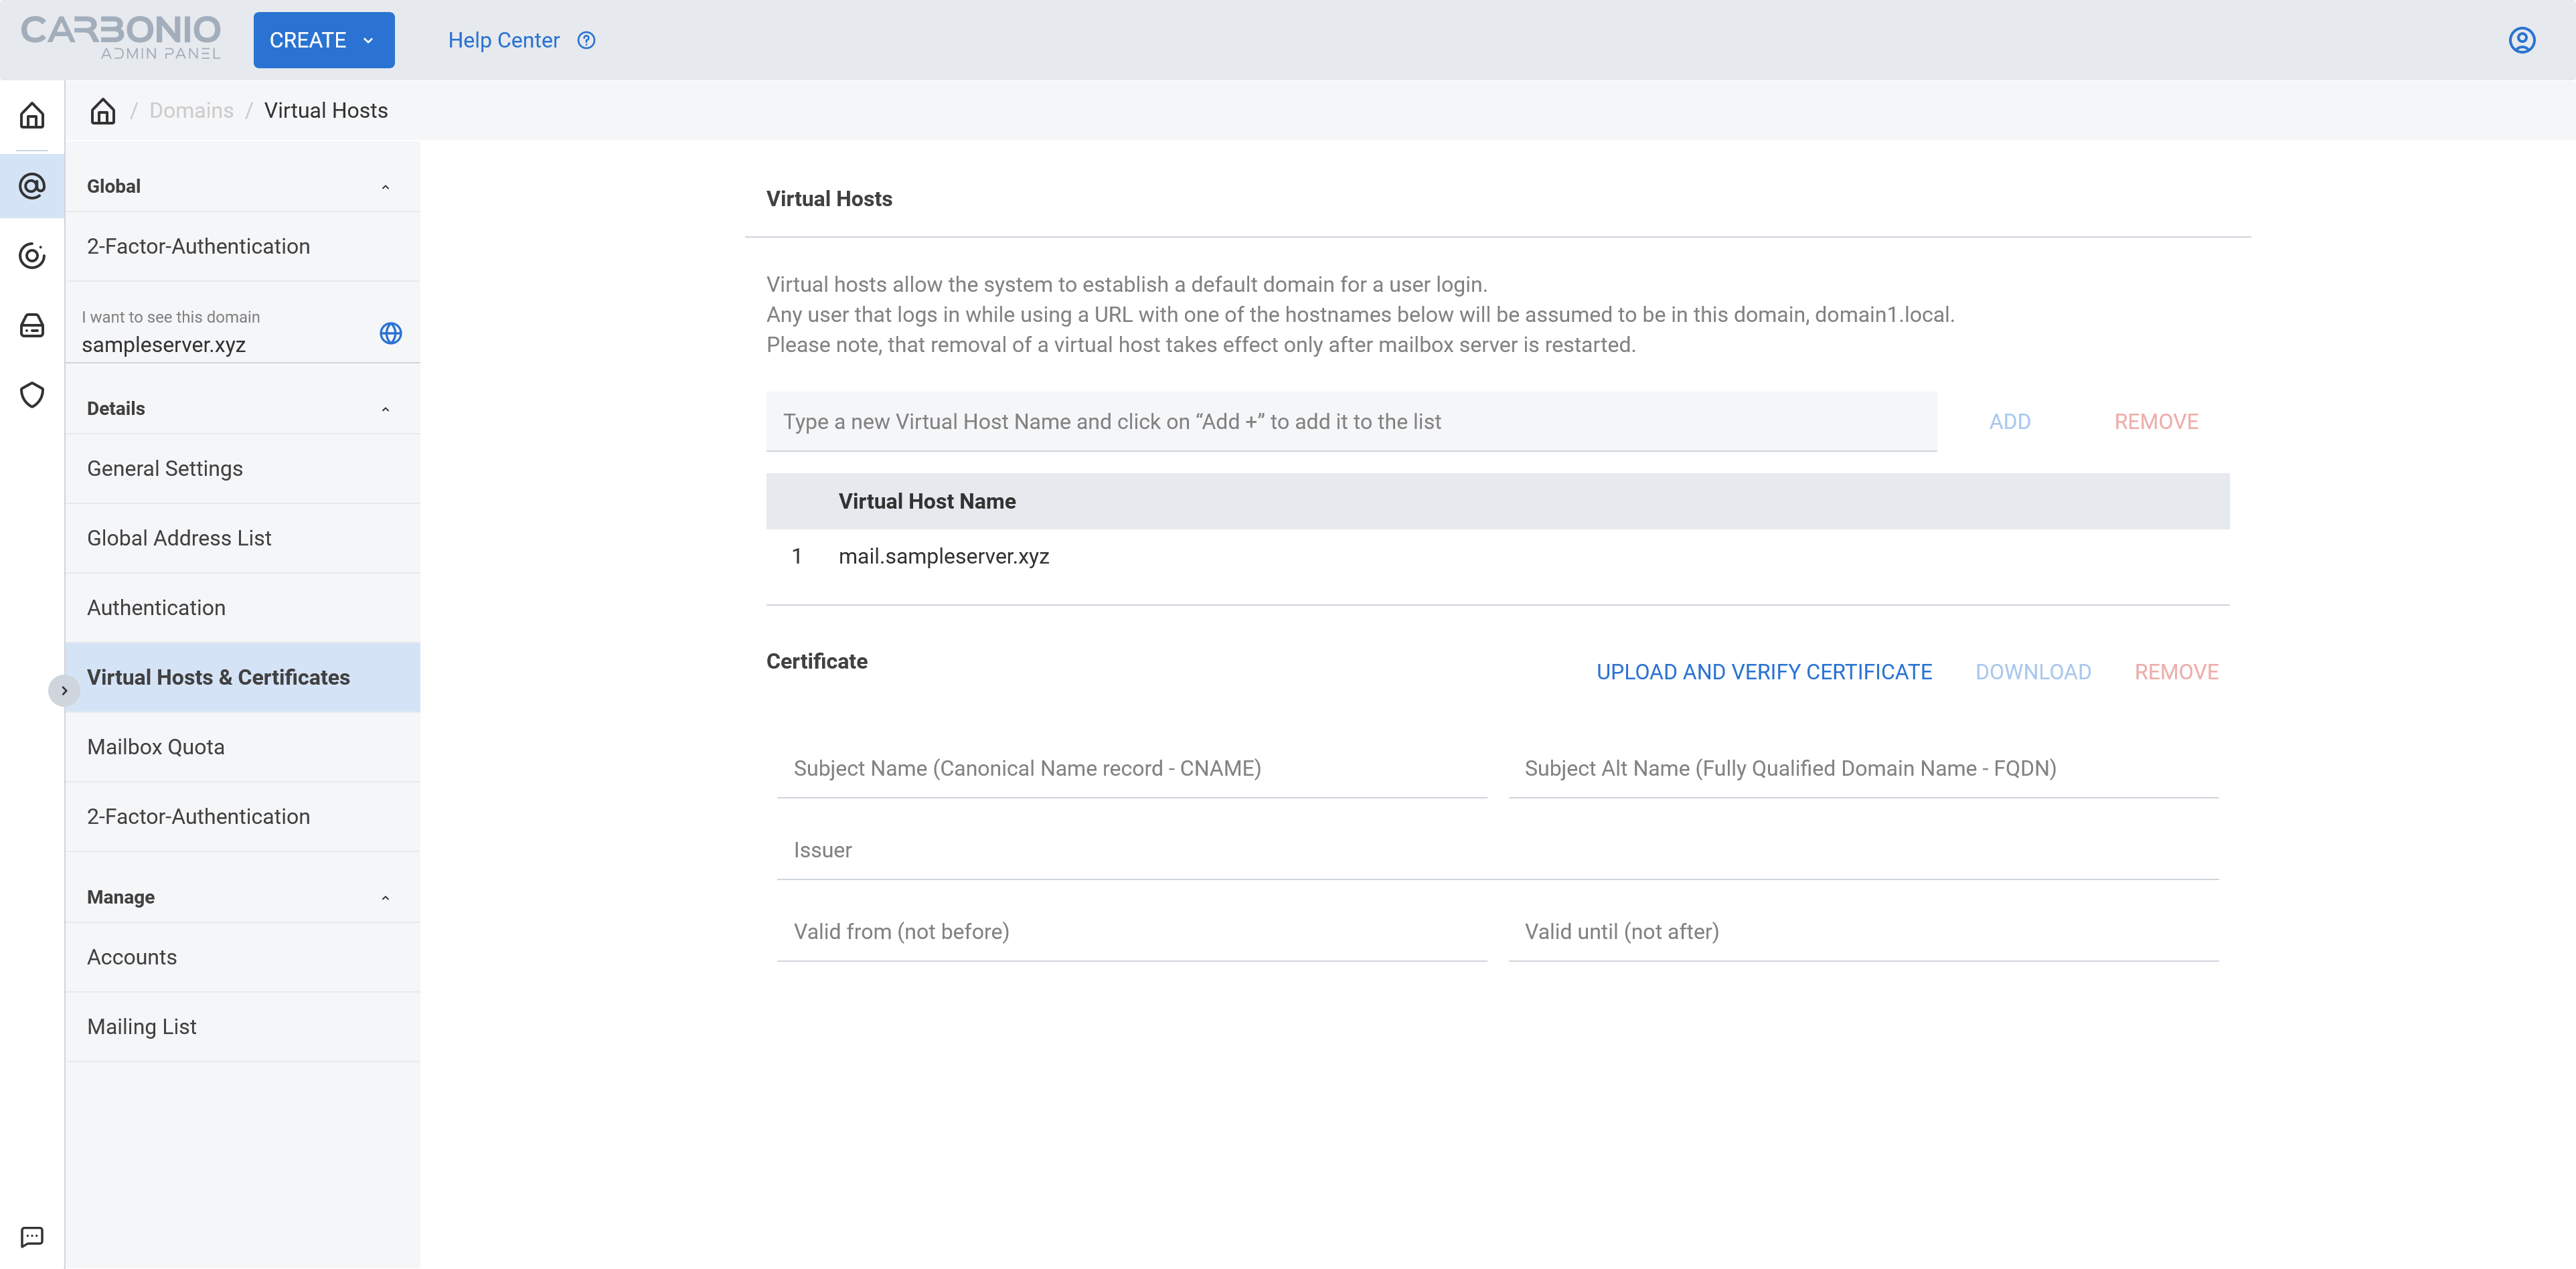
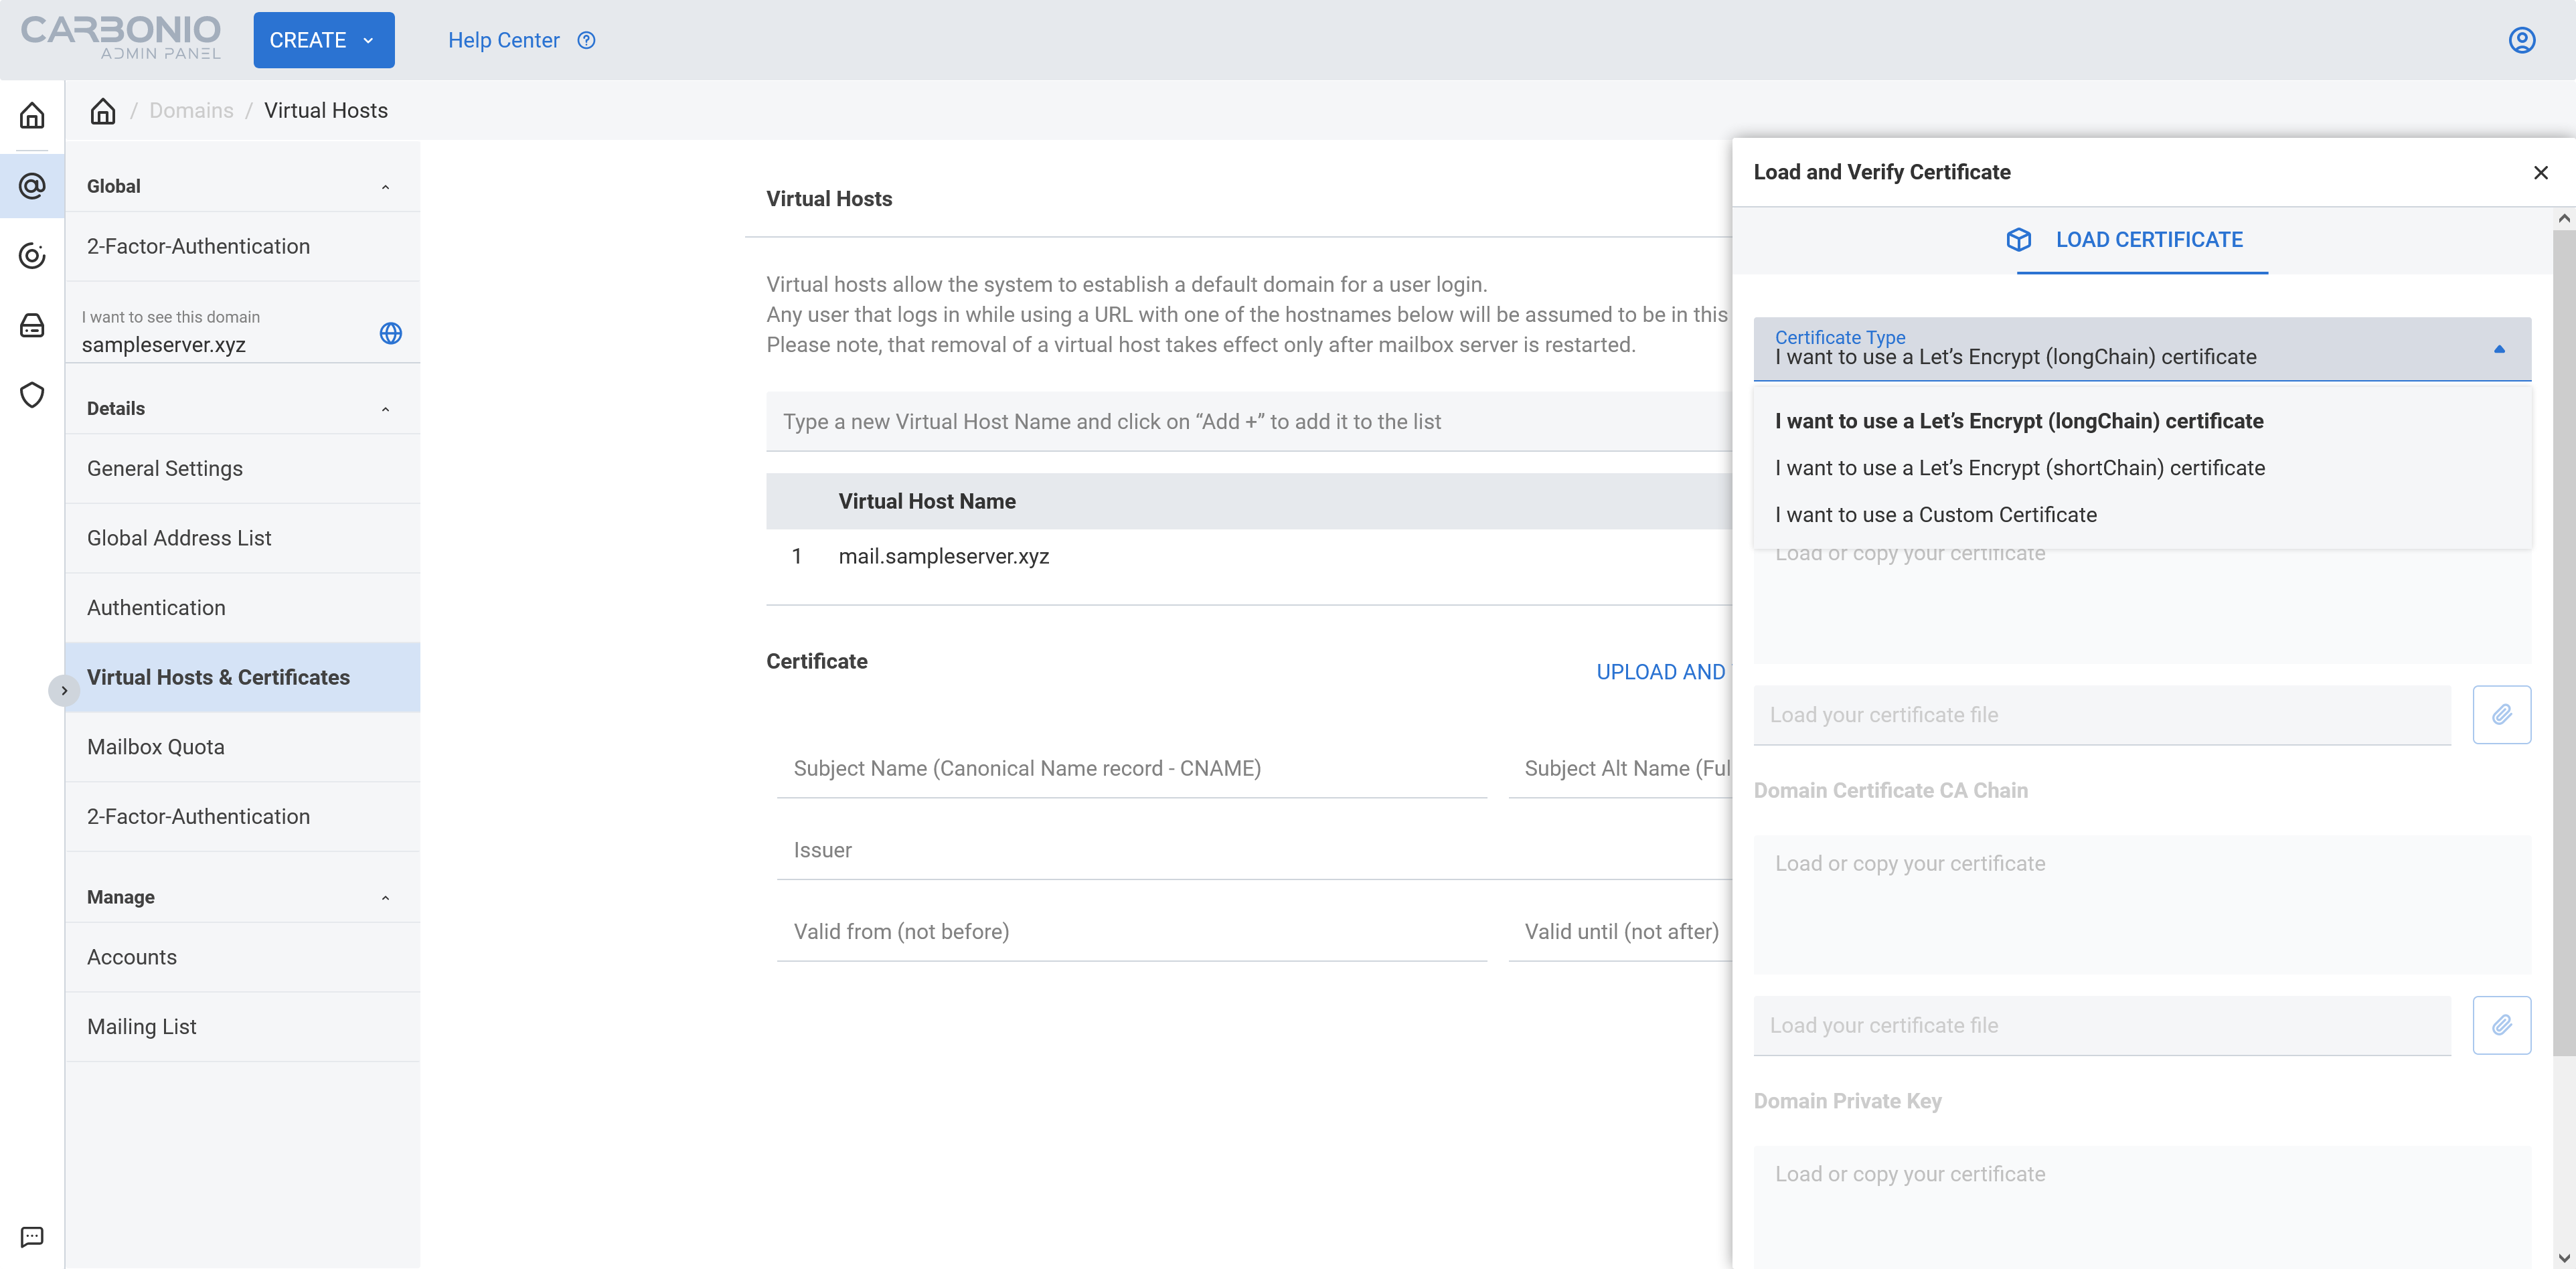
- Now click
UPLOAD AND VERIFY CERTIFICATE. From the next popup window selectI want to use Let's Encrypt (Long Chain) certificate.
- Now click the
GENERATE CERTIFICATEbutton and you will see a green notification on the bottom right corner of your screen.
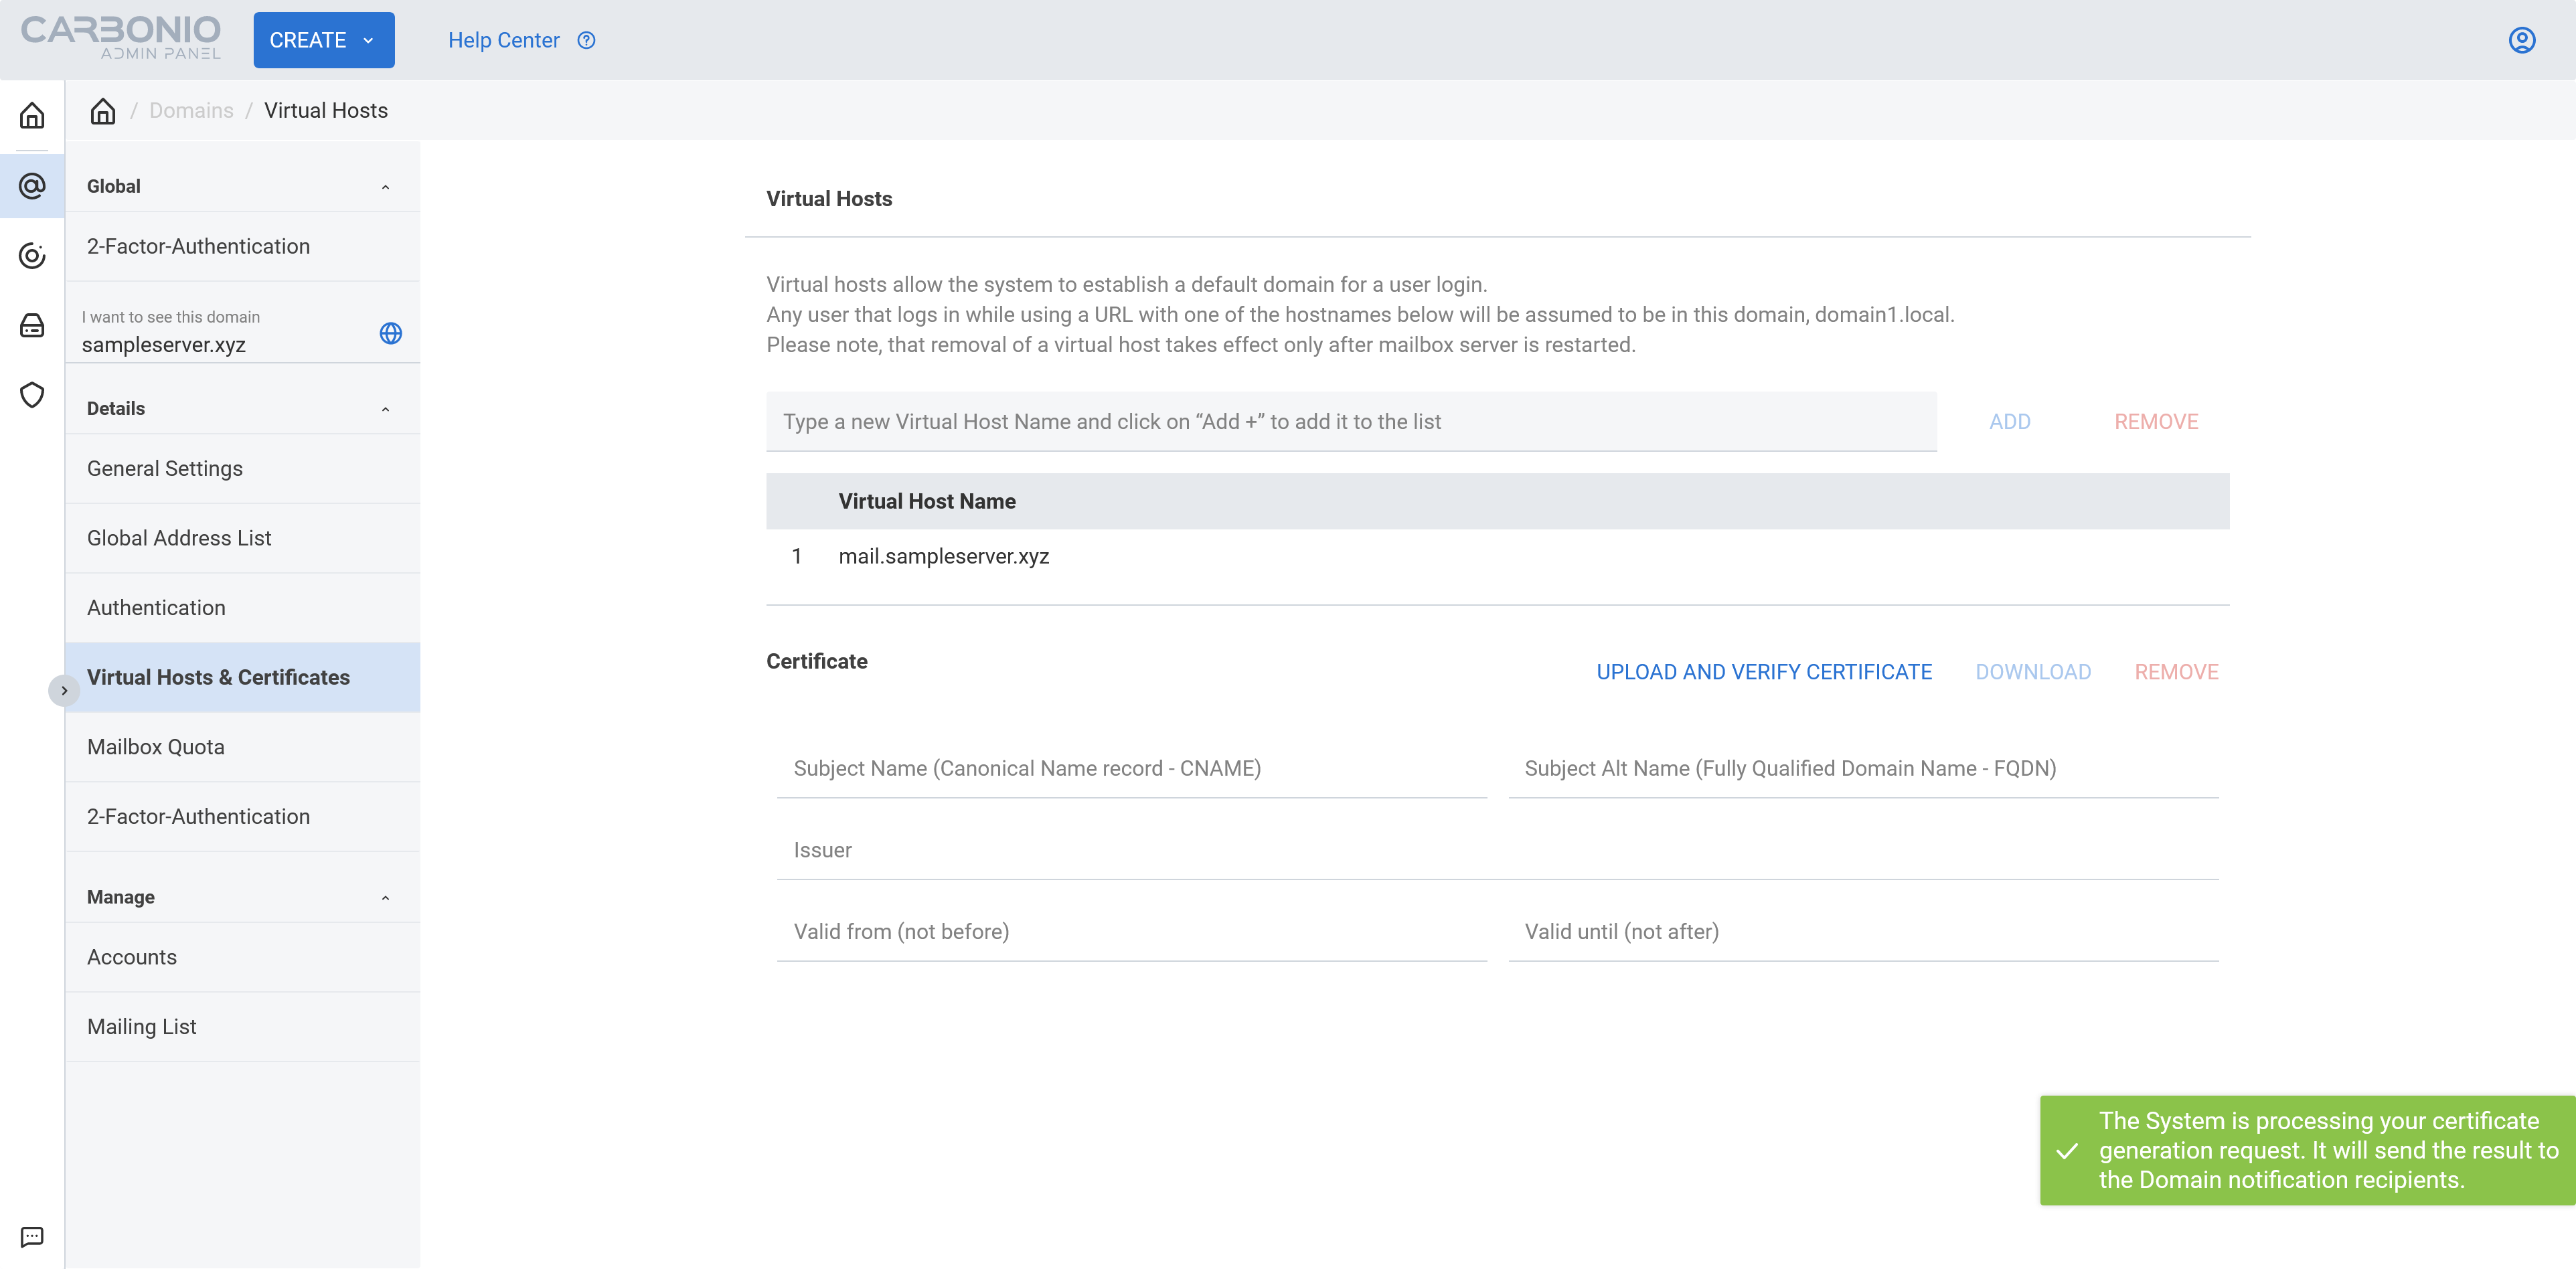
- It says it will send the result to the
domain notification recipients. Let’s check who is ourdomain notification recipients.
zextras@mail:~$ carbonio prov gd sampleserver.xyz| grep -i carbonioNotification
carbonioNotificationFrom: zextras@sampleserver.xyz
carbonioNotificationRecipients: zextras@sampleserver.xyz
zextras@mail:~$
So as you can see zextras@sampleserver.xyz is our notification recipient. Not let’s check the mailbox of zextras@sampleserver.xyz.
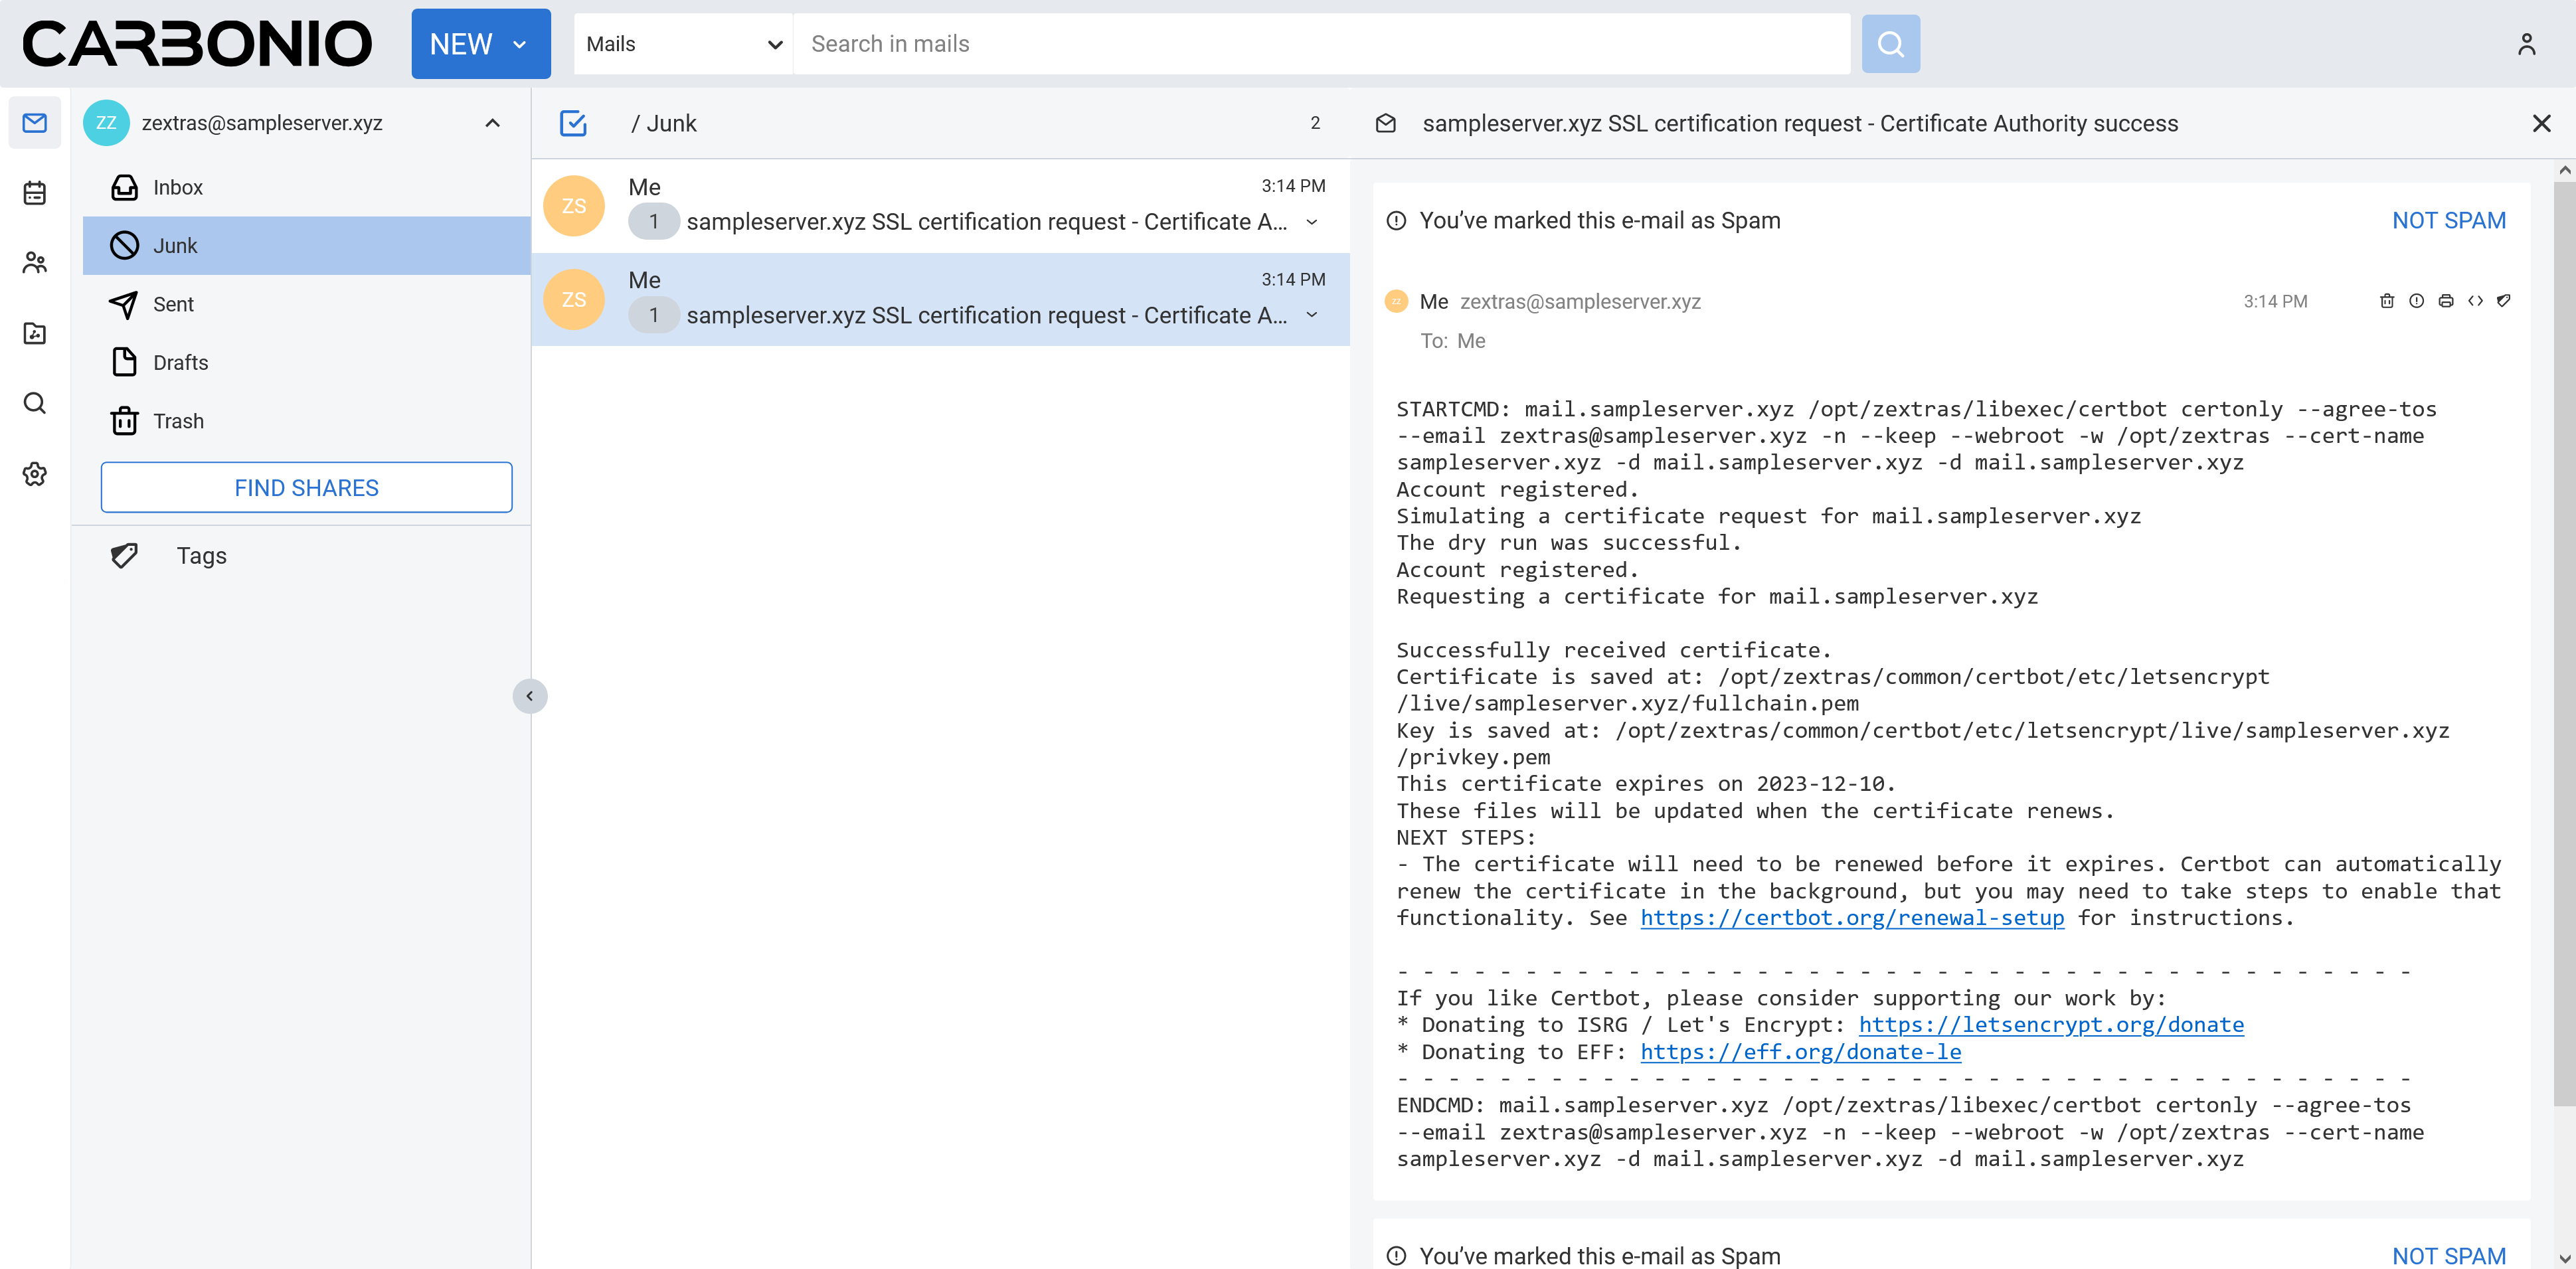
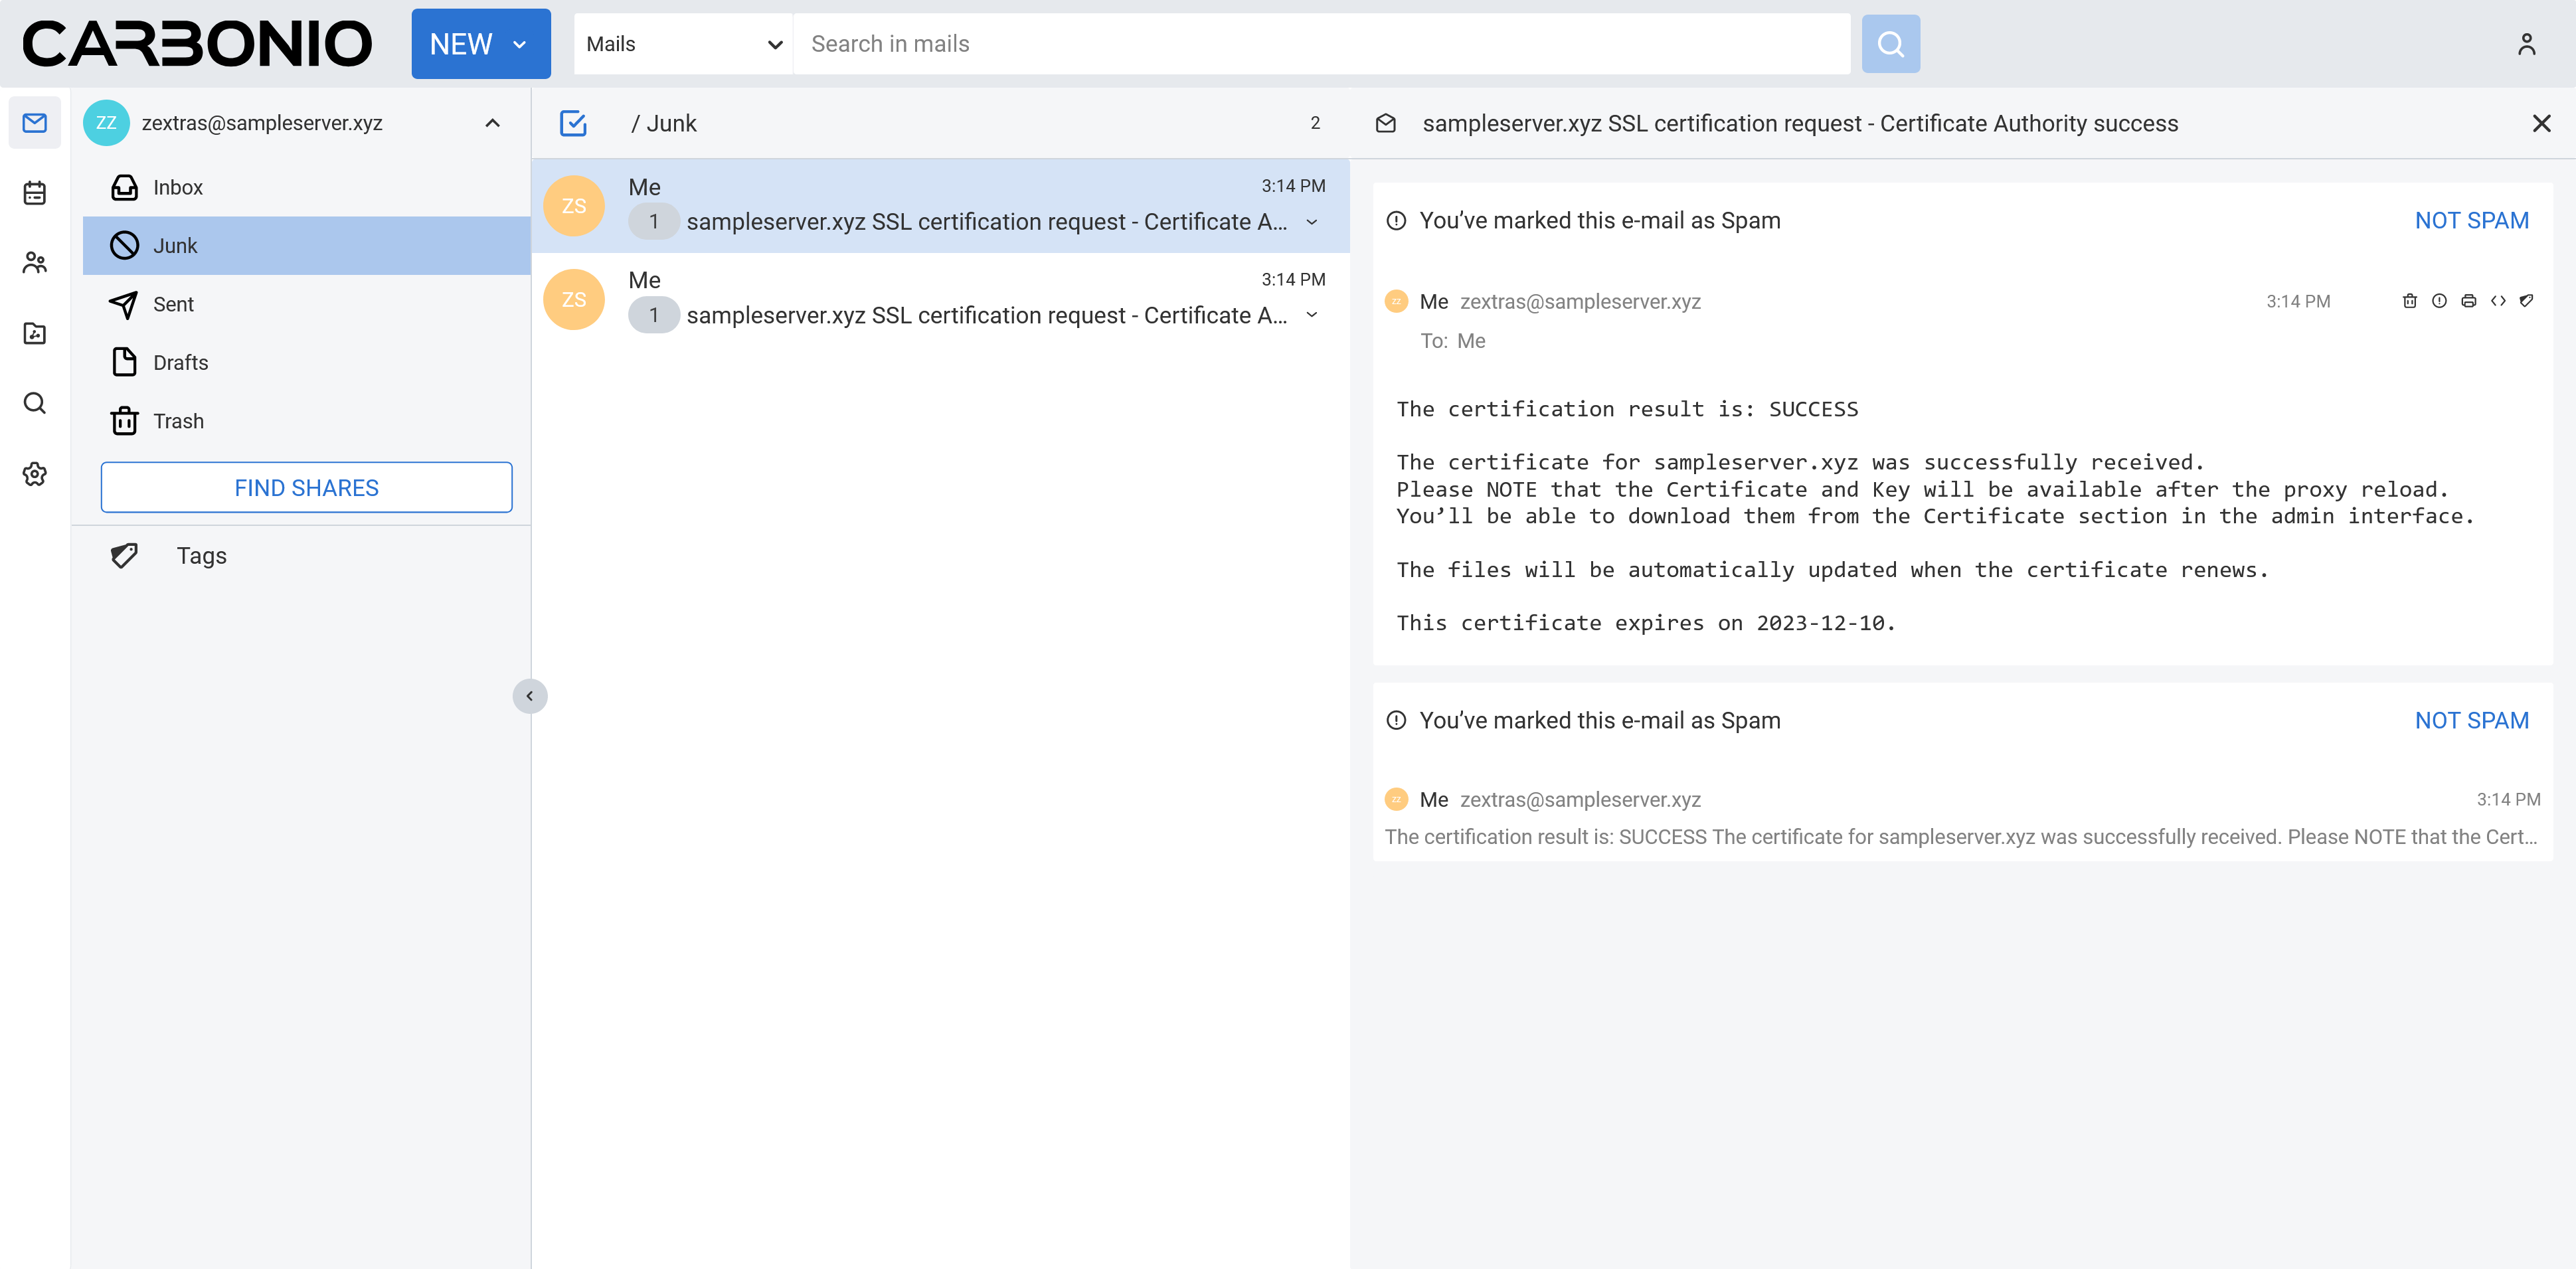
We can see we received two emails and from the first look we can say that our Let’s Encrypt deployment for this domain is successful.
- Now let’s restart services and check the status.
zextras@mail:~$ zmcontrol restart
Host mail.sampleserver.xyz
        Stopping config service...Done.
        Stopping service webapp...Done.
        Stopping stats...Done.
        Stopping mta...Done.
        Stopping cbpolicyd...Done.
        Stopping opendkim...Done.
        Stopping amavis...Done.
        Stopping antivirus...Done.
        Stopping antispam...Done.
        Stopping proxy...Done.
        Stopping memcached...Done.
        Stopping mailbox...Done.
        Stopping directory-server...Done.
Host mail.sampleserver.xyz
        Starting directory server...Done.
        Starting config service...Done.
        Starting mailbox...Done.
        Starting memcached...Done.
        Starting proxy...Done.
        Starting amavis...Done.
        Starting antispam...Done.
        Starting antivirus...Done.
        Starting opendkim...Done.
        Starting mta...Done.
        Starting stats...Done.
        Starting service webapp...Done.
zextras@mail:~$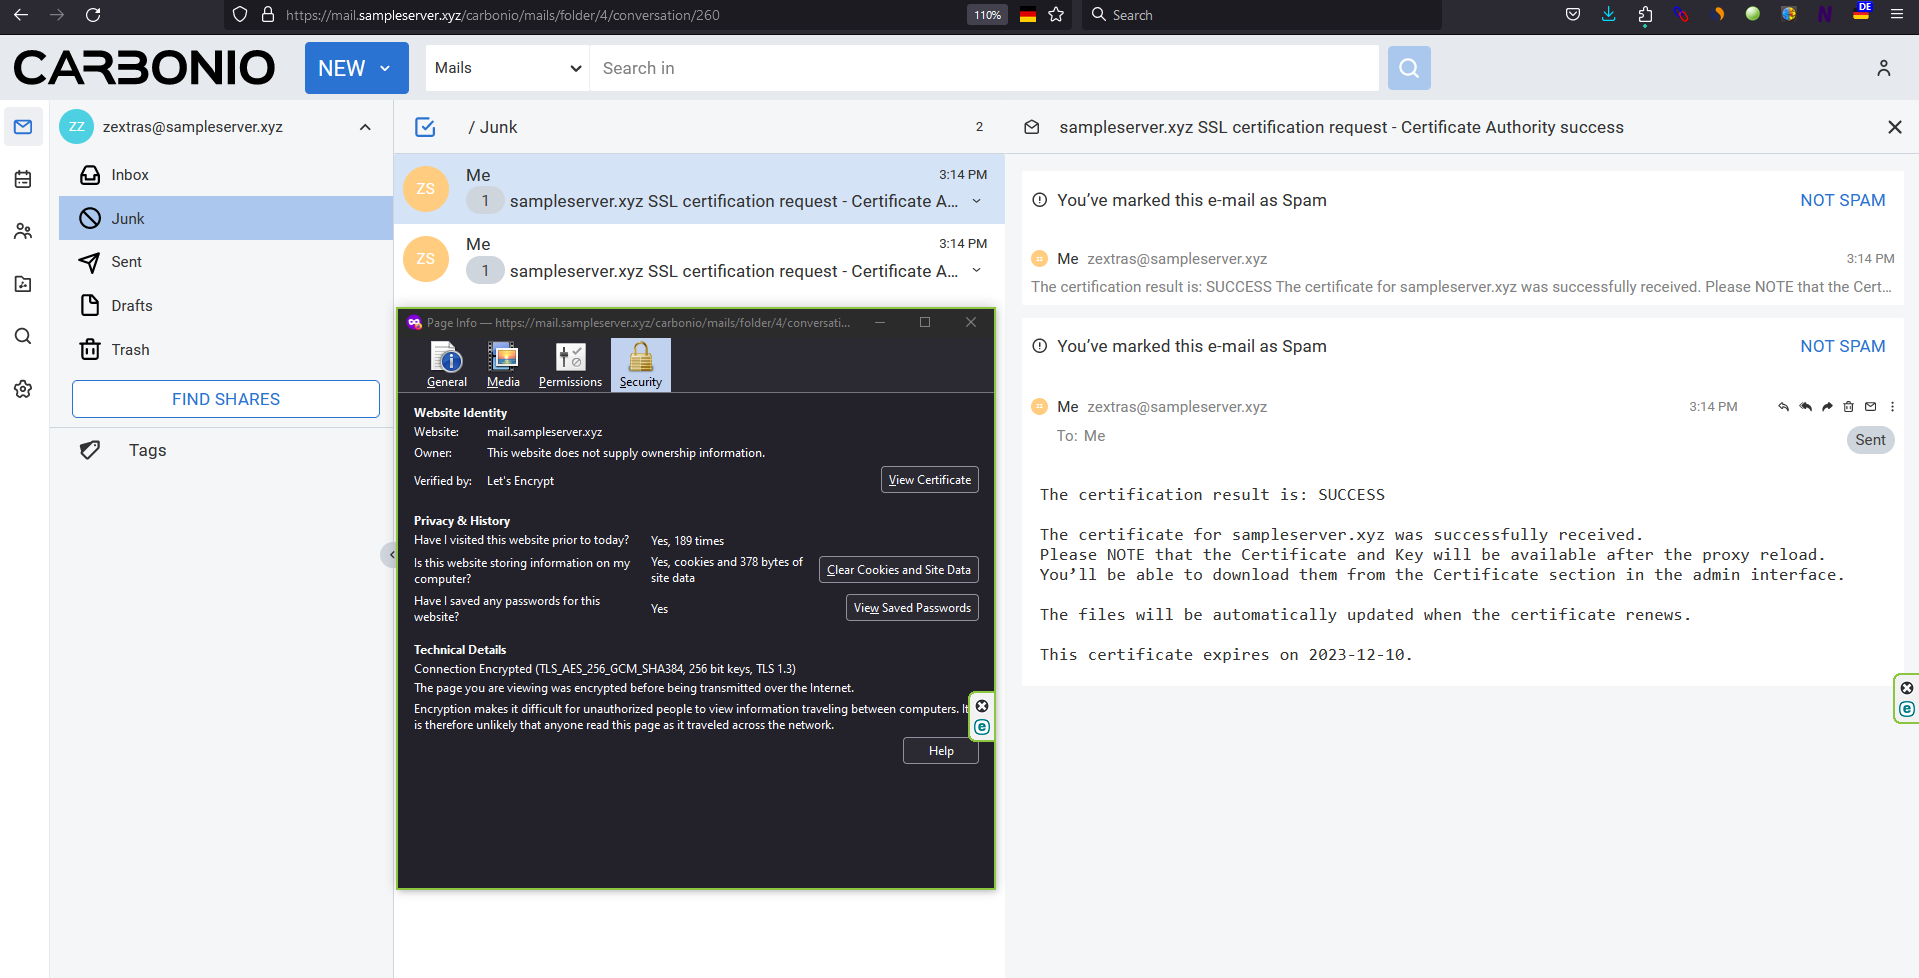
And you can see we have successfully deployed Let’s Encrypt Certificate using Admin panel and with a little help of CLI.
What If You Have Two or More Domains In The Server?
Basically we are going follow above mentioned steps but for your convenience, let me summarize it:
- Install
python3-setuptools. But it is not needed here as you already installed it in this server. - Change the reverse proxy mail mode to redirect. Also it is not needed as you have already set it.
- Select you desired domain. Then select
Virtual Hosts & Certificatesunder Details. - Set
Virtual Host Namefor this domain. You can set it using both CLI and graphical interface. - Now click
UPLOAD AND VERIFY CERTIFICATE. From the next popup window selectI want to use Let's Encrypt (Long Chain) certificate. - Now click the
GENERATE CERTIFICATEbutton and you will see a green notification on the bottom right corner of your screen. - You can check which email addresses are your
domain notification recipientsand then check their mailbox for the notification. - Once you get the successful deployment notification, restart services.
- And you can check the Let’s Encrypt SSL certificate status from both CLI and web browser.
By following these steps, you can configure Let’s encrypt SSL certificate for all of your domains.
As soon as all certificates are deployed properly and activated then you should change the reverse proxy mail mode from redirect to https again as Carbonio CE emphasize security more than anything else.
If you are curious about why certificate authority tries to connect with your server using http, then reading this Let’s Encrypt article will help you understand the concept. Let’s Encrypt Challenge types.
Attention: To make your life a little bit easier, we prepared a script that can automate the installation of Let’s Encrypt SSL certificate in your server no matter how many domains you have. Try check that out.
So that’s it.
Comments
Can I use this method also for wildcards? E.g. both for sigtrap.org and *.sigtrap.org ?
[…] Configure Let’s Encrypt Certificate Using Carbonio Admin UI (zextras.com) […]
"As soon as all certificates are deployed properly and activated then you should change the reverse proxy mail mode from redirect to https again as Carbonio CE emphasize security more than anything else." Ok, but what about SSL certs' auto-renews, which are scheduled once every 3 months, is I correctly remember? If you change the reverse proxy mail mode from redirect to https then during next renew cycle Let's Encrypt would not be able to challenge the domain, so no SSL certificate renew at all. Am I in wrong? Cheers, e.-