For additional guidance, check out our community articles detailing the process of migrating from your current platform to Carbonio CE.
For enterprise-level requirements and advanced features, consider checking out Zextras Carbonio – the all-in-one private digital workplace designed for digital sovereignty trusted by the public sector, telcos, and regulated industries.
A calendar resource is actually a location or an equipment that can be scheduled for a meeting. Each of these is set up as a resource account. We have seen how to manage these resources through some CLI commands in this article. Here, however, we’ll show you how to manage a typical business situation in which the creation and assignment of different types of resources is required.
For example, you can figure out an admin who is in charge to manage and assign resources such as meeting rooms and various kind of equipments (AV materials, cars …)
Creating Resources
The first step is surely to create the desired resources that you will then assign and manage.
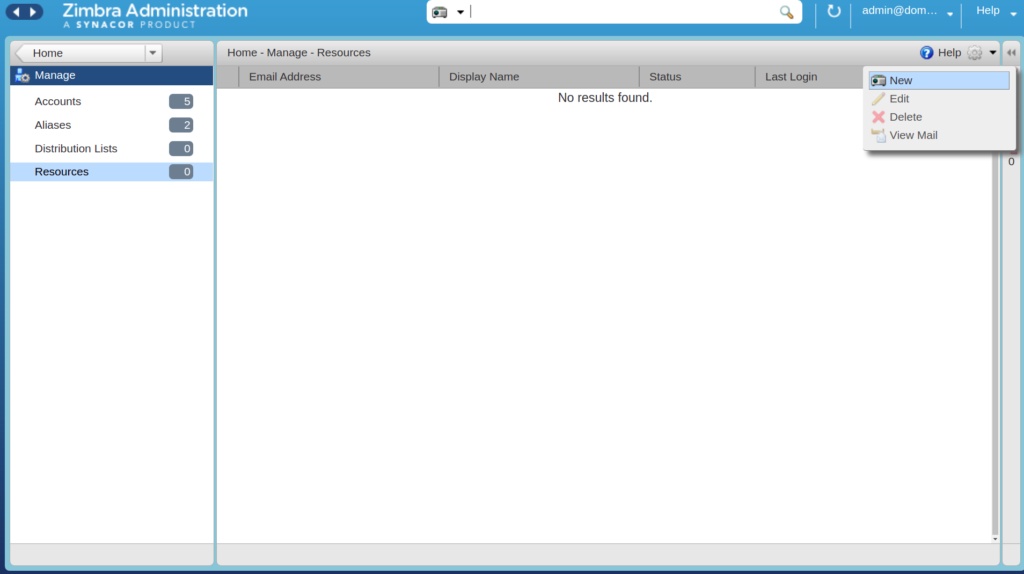
Considering our sample scenario, our Admin could start by creating some meeting rooms. To do so, the easiest way is to go to your Zimbra Administration Console. Inside that, proceed to manage → Resources and then click on the gear wheel icon on the top right and then on “new” in the drop down menu
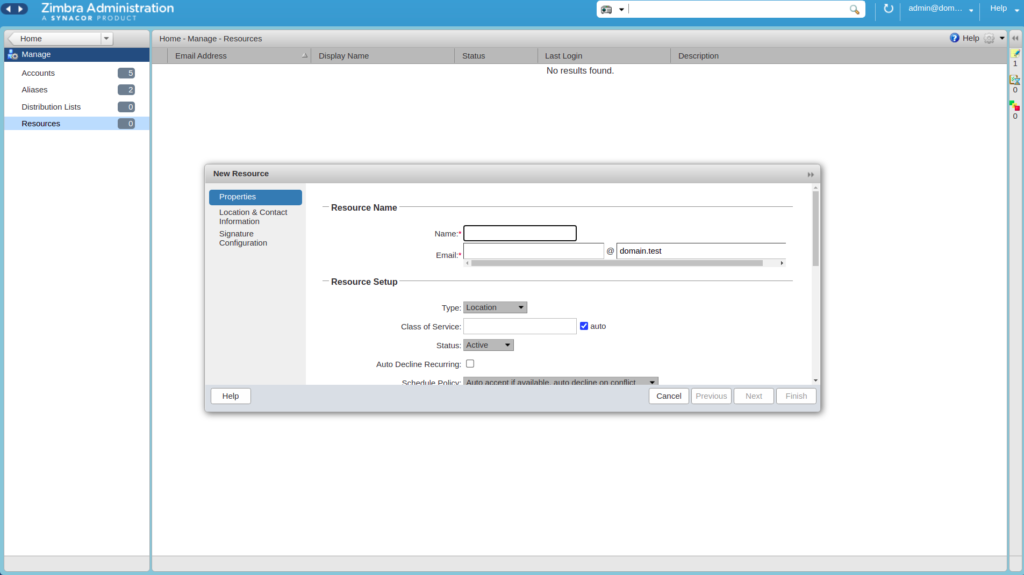
A window will open in which you can enter a series of data and details related to the resource account you want to create. In particular, you can configure:
- Type of resource: you can choose between Location or Equipment
- Scheduling policy
- Forwarding address: who is going to receive a copy of calendar invitations
- Description of the resource: a description and / or some notes related to the resource
- Contact information: Name, email and phone of the person to contact in case of problems
- Location information: you can detail building location, address, floor, room and capacity
- Customization of auto response message and signatures to be used in the reply emails
When the resource account creation is finished, a directory account is created in the LDAP server.
Assigning Resources
Now that the resources have been created, our admin can decide how to assign them. It can be configured for automatic management, where the user is going to “invite” the location or equipment resource to a meeting. When they do so, if the admin has set them up (see the paragraph above), they can see details and description of the resource. After meeting invitations has been sent, an email is sent to the resource account, and, based on the scheduling policy, if the resource is available, the meeting is automatically added to the calendar of the resource which becomes busy.
If our admin prefer to assing various resources manually, he can manage it through the Scheduling Policy set up.
Set Up the Scheduling Policy
As we have seen, it is possible to set up manual or automatic management of the assignment of the various resources created, whether they are places or equipment. Let’s now see how to configure the different options:

- Auto decline all recurring appointments - Enabling this option will make the resource available for individual meetings only. You will not be able to schedule recurring appointments.
- Auto accept if available, auto-decline on conflict - If this option is enabled, the resource account will automatically accept meetings as long as it is available.
- Manual accept, auto decline on conflict - With this option, while the resource will automatically decline meetings when they are in conflict, all the appointments request when the resource is available, must be manually accepted. To do so, a forwarding mail address must have been configured, so that the admin can accept the invite.
- Auto accept always - By selecting this option, the resource will always automatically accept any invitation and will therefore always be available.
- No auto accept or decline - By selecting this option, the admin is going to manage the resource completely manually, logging into the account of the resource and managing the different requests from within.
Administrator can also configure the Maximum allowed number of conflicts and/or the Maximum allowed percent of conflicts. These two options will allow a recurring resource to be scheduled even when it is not available for all the requested recurring appointment dates.
Managing Resources
After the resource has been created, as well as organizing its assignment modes, the administrator can at any time manage it individually by logging into the resource account.
From here, going to Preference → Calendar, it is possible to configure some management options.
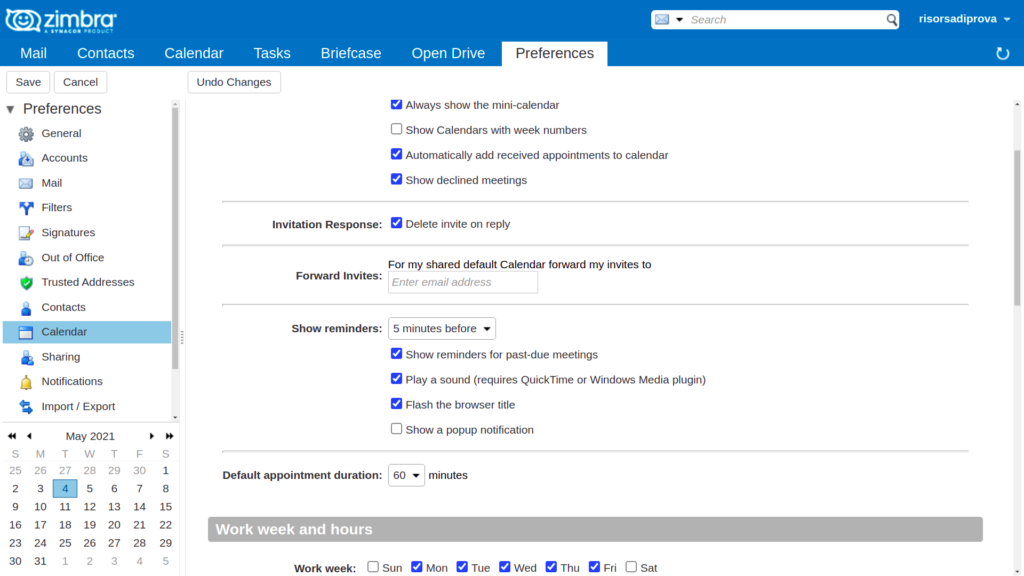
You can add an address to forward invites and manage them manually.
Please note that if you already set up one forwarding address during Resource creation, here you can change it
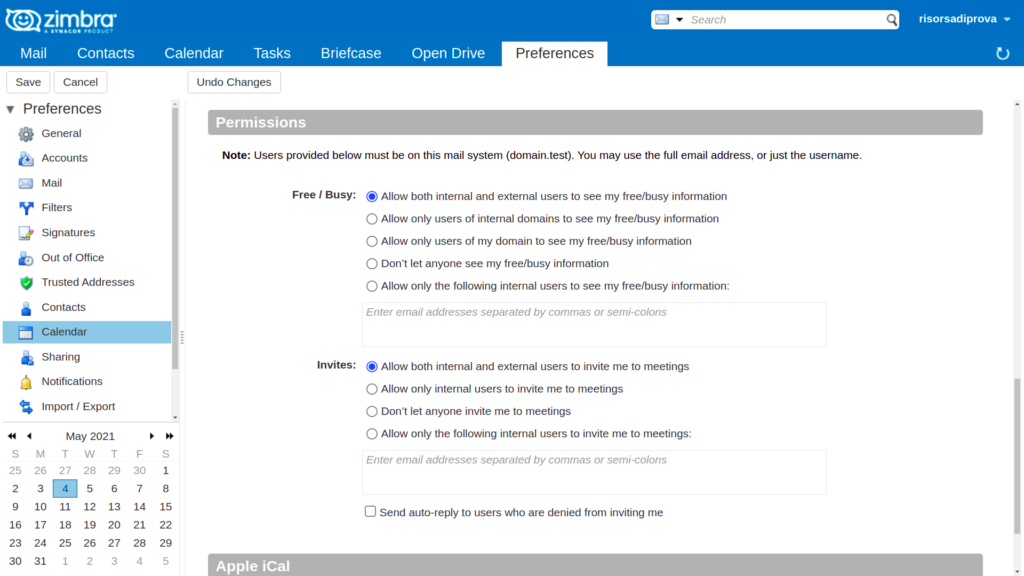
Then you can also decide who can use that specific resource. You can add only some specific users by selecting the option “Allow only the following internal users to invite me to meetings” and then adding the email addresses of those users.
Lastly, the administrator can decide to delegate the management of one or more resources to others, and in this case he can share the resource’s calendar with him/her by giving him/her administrative rights. This way he/she will be able to manage the resource autonomously, as he/she can view, edit, add, remove, accept or decline the invites.